

.png "Build a Marshmallow Shooter")
Get Ready for Some DIY Fun!
This hands-on project is a great way for kids (and adults!) to explore simple building skills while creating a fun marshmallow launcher. With just a few PVC pieces, you can build your own shooter and customize it however you like. Before you begin, make sure you have all your parts laid out and ready to go!
Materials Required
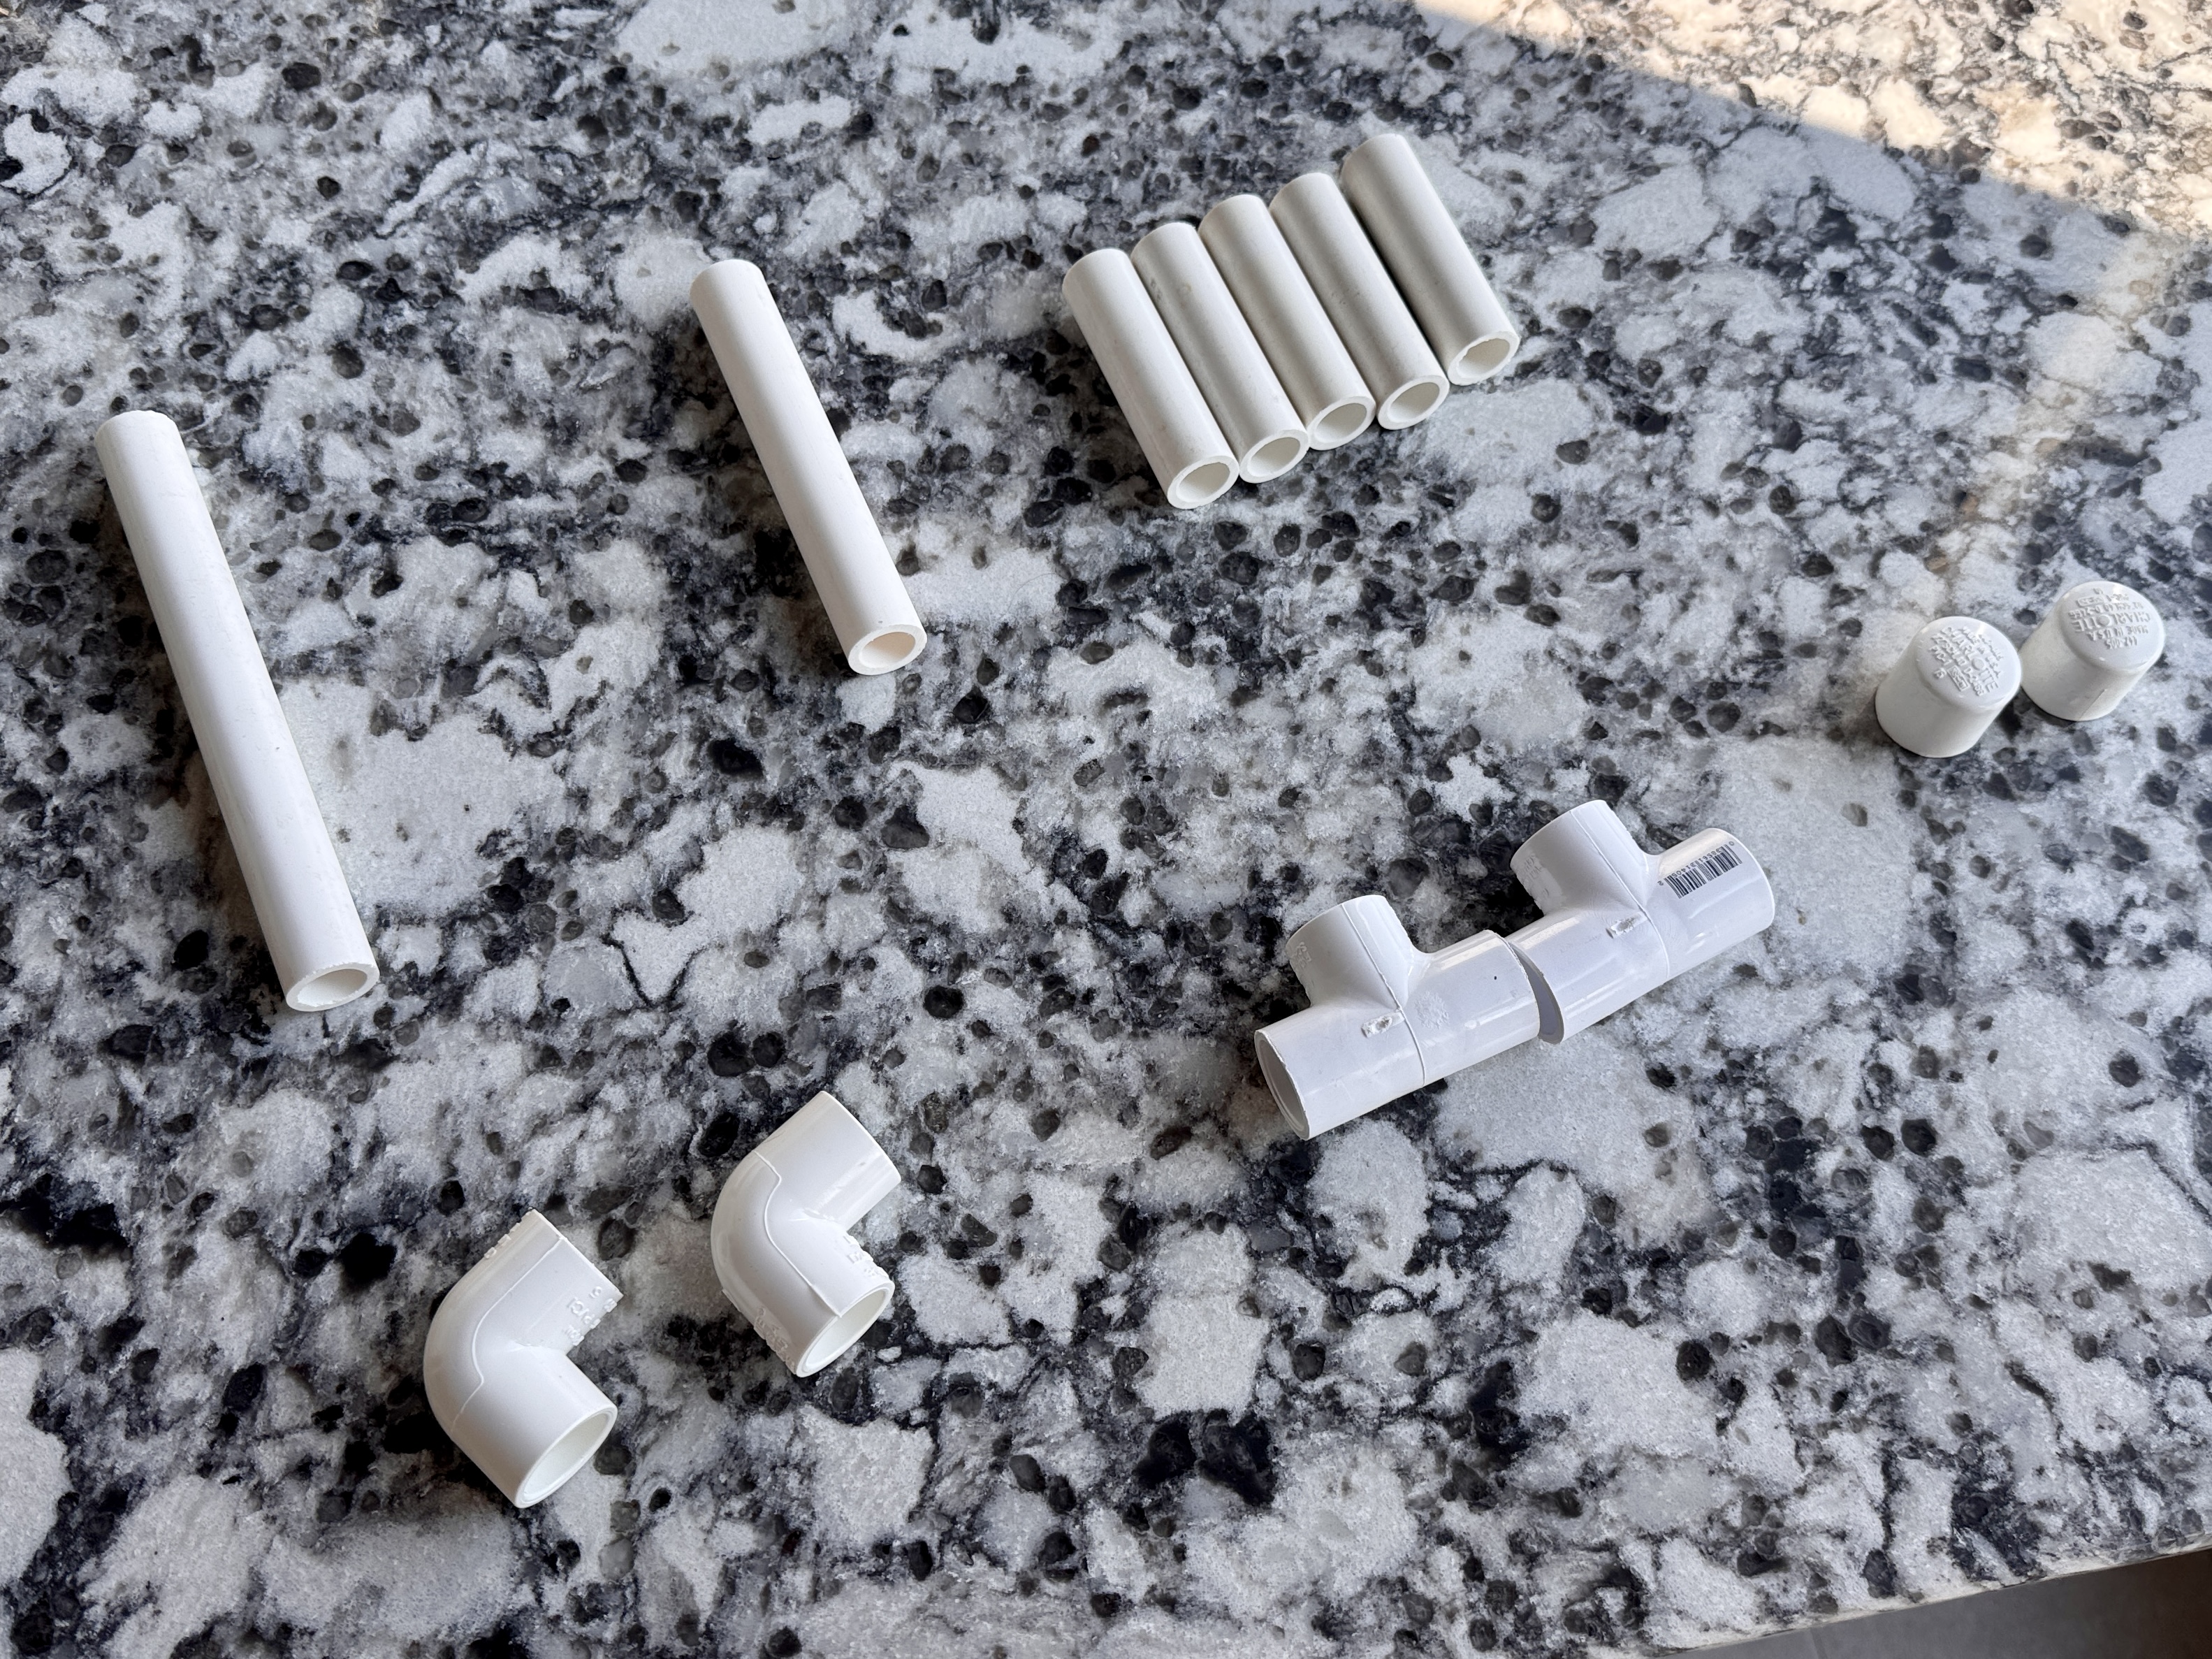
- (1) 1/2 in. PVC pipe cut in different size
- (5) 3 in. Pieces
- (1) 5 in. Piece
- (1) 7 in. Piece
- (2) PVC End Caps
- (2) PVC Tee's
- (2) PVC Elbows
Basic Design Principles
The marshmallow shooter operates on compressed air principles. Air pressure builds within the sealed chamber and releases rapidly when the valve opens, propelling the marshmallow forward through the barrel.
Step-by-Step Instructions
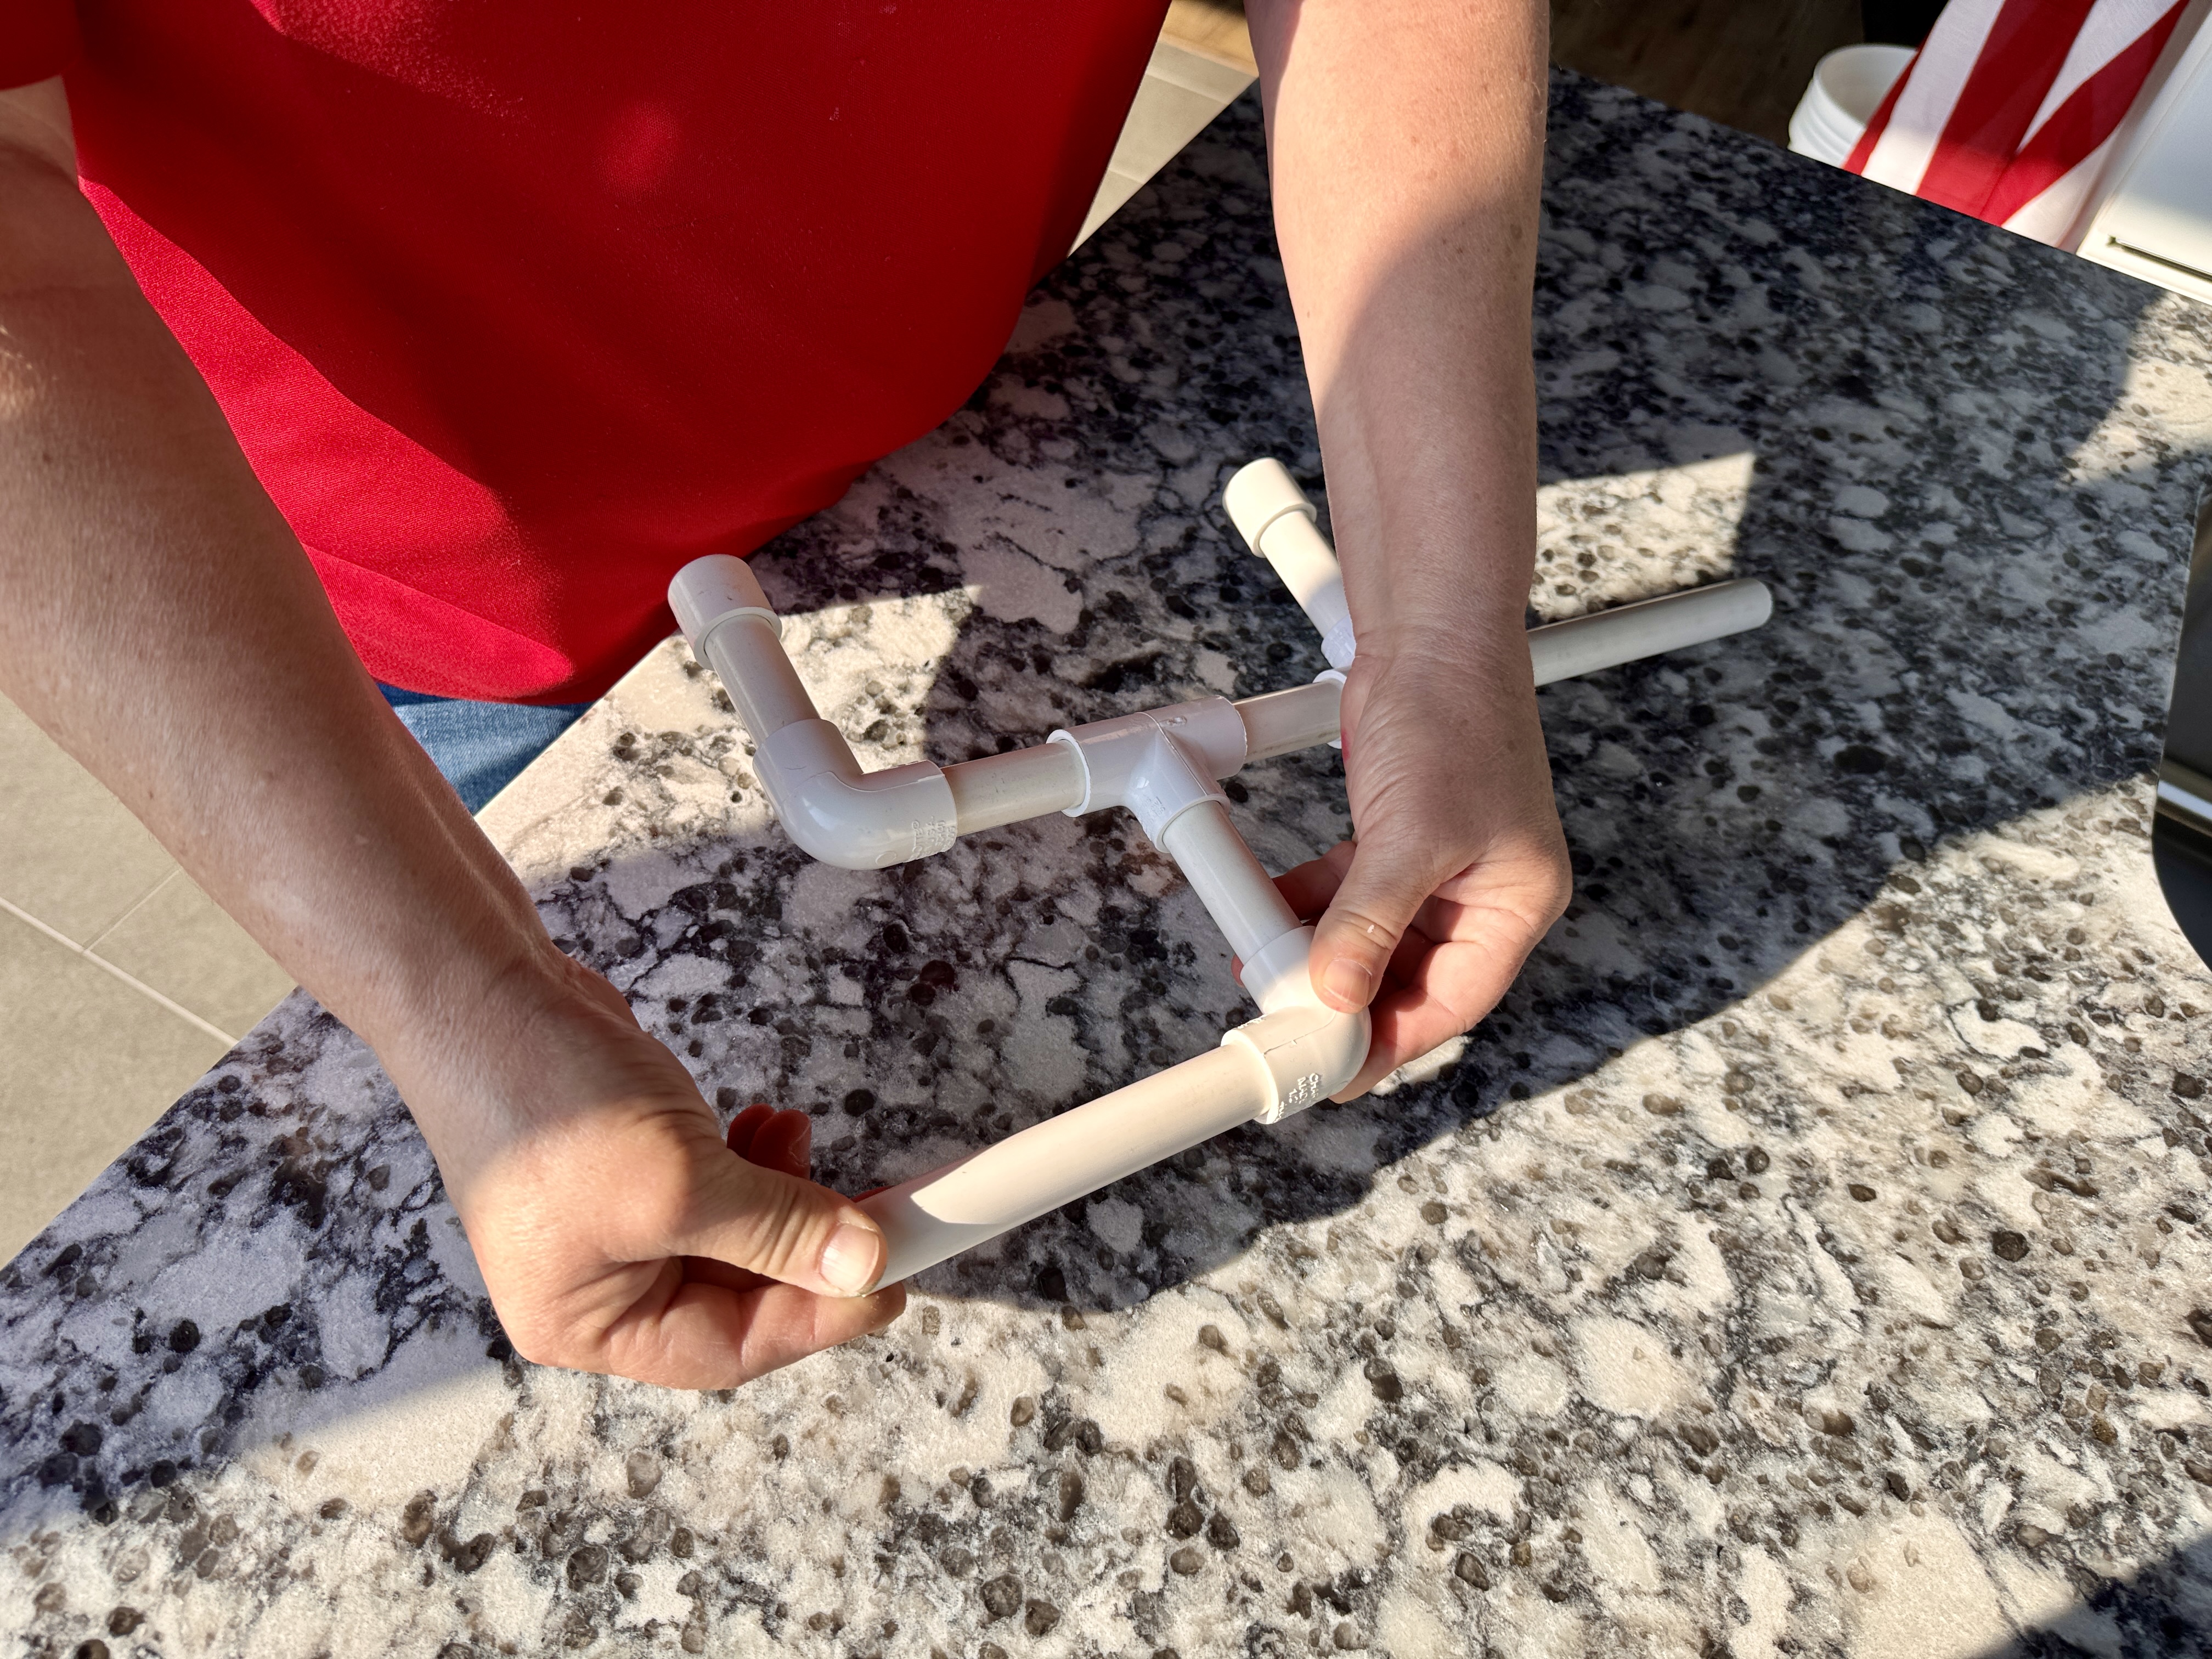
Step 1: Plan Your Build
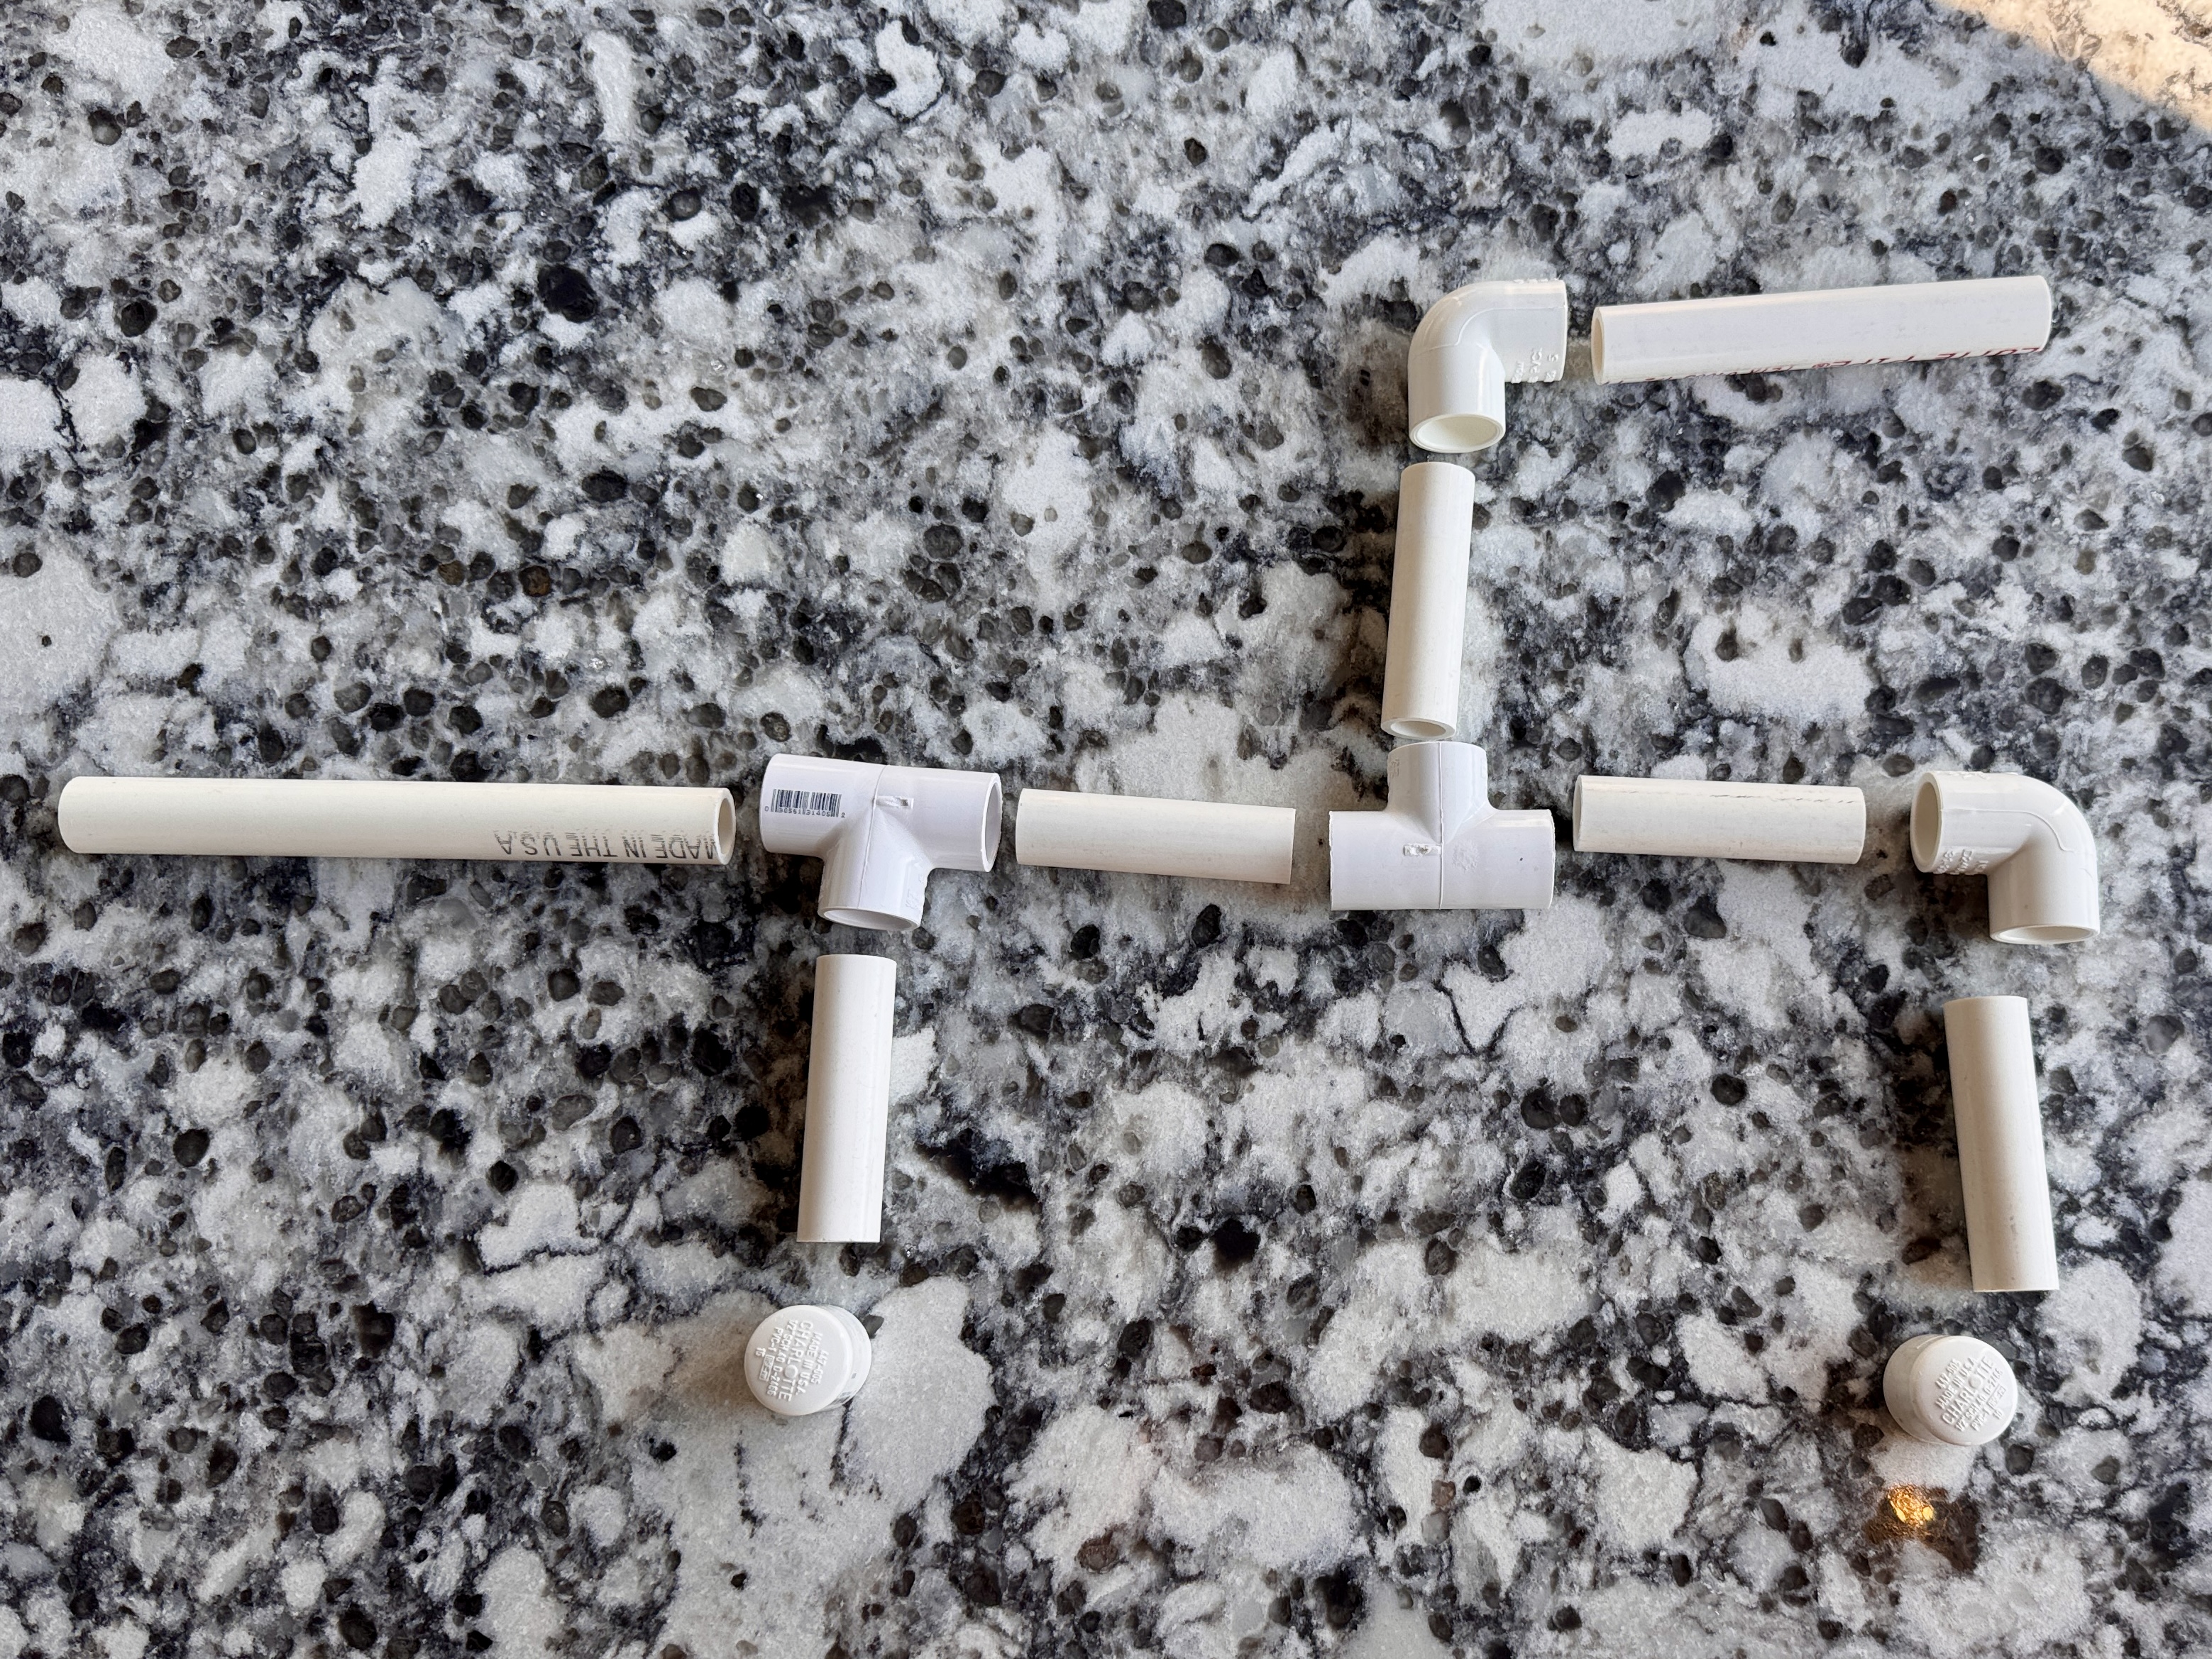
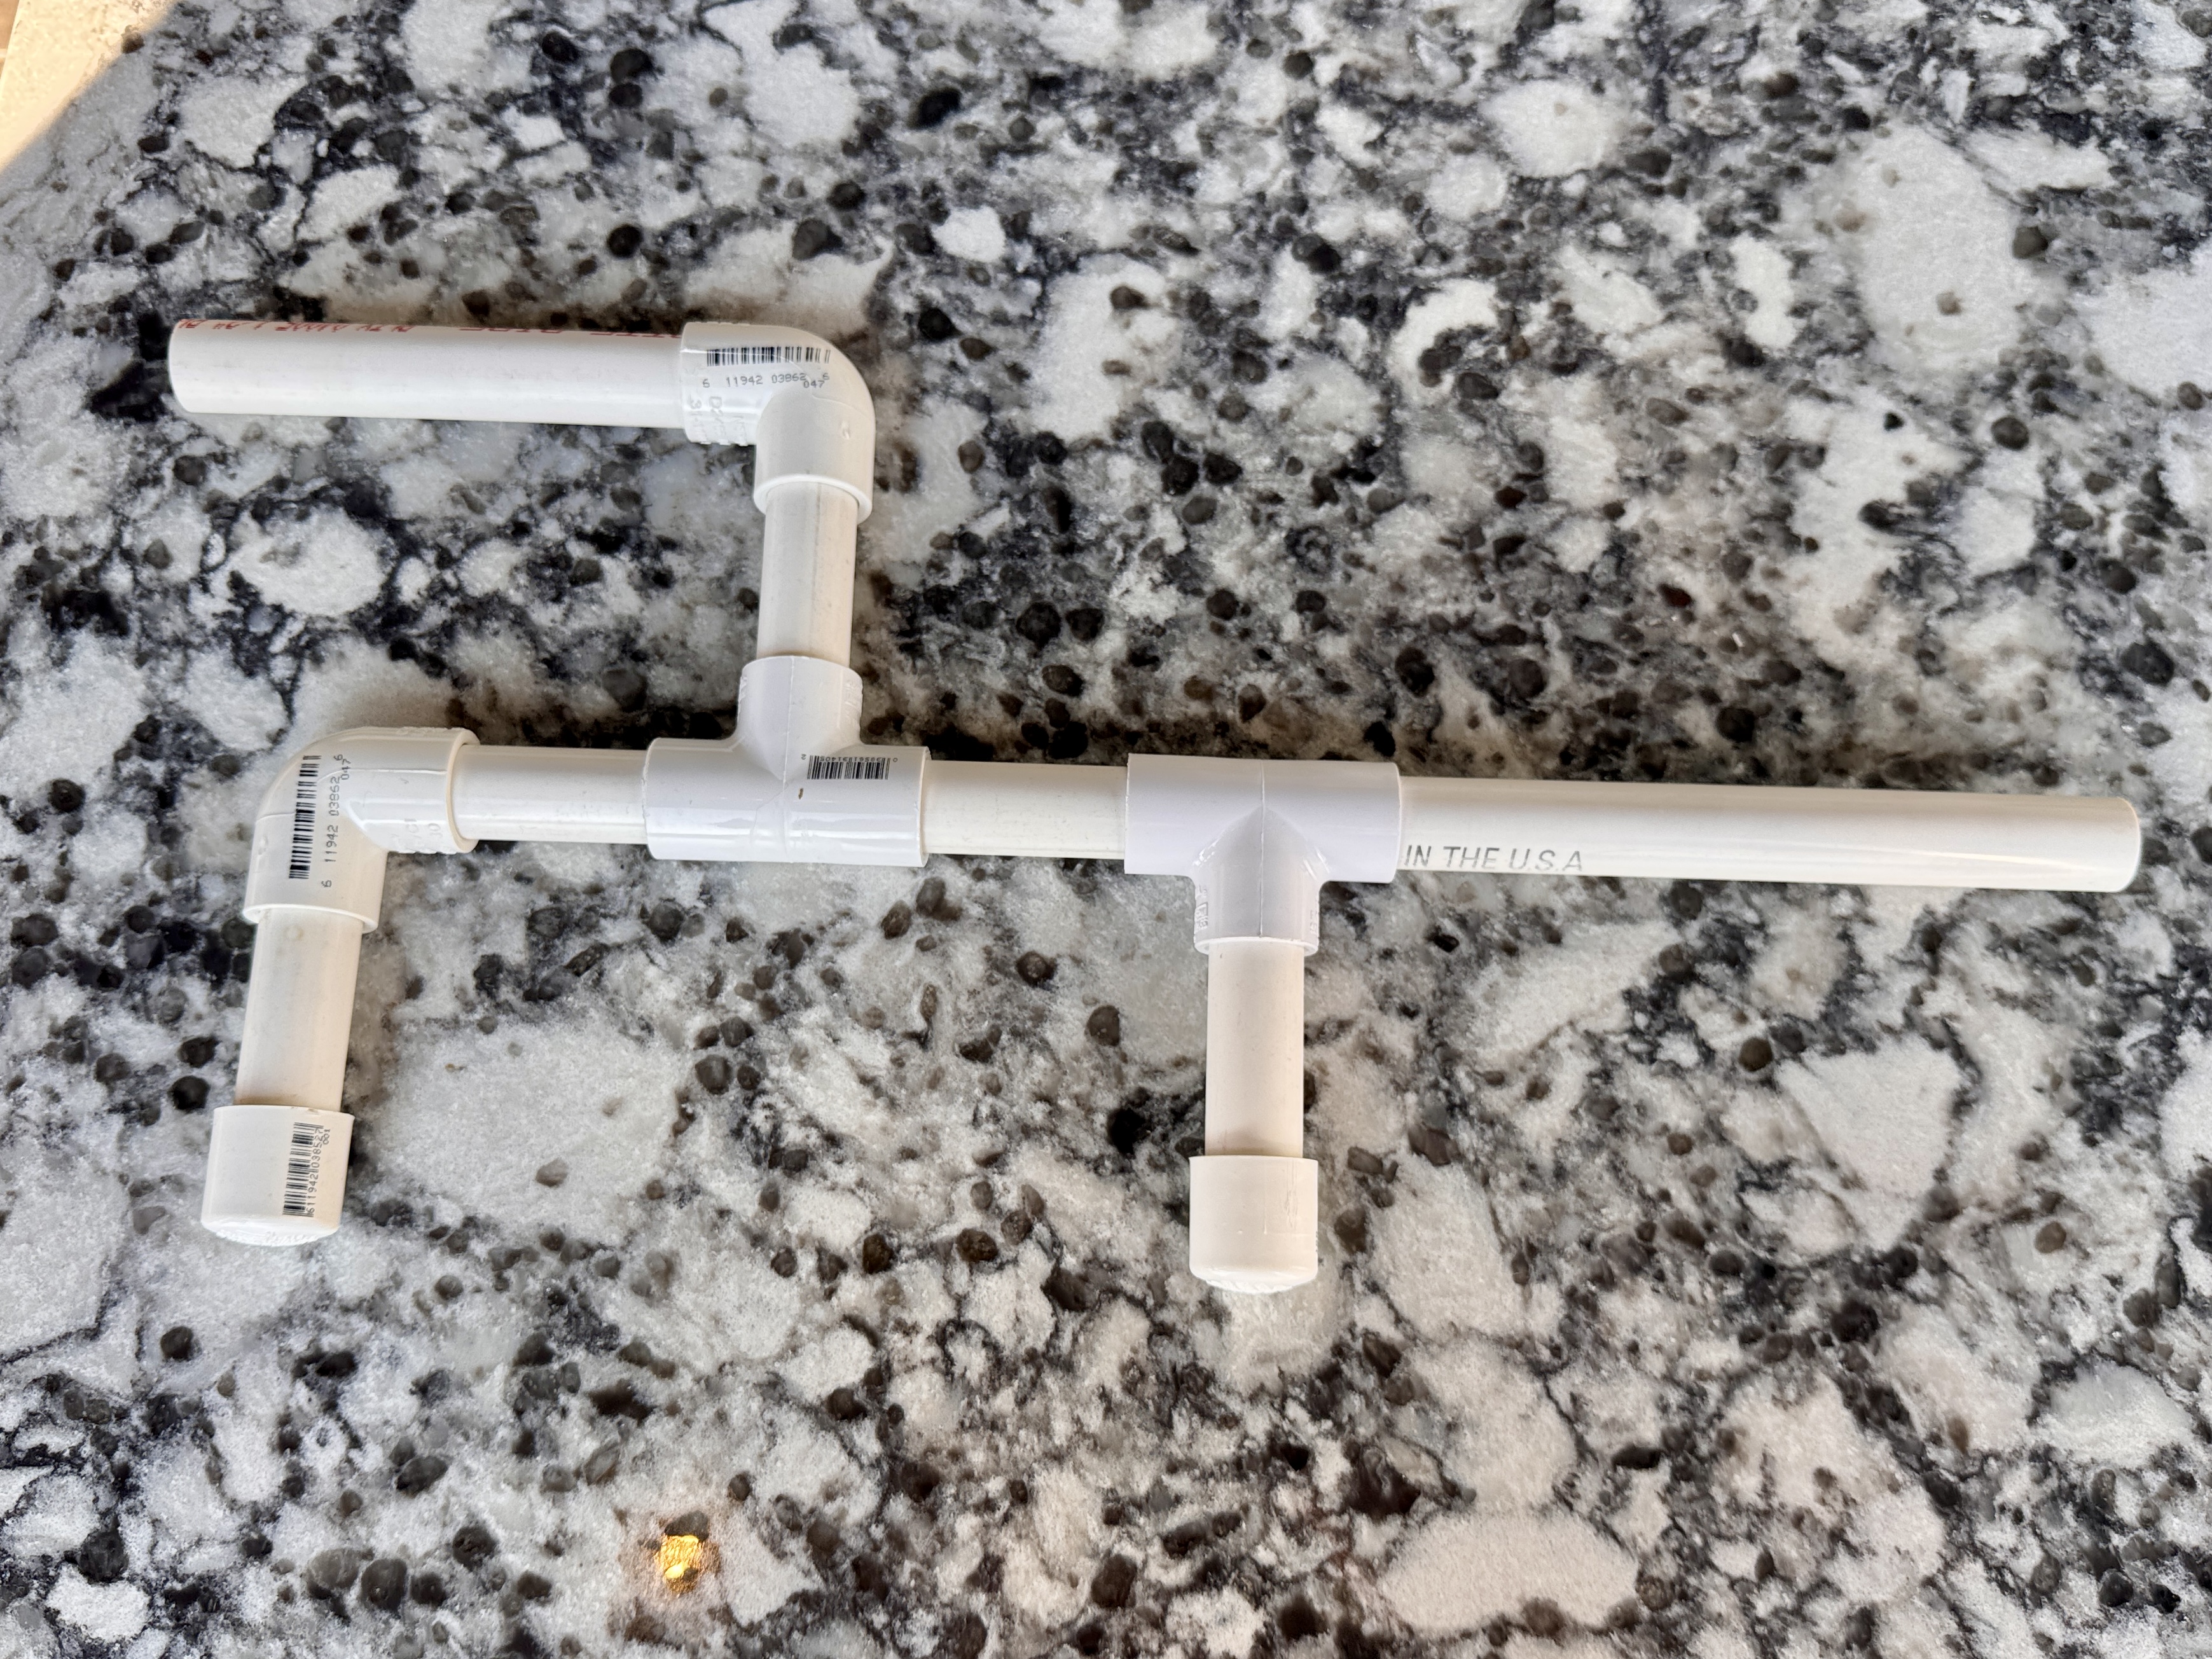
Lay out all the PVC pieces to match the final shape of your marshmallow shooter. This step will help you visualize the build and make sure all the parts are in the right place before assembling. Refer to the image for guidance.
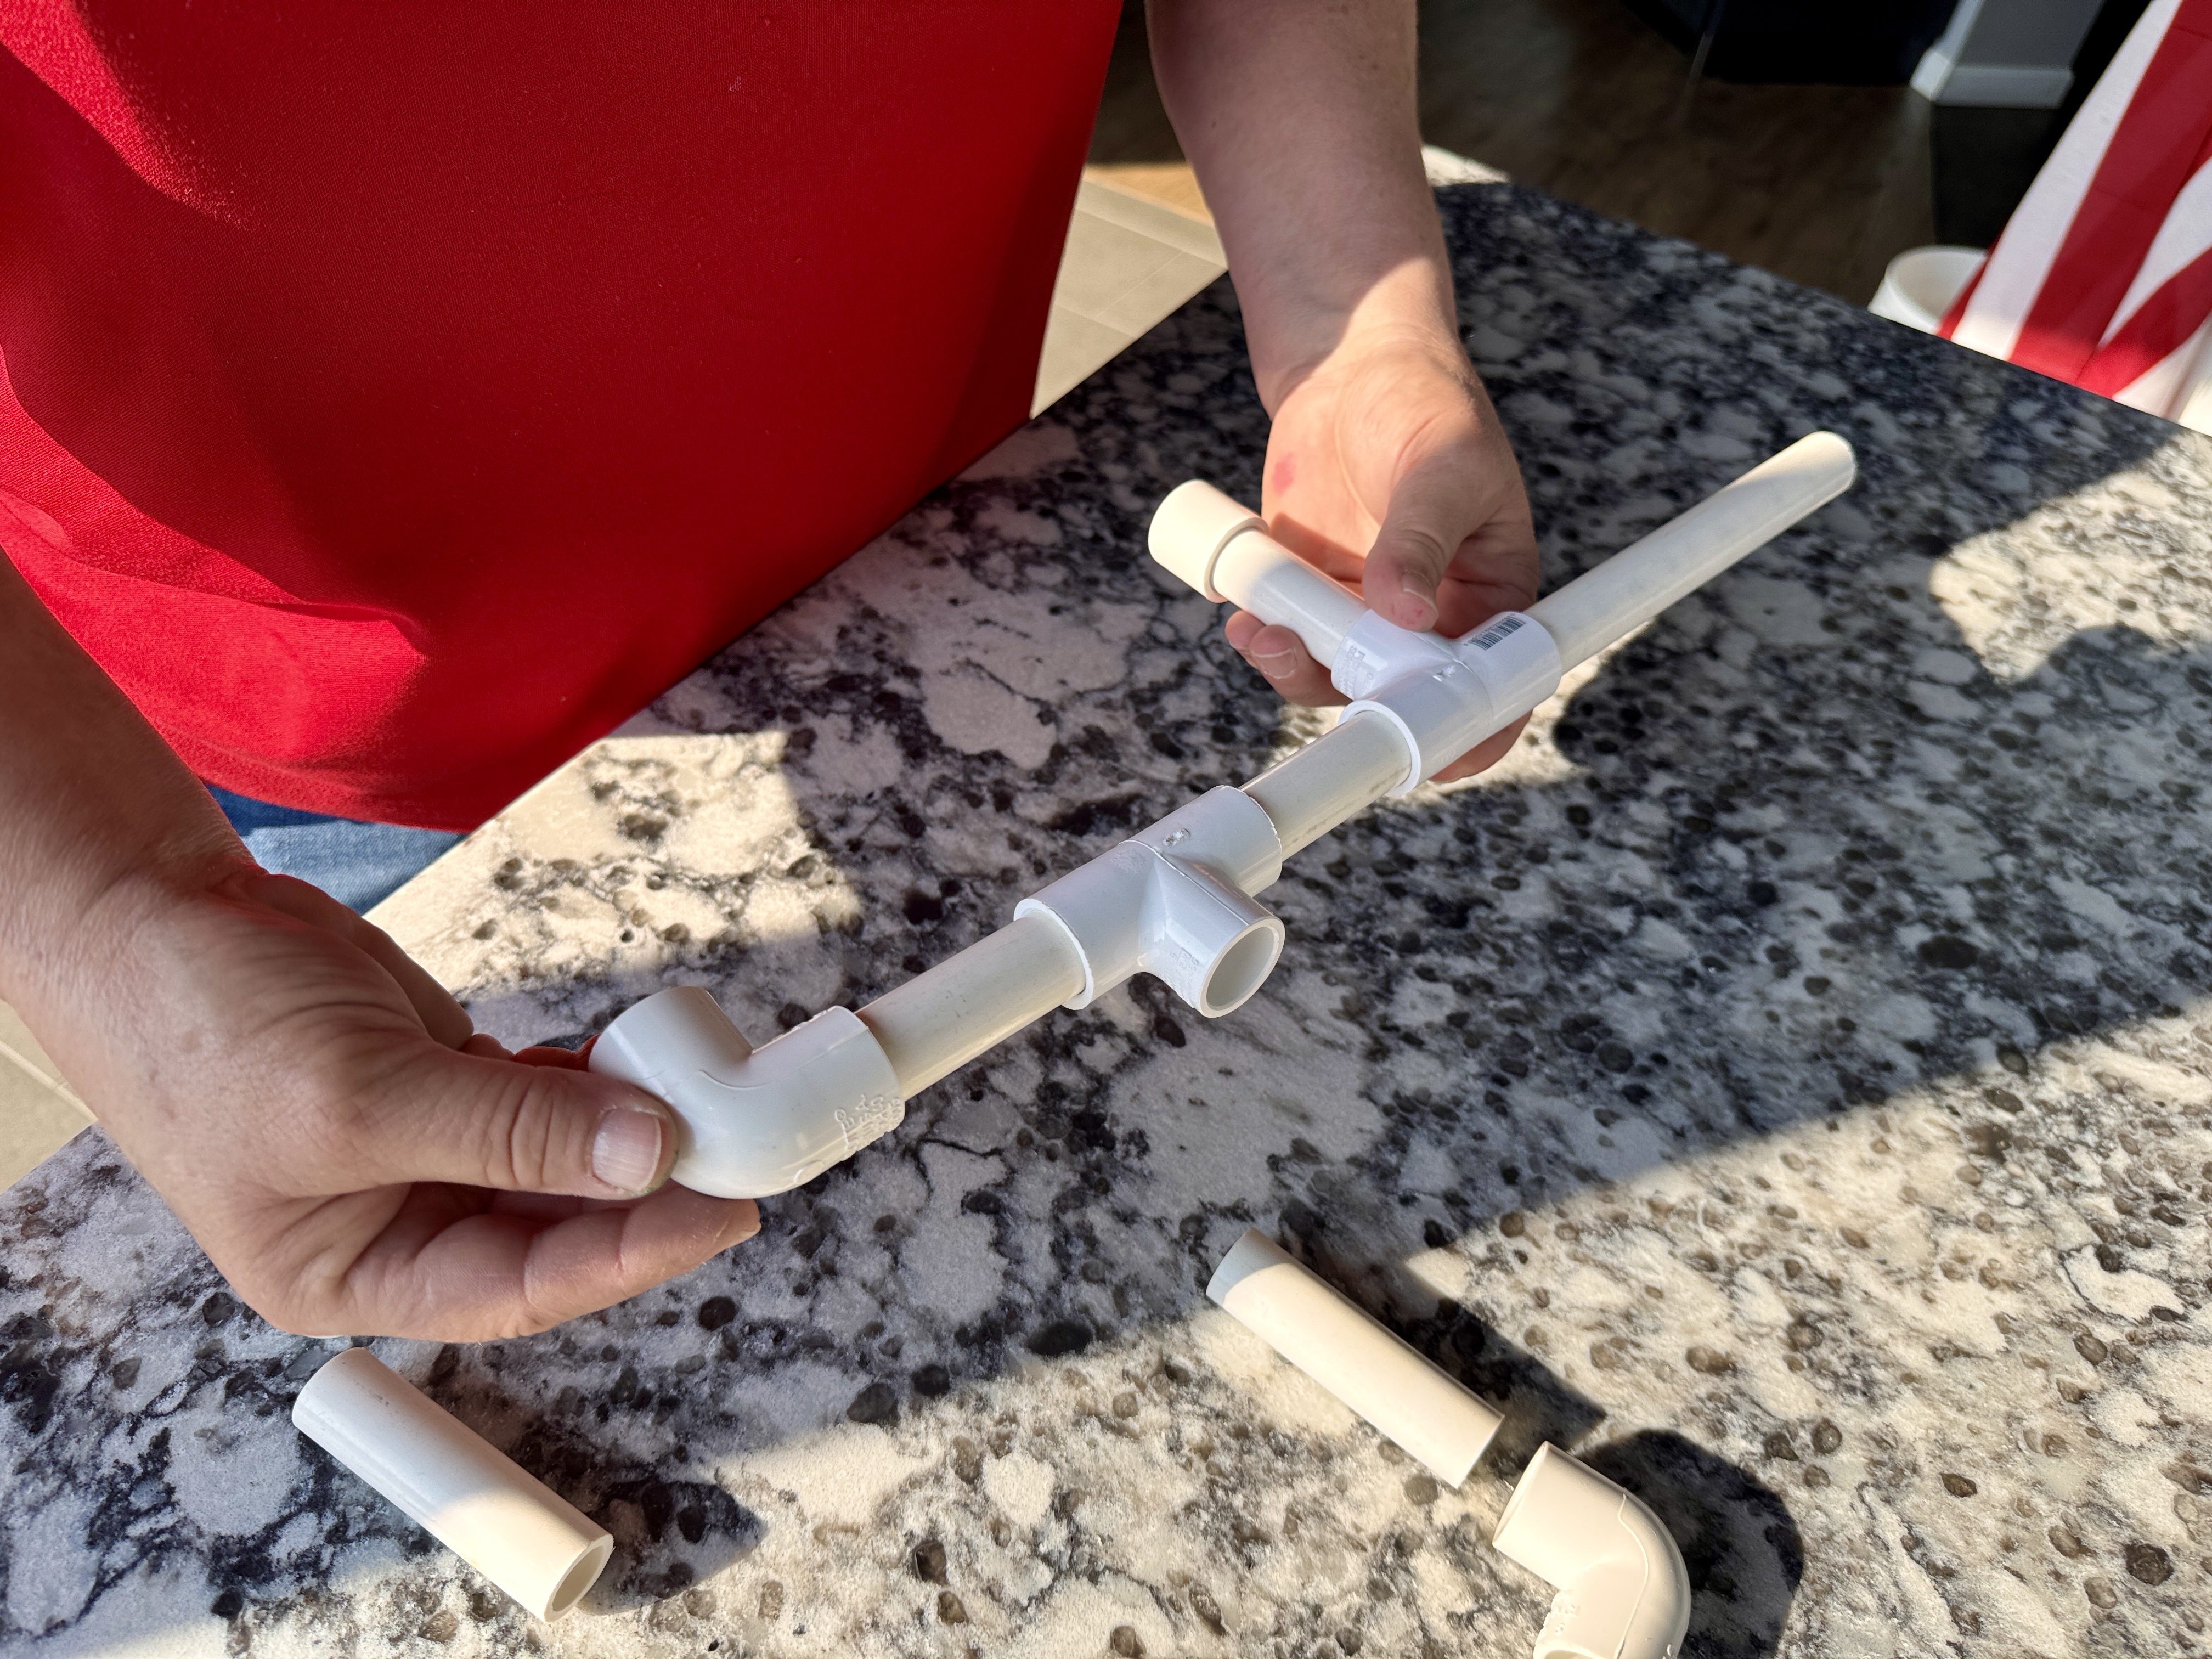
Step 2: Start with the First T-Connector
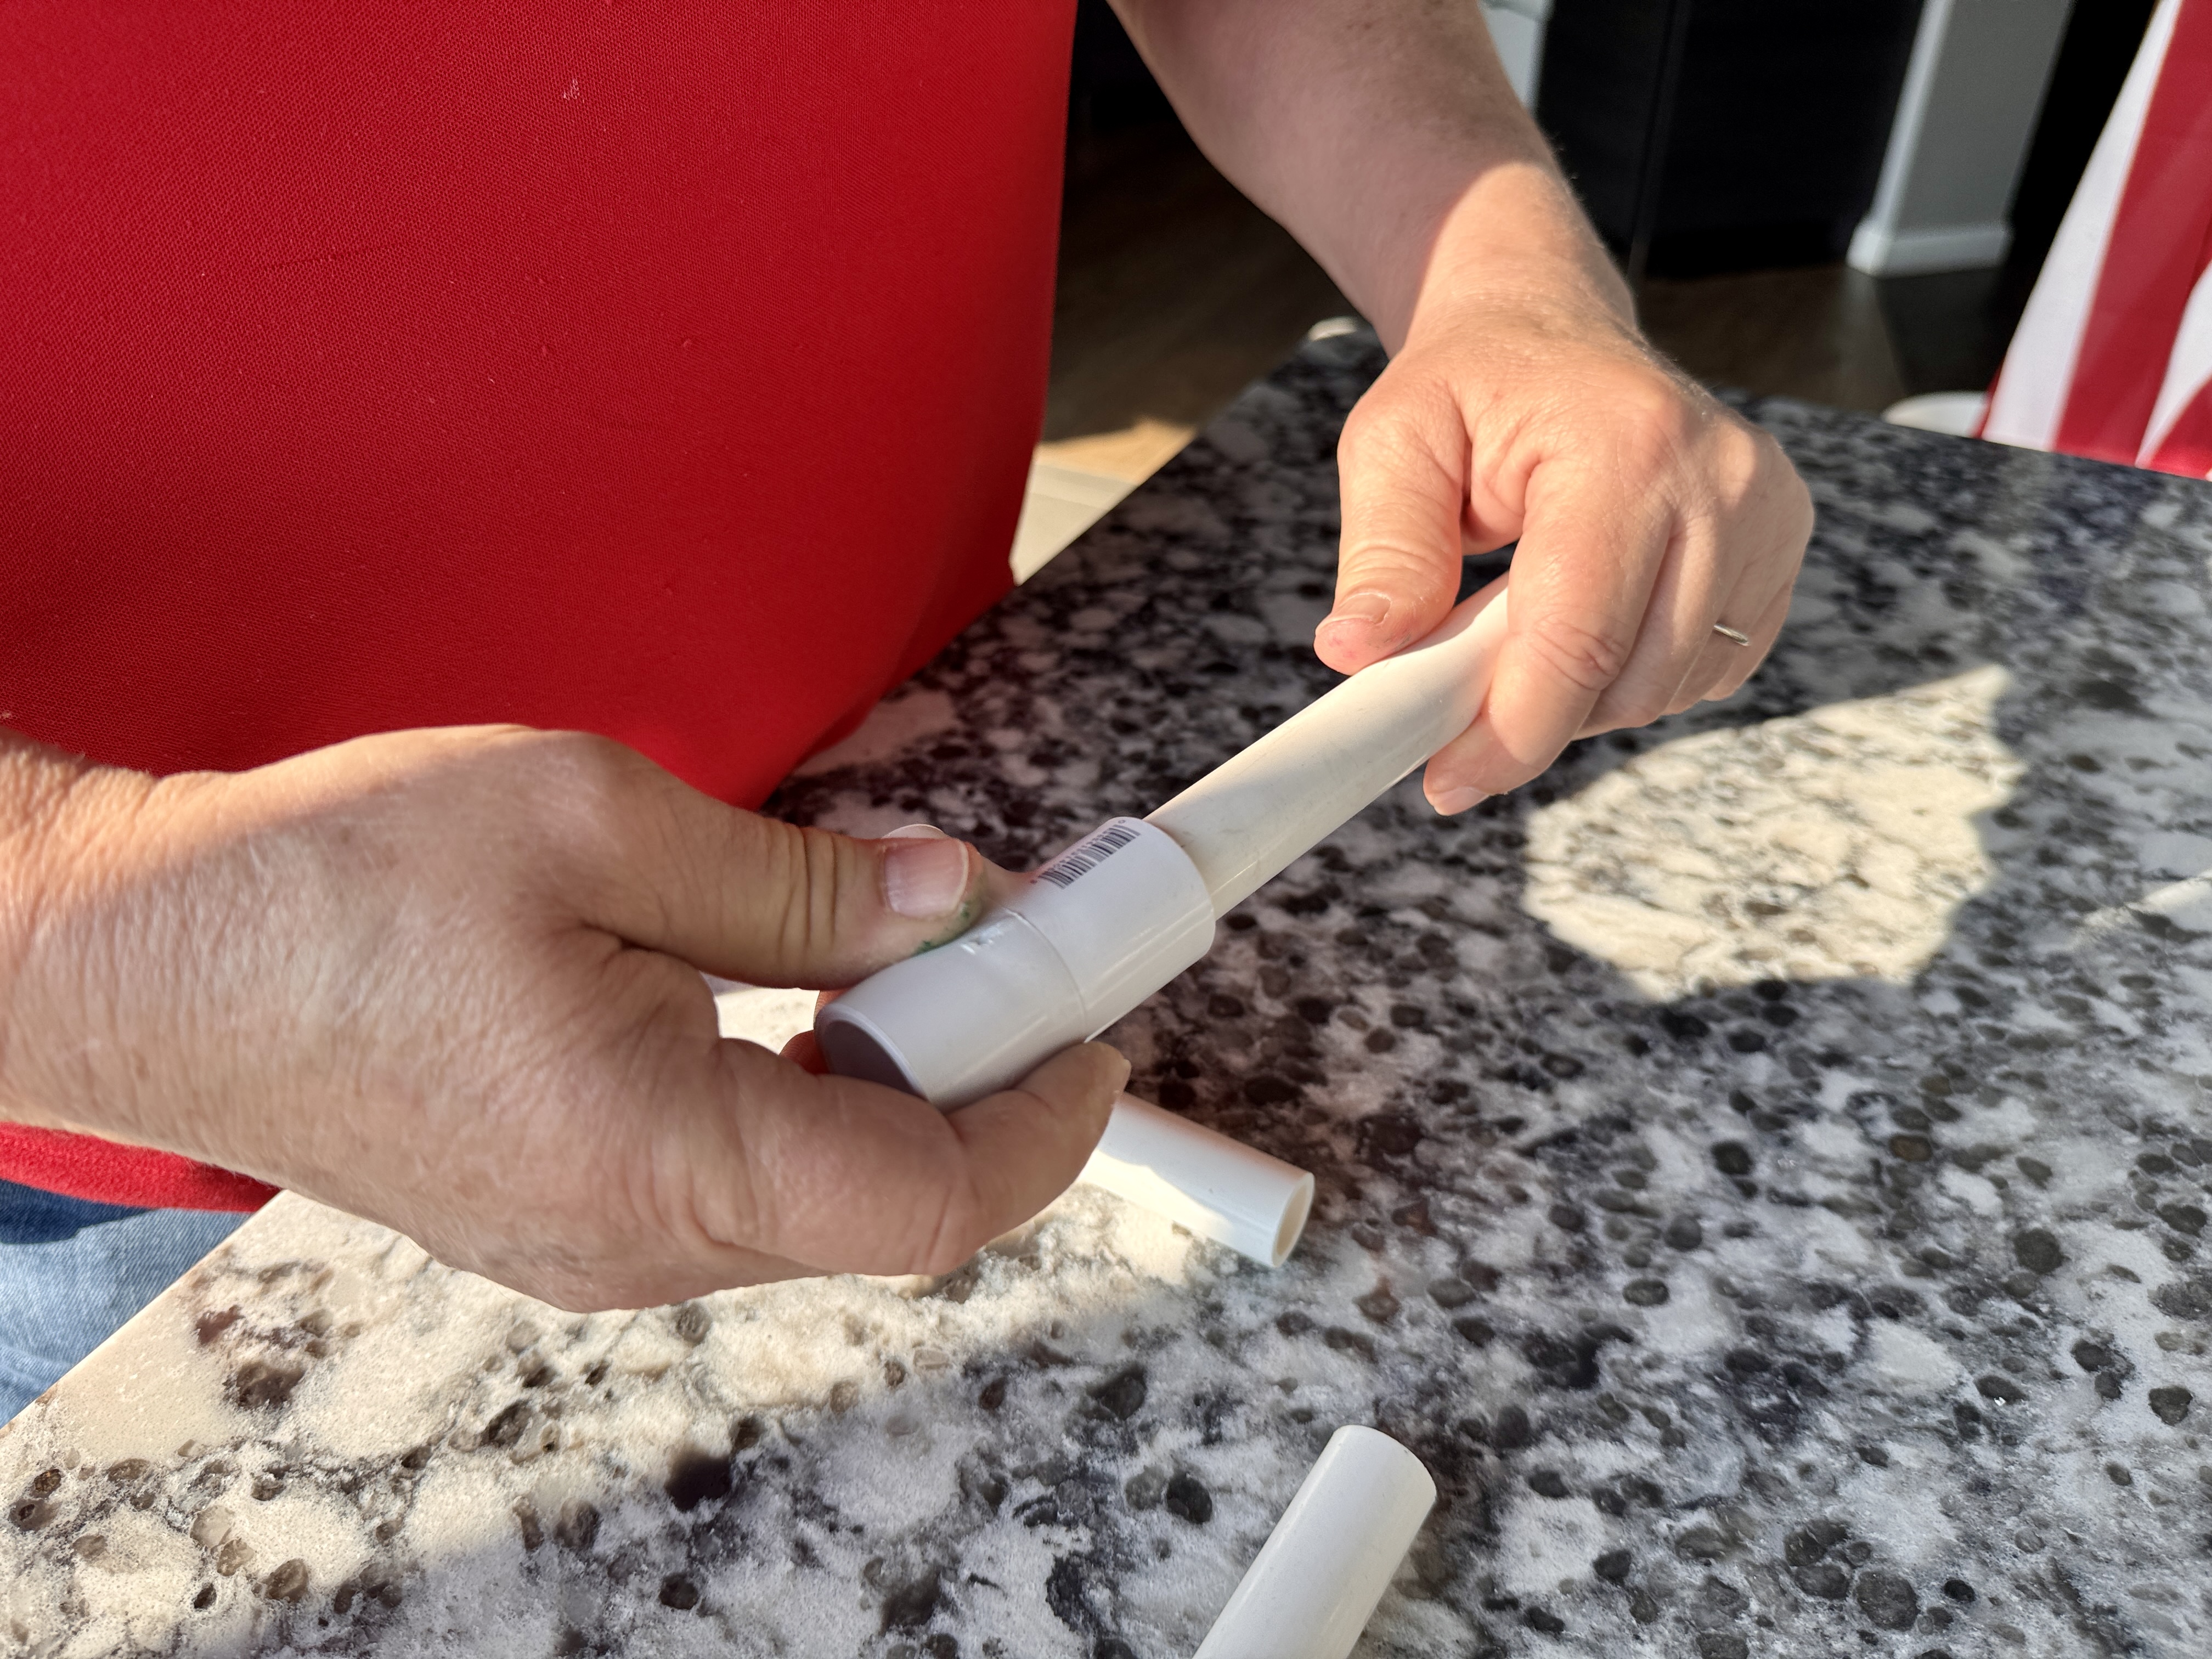
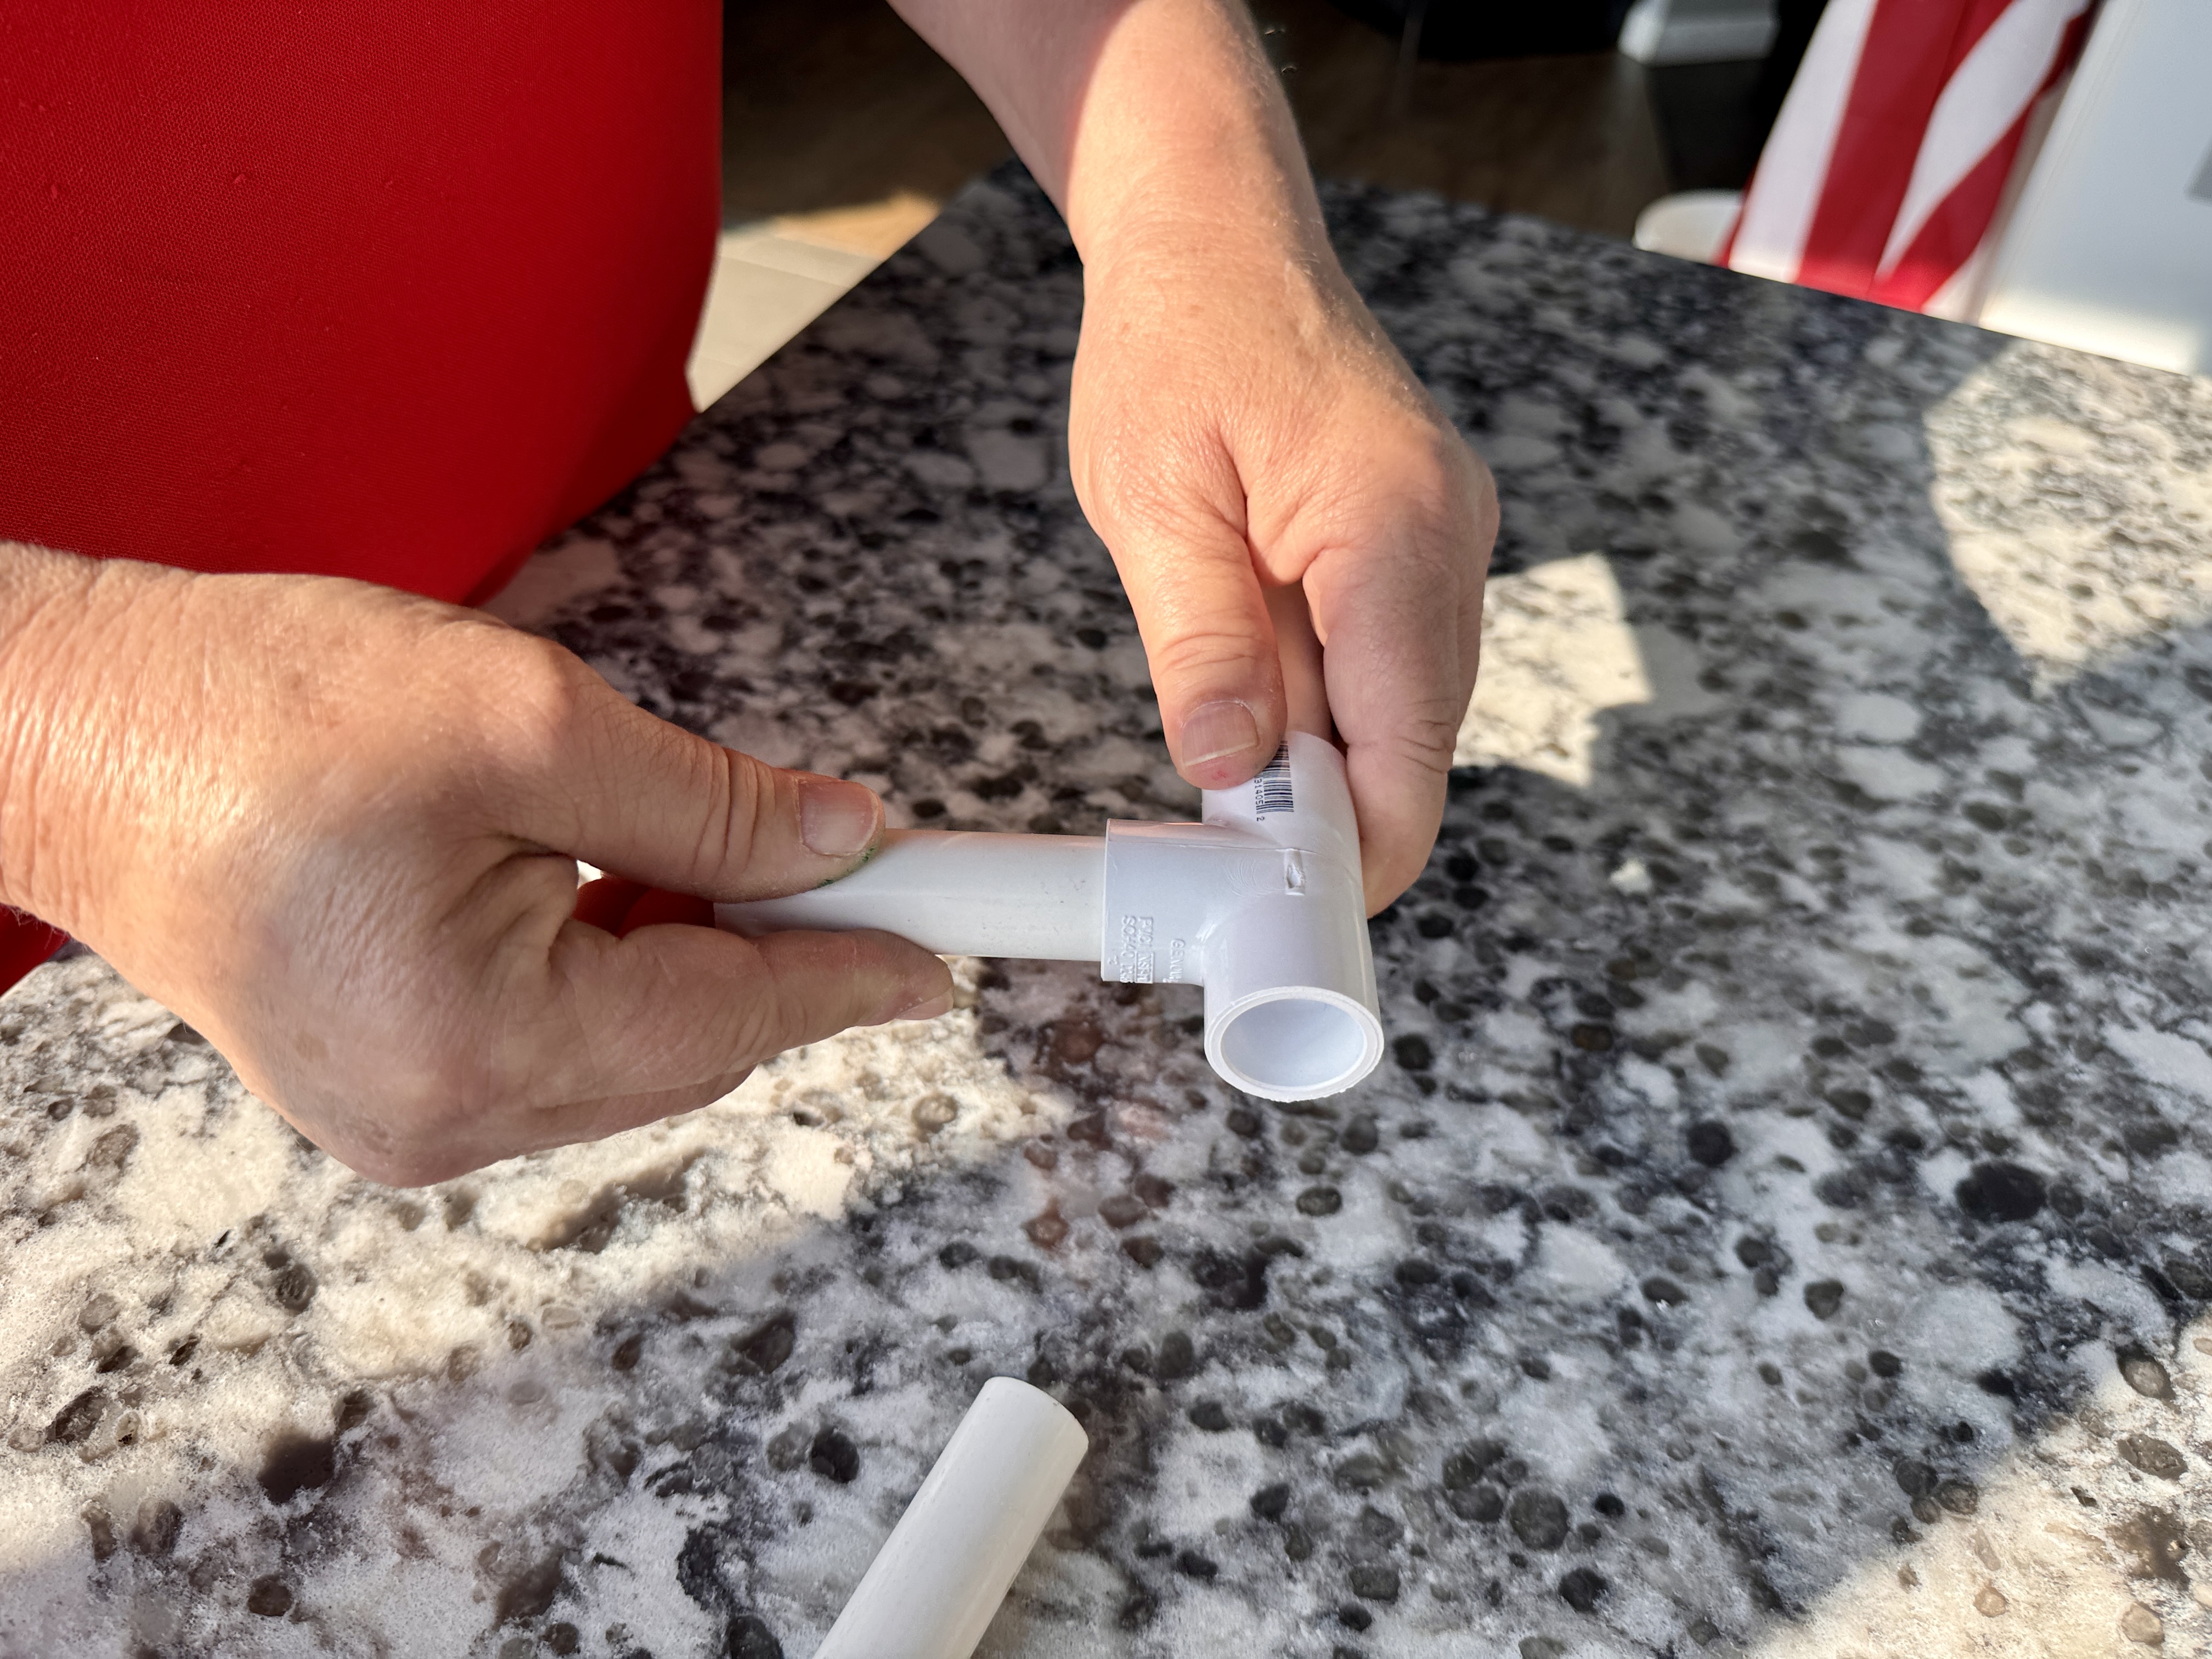
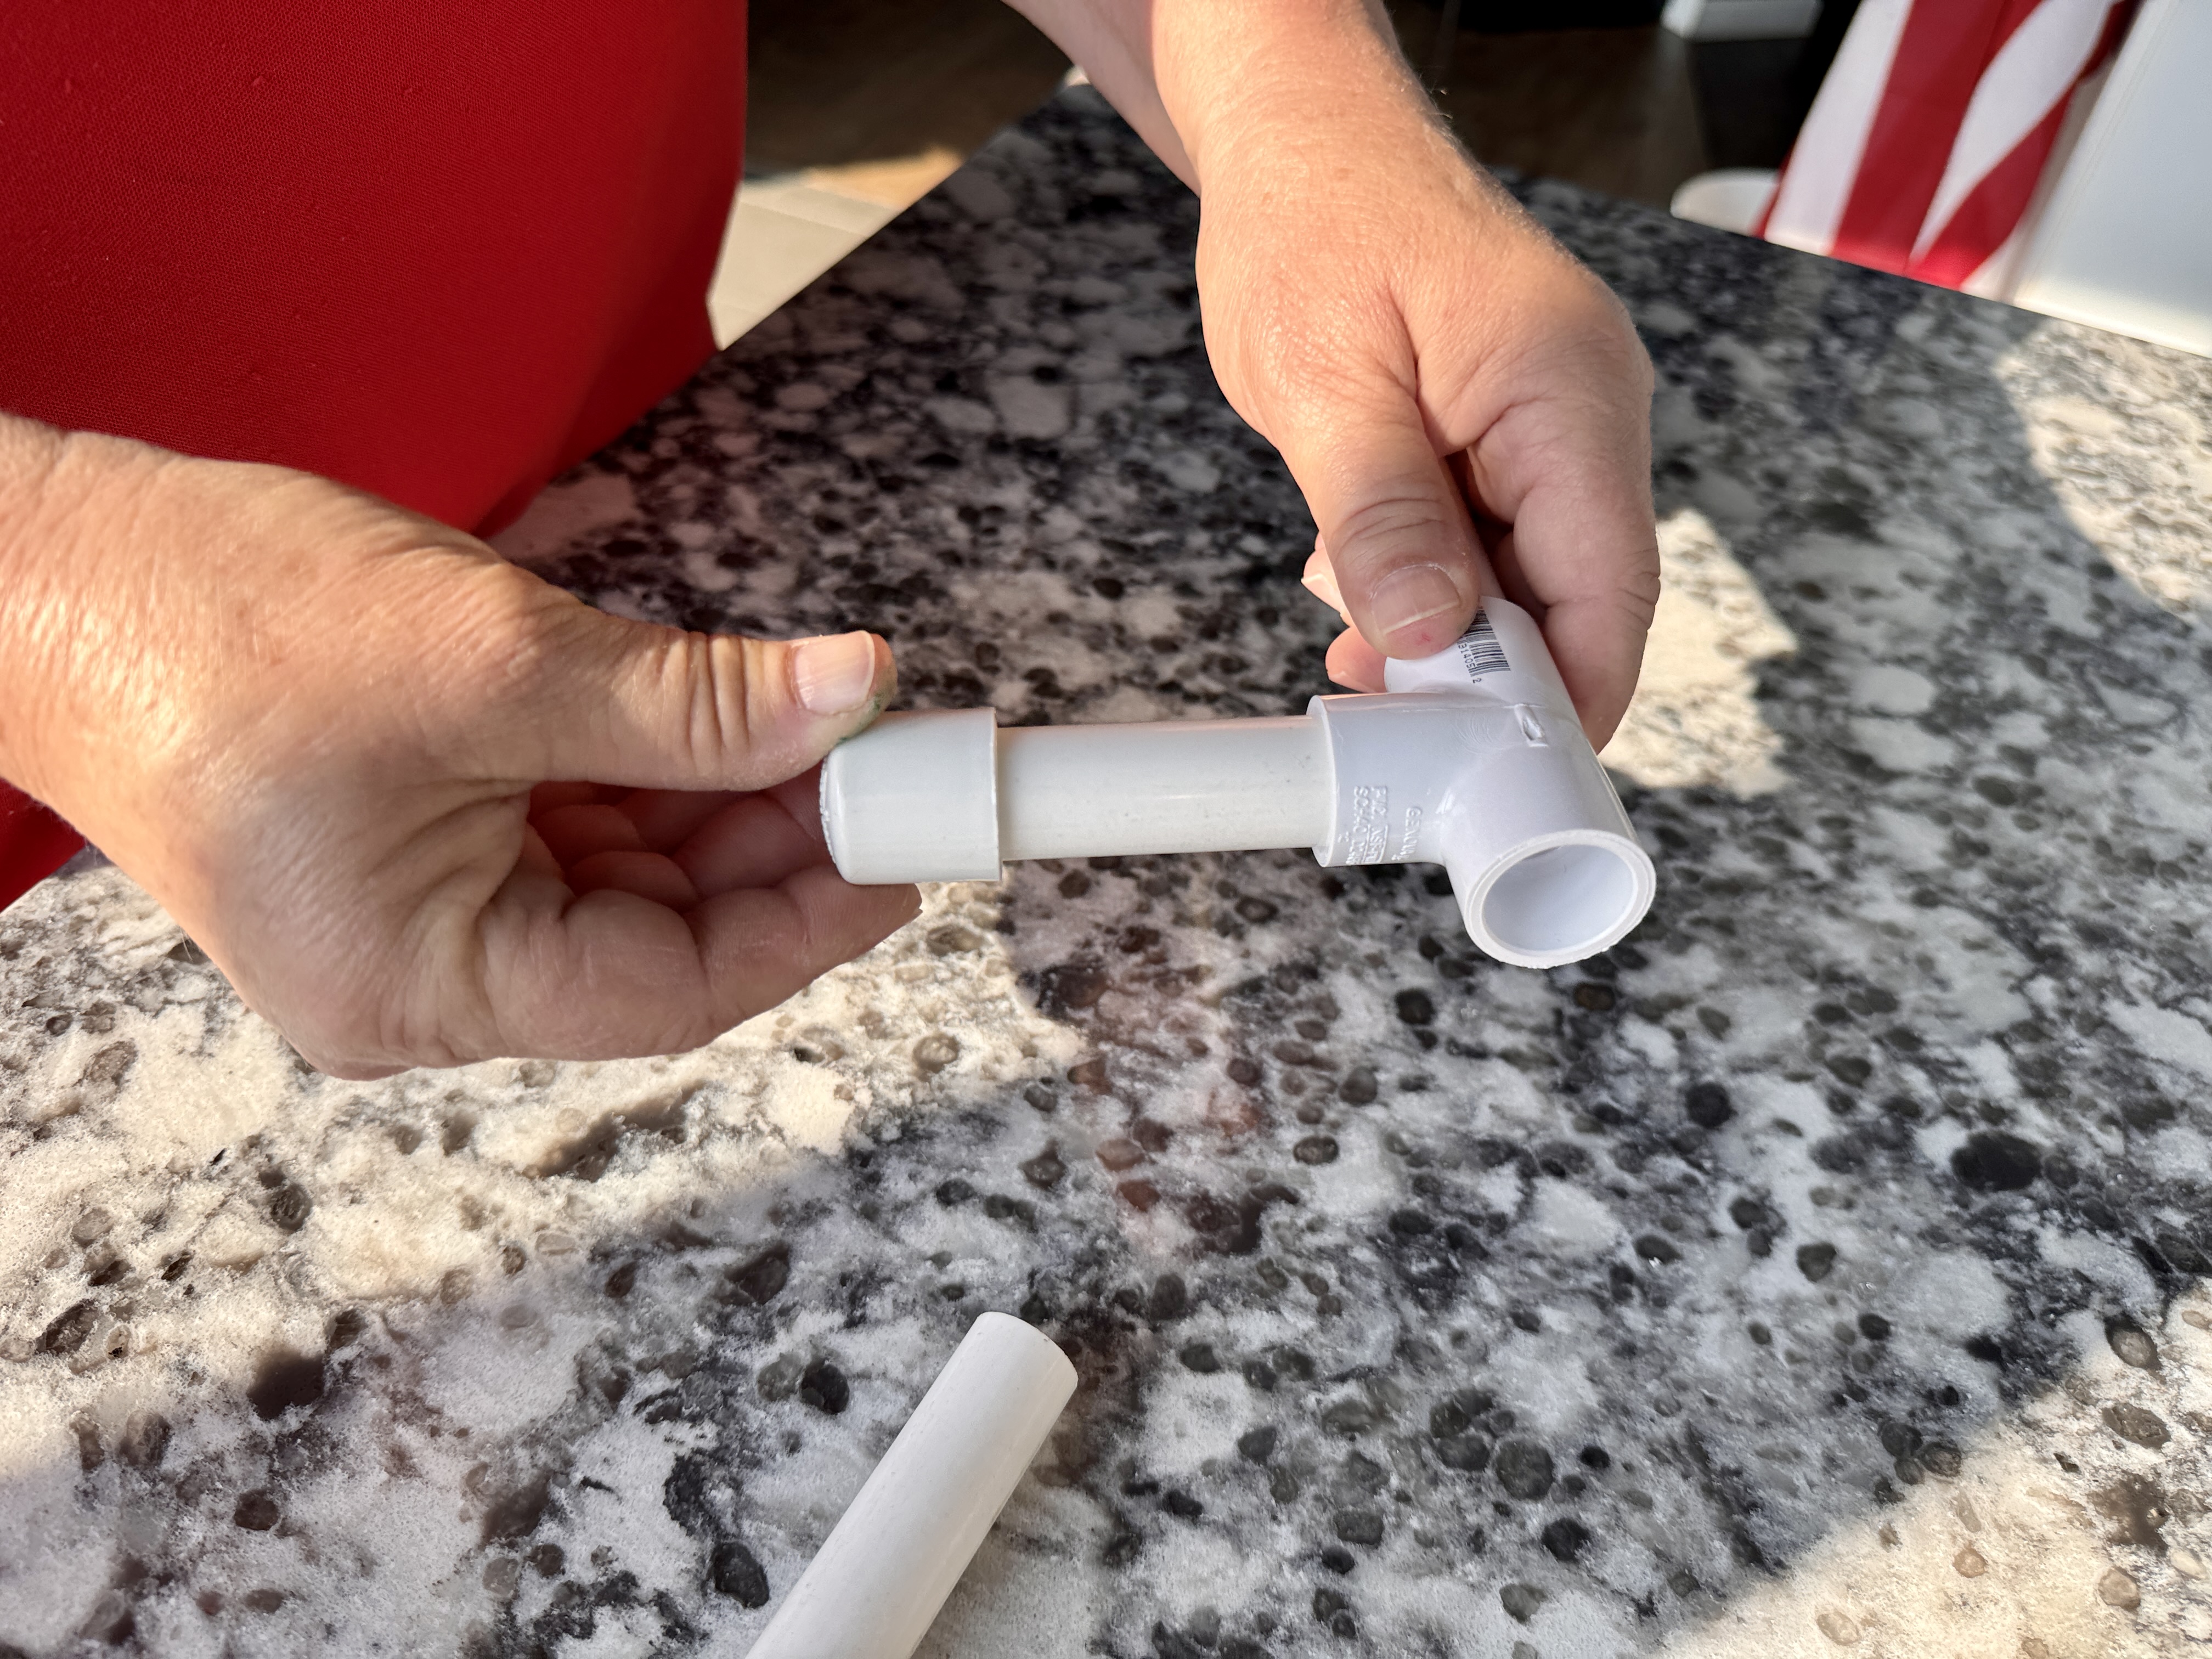
Grab one of the PVC Tee-connectors and insert the 7-inch PVC pipe into one of the side openings.
Next, take a 3-inch pipe and insert it into the bottom opening of the Tee (make sure the Tee is facing down).
Cap the end of the 3-inch pipe with a PVC end cap.
Step 3: Build Upward
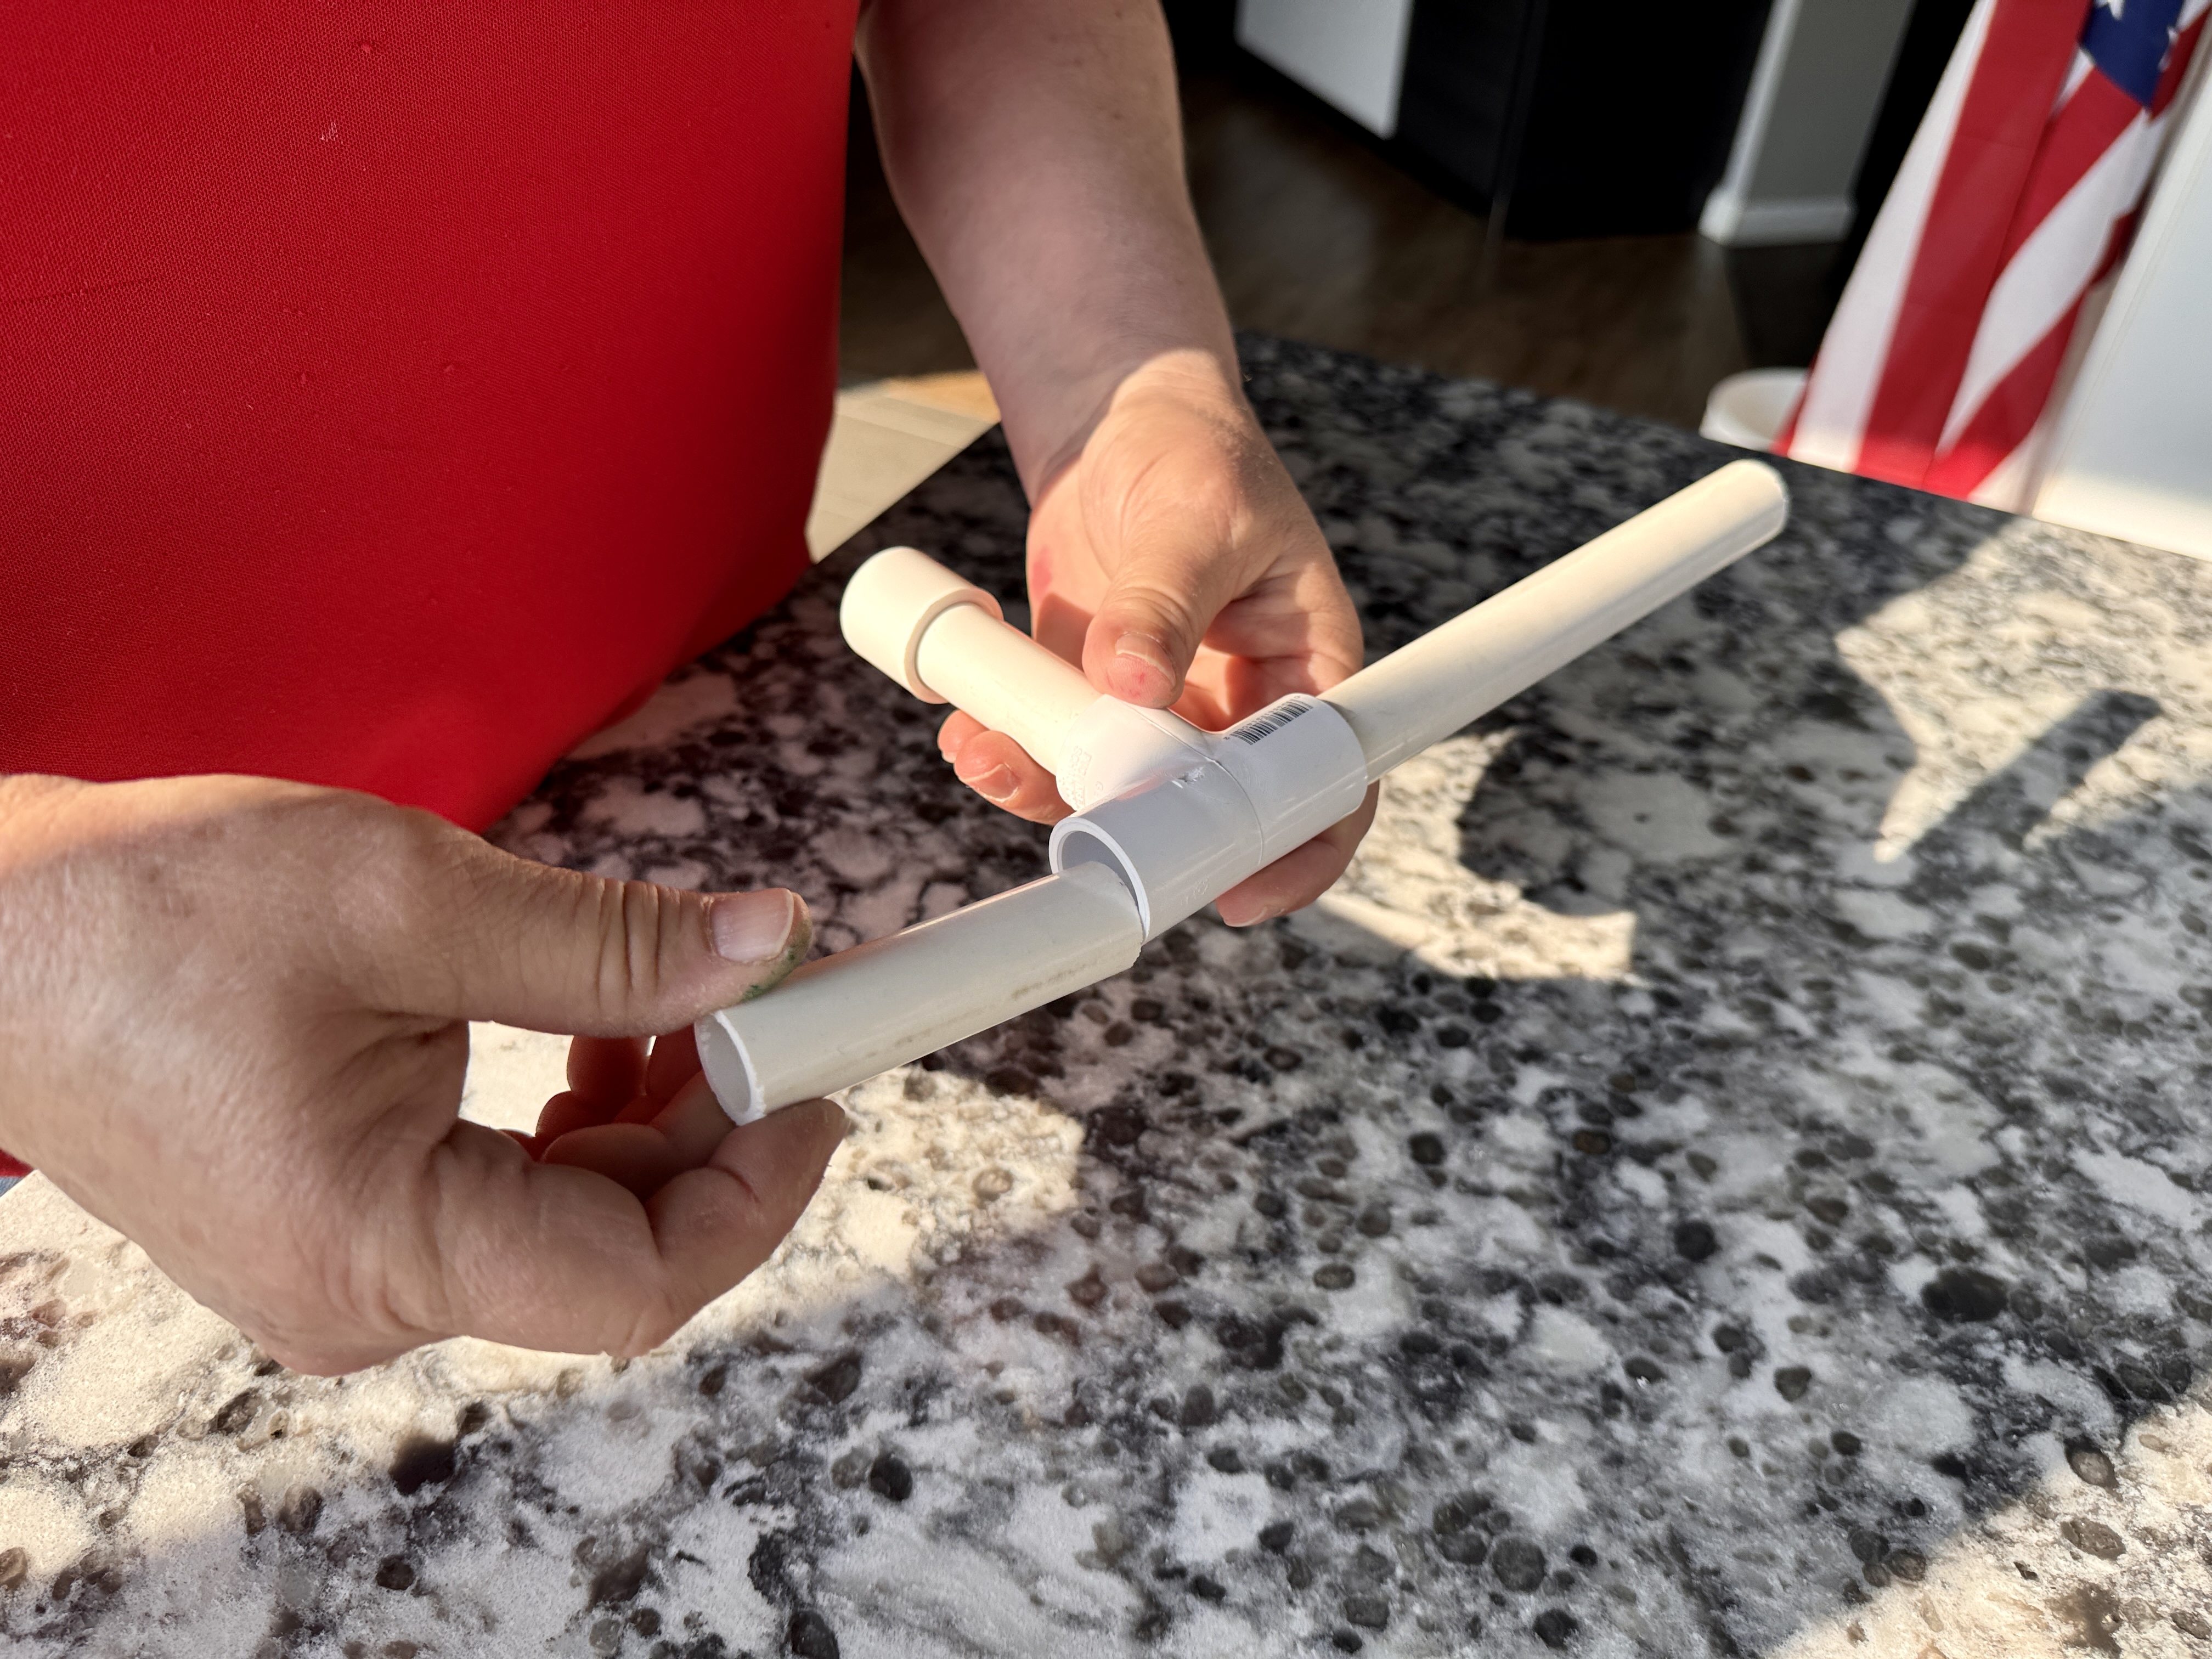
Attach another 3-inch pipe to the open side of the Tee-connector you’ve been working with.
Then connect the second Tee-connector to the end of that pipe. This time, make sure the Tee is facing up.
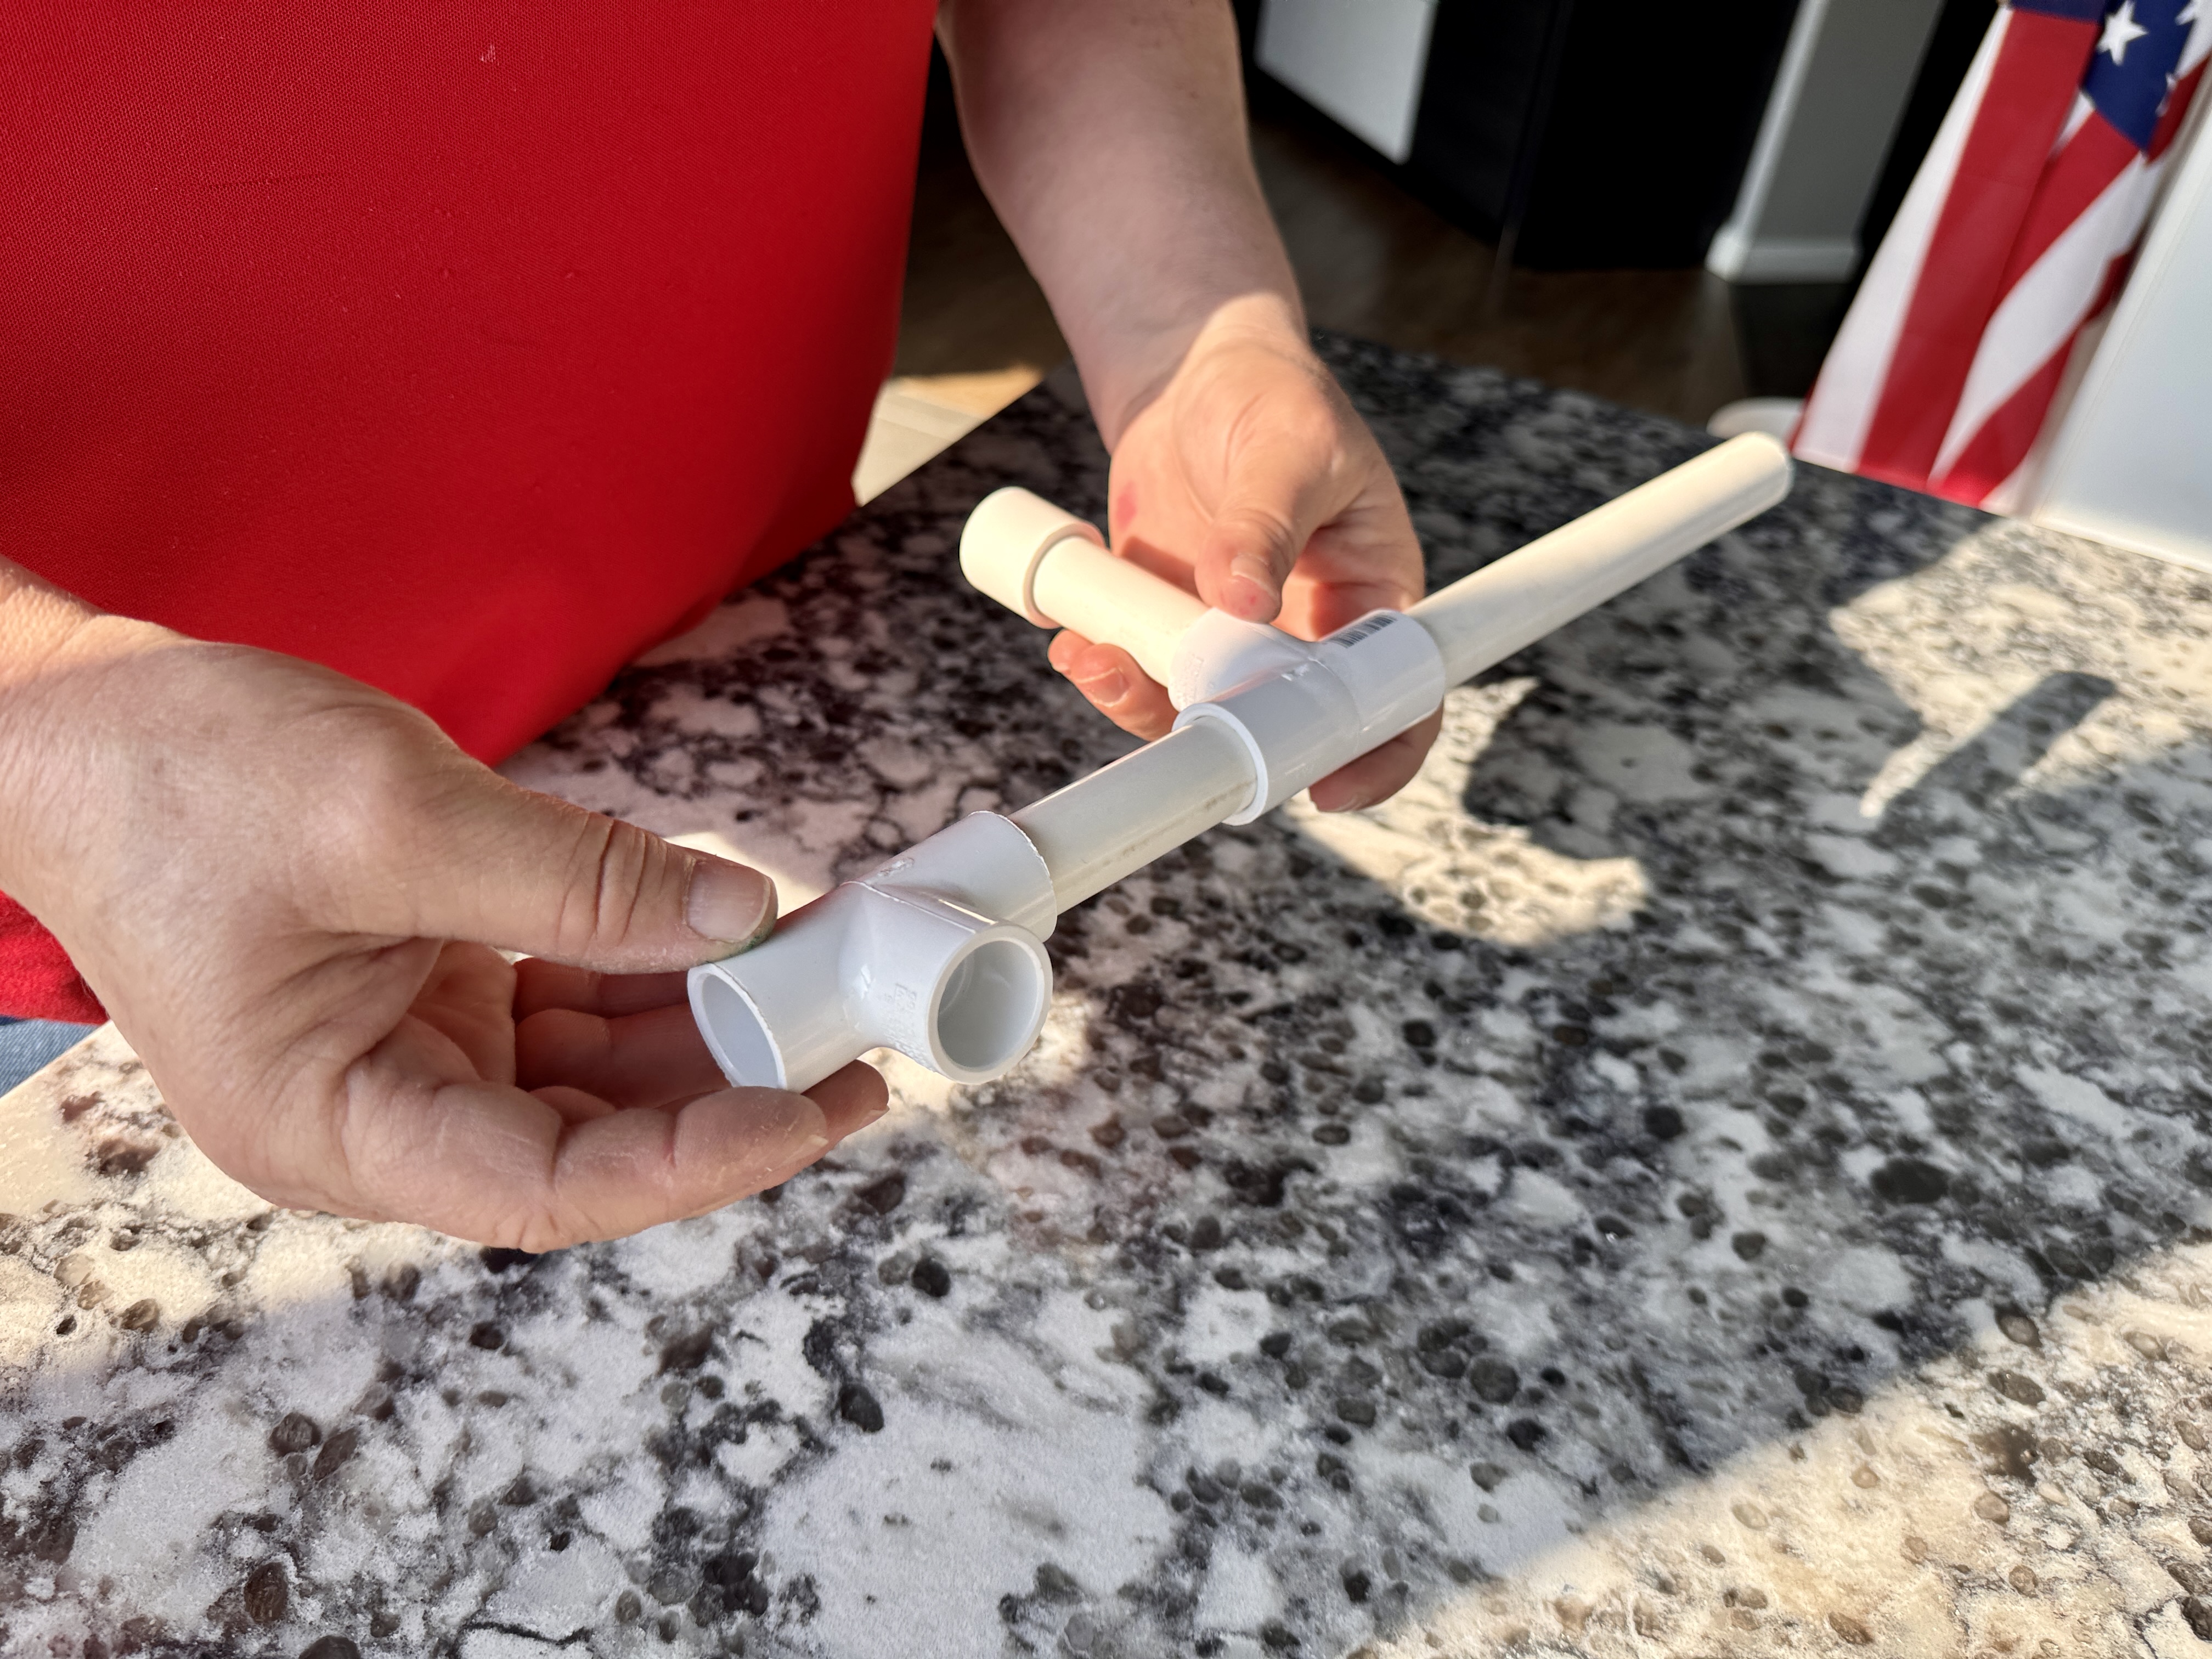
Step 4: Build to the Side
Insert another 3-inch pipe into the side of the second Tee-connector.
Attach a PVC elbow to the end of this pipe, with the elbow facing down.
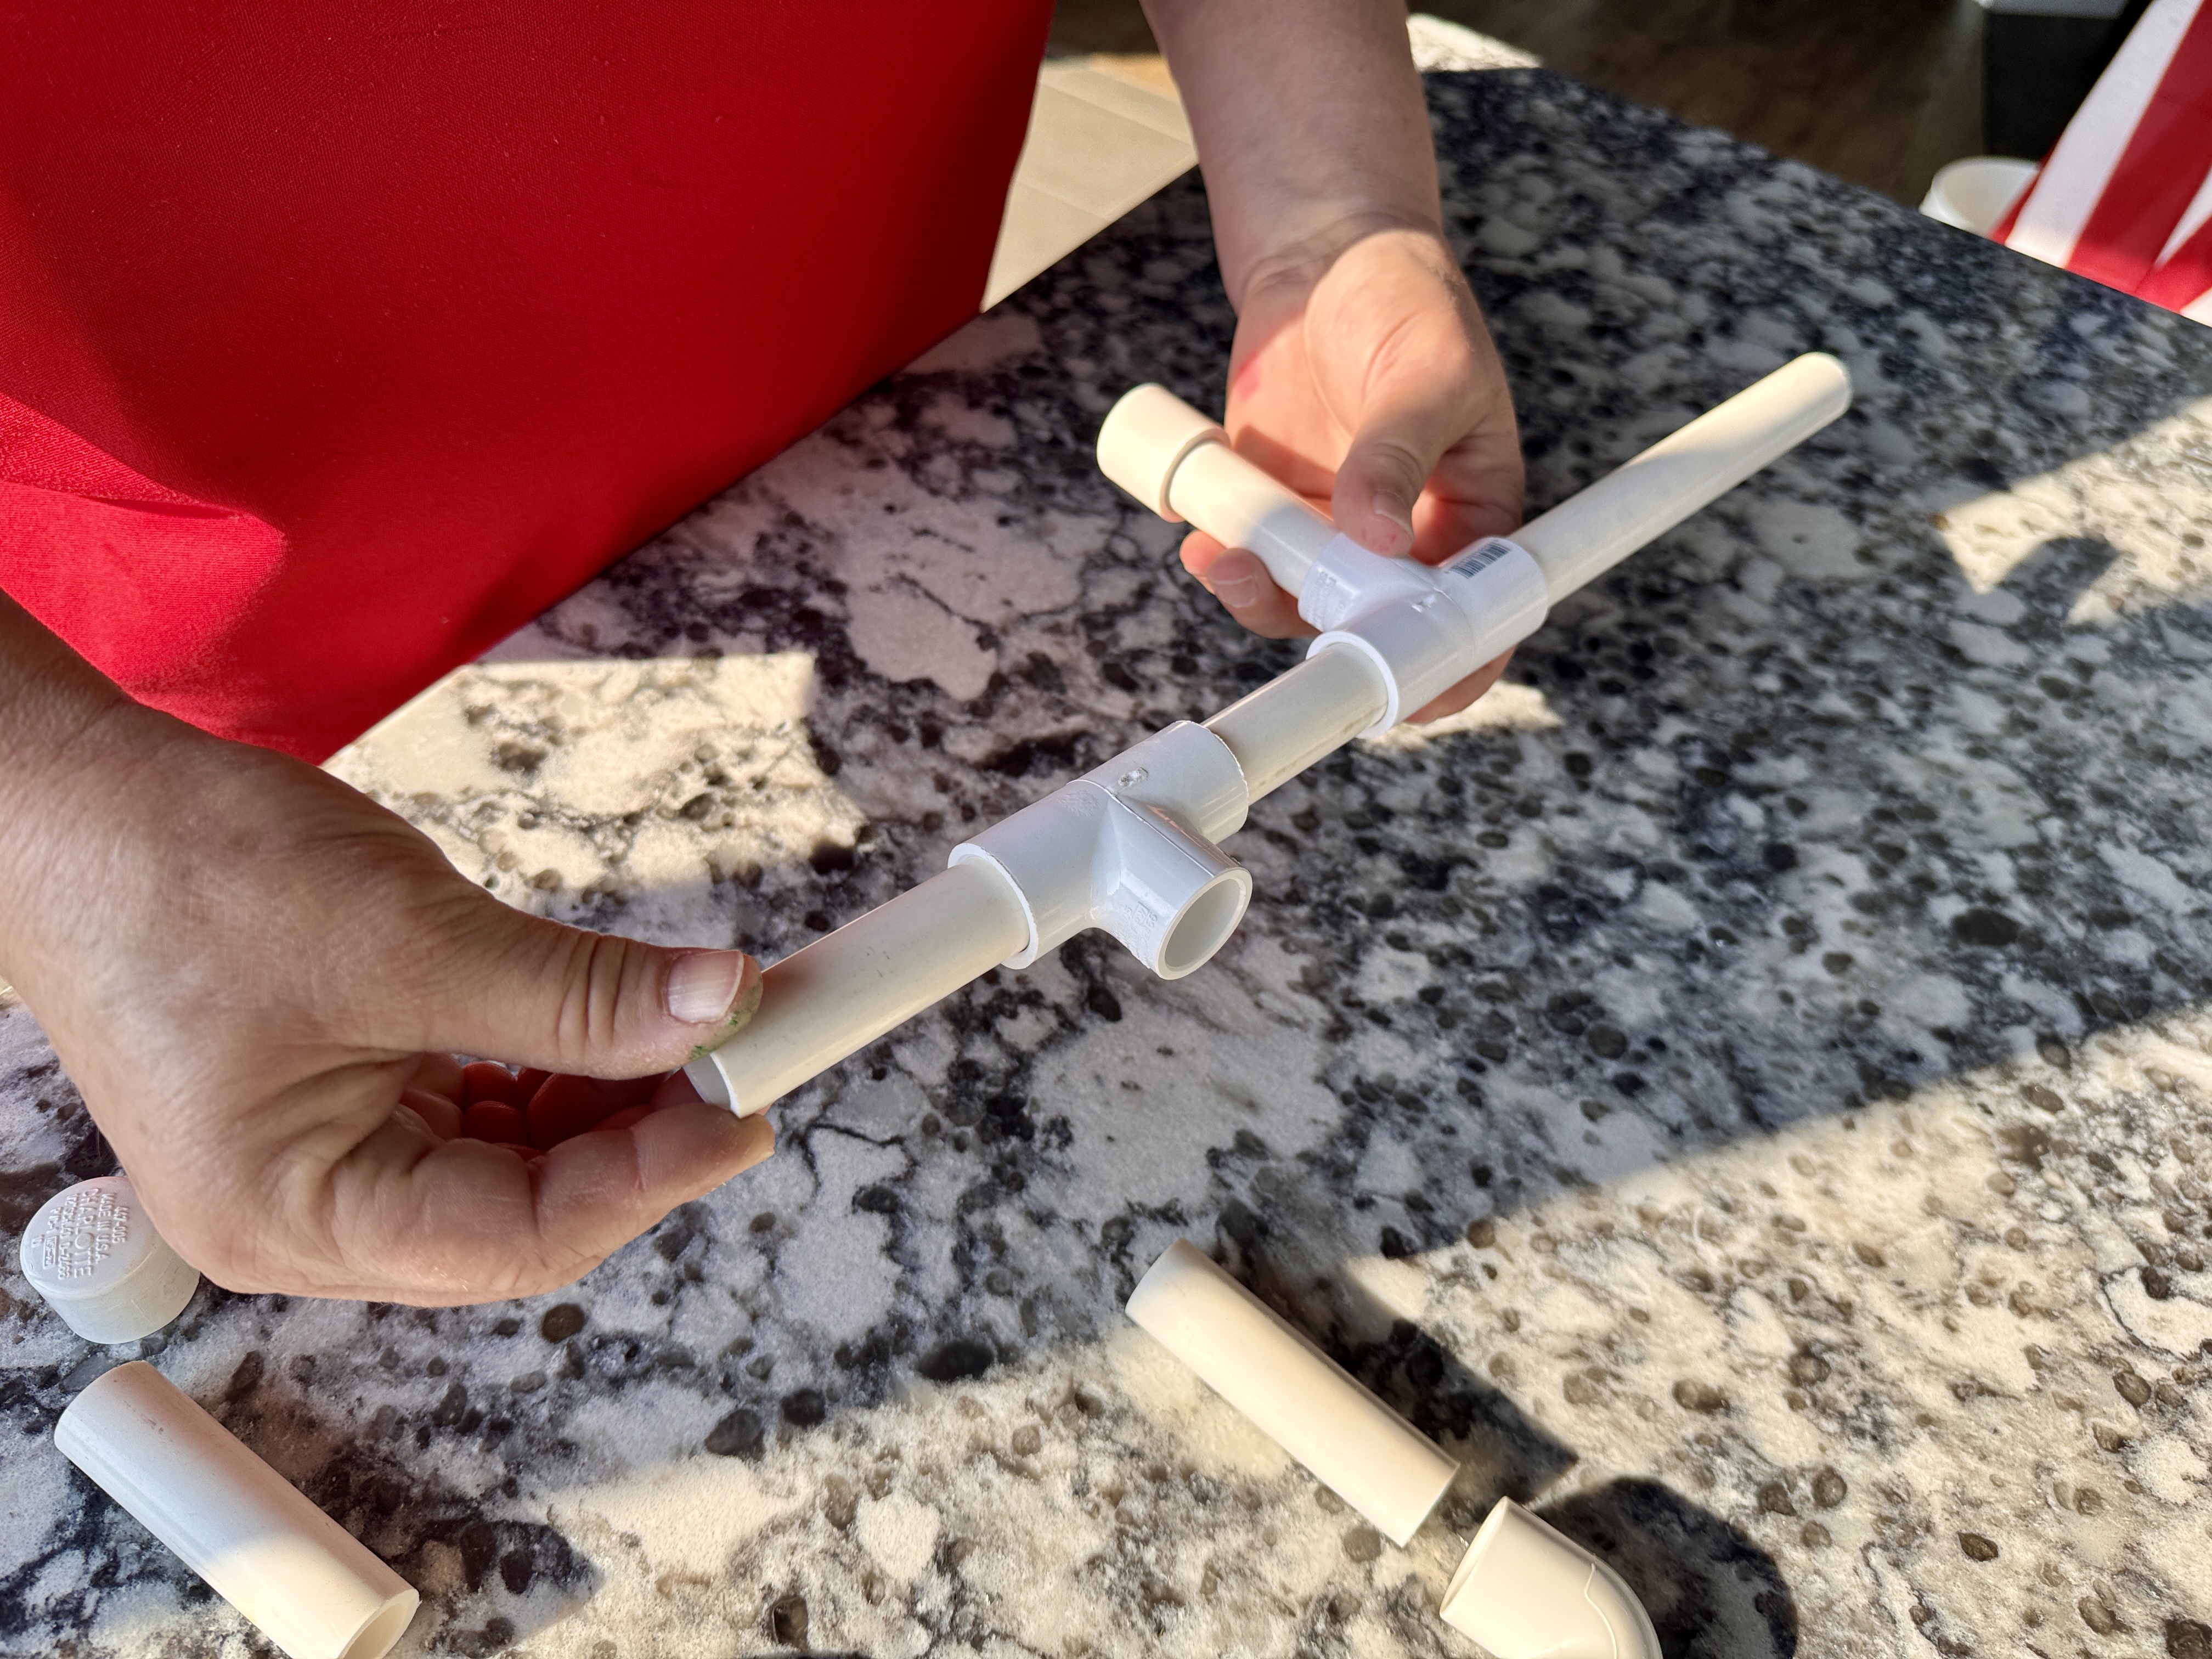
Step 5: Finish the Side Arm

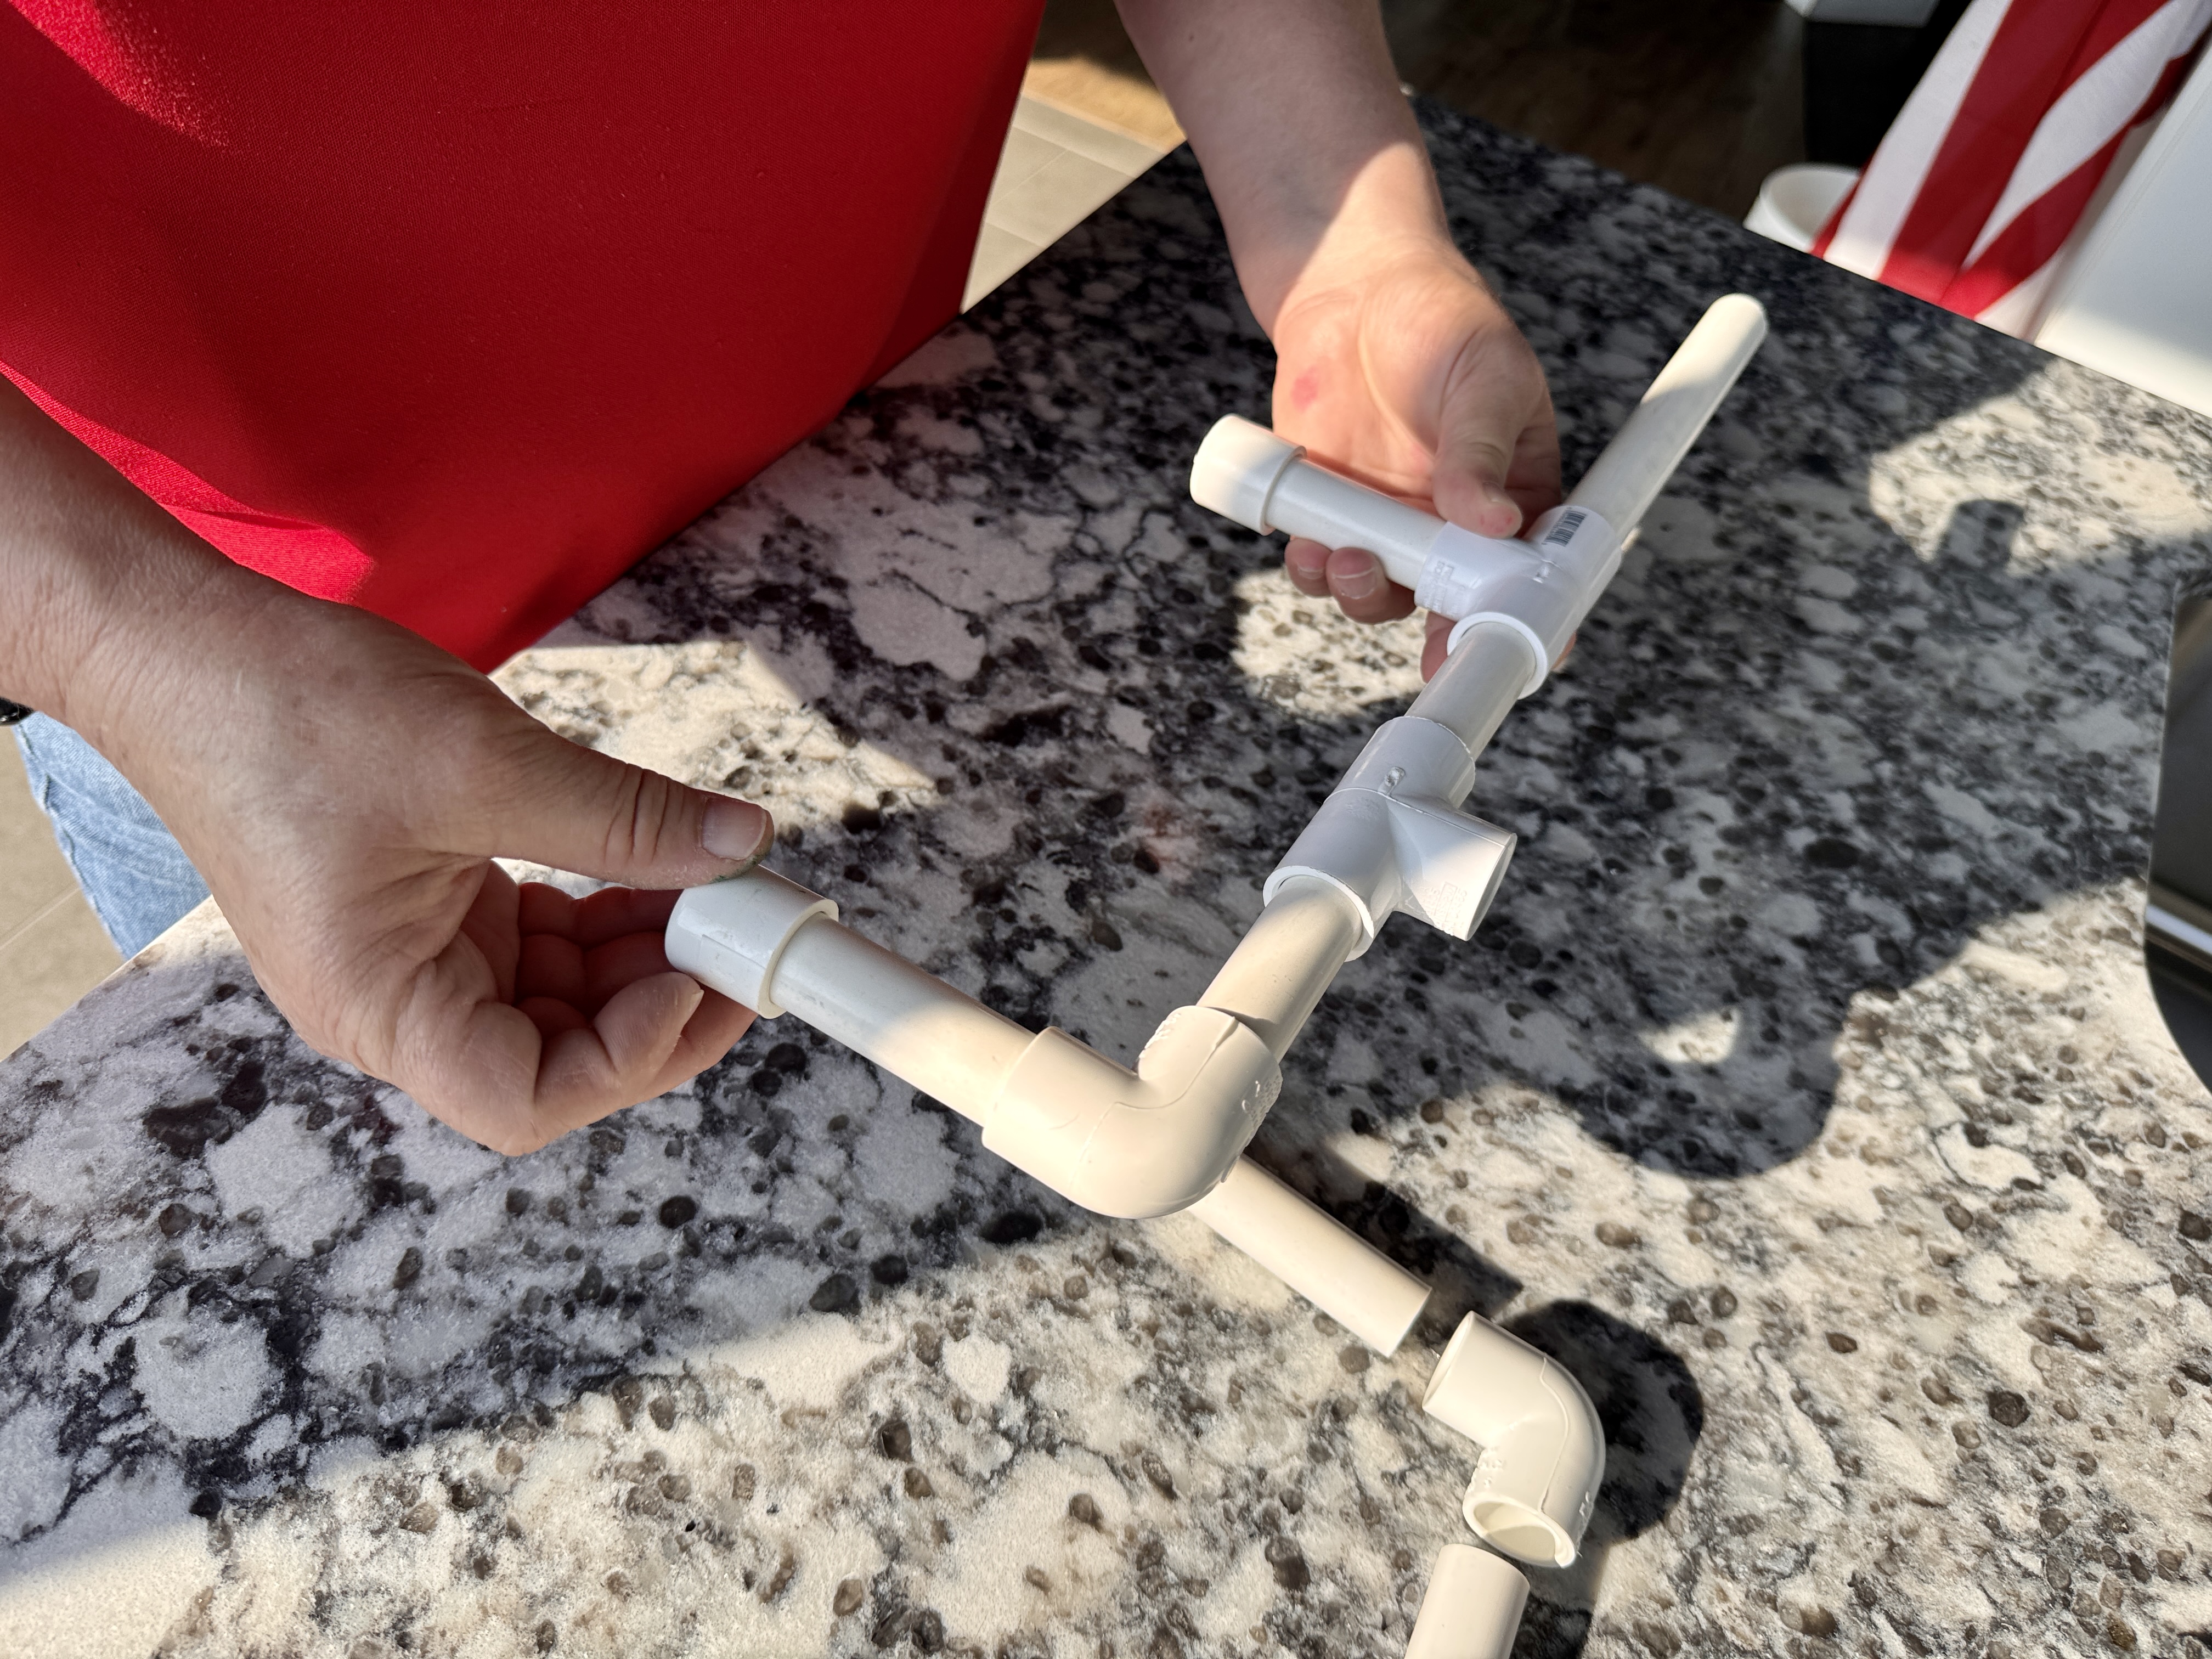
Connect another 3-inch pipe to the elbow you just added.
Cap the end of this pipe with a PVC end cap.
Step 6: Create the Mouthpiece
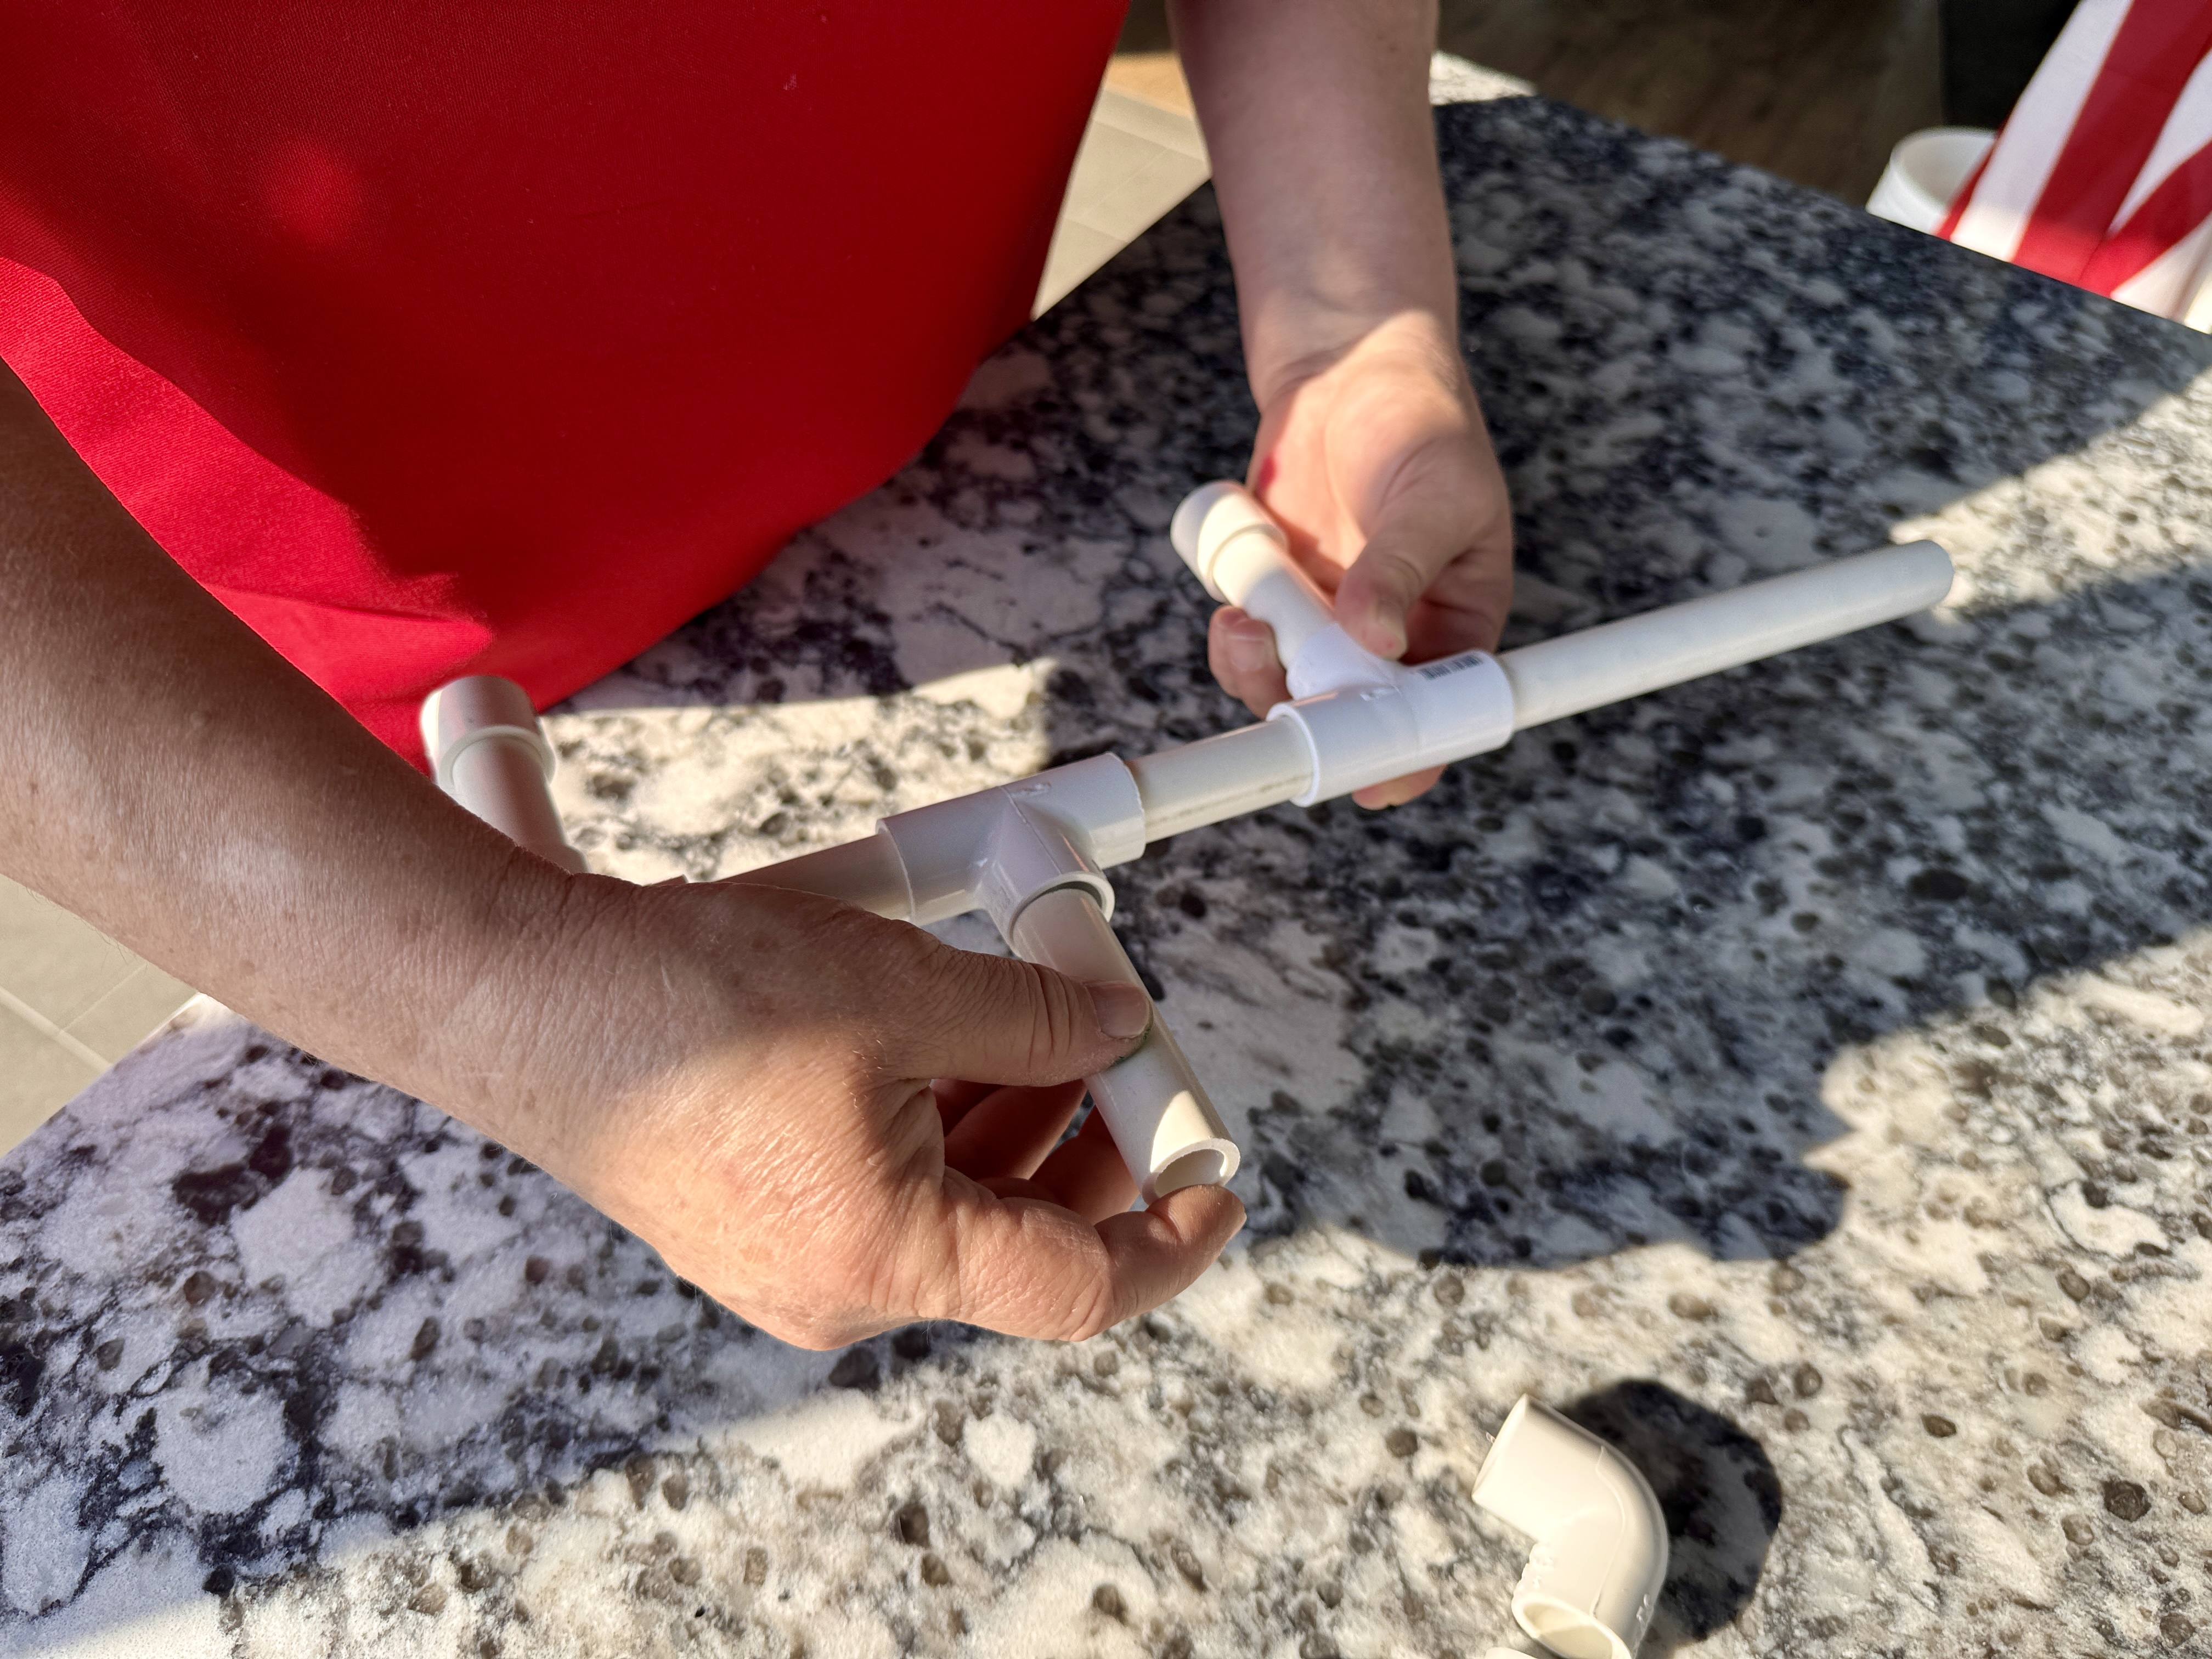

Insert the final 3-inch pipe into the top opening of the second Tee-connector.
Attach the second elbow to this pipe, with the elbow facing forward.
Finish by connecting the 5-inch pipe to the open end of the elbow—this will be your mouthpiece.
Step 7: Decorate Your Shooter
Now that the build is complete, it's time to decorate! Customize your marshmallow shooter with paint, stickers, markers, and more. Make it your own!
Time to Play!
You did it—your marshmallow shooter is ready to go! Load a mini marshmallow into the mouthpiece, take a deep breath, and blow to launch. It’s the perfect mix of creativity, construction, and fun. Enjoy your new creation and see how far you can launch your marshmallows!
Supplies to Help You Get Started


Get Ready for Some DIY Fun!
This hands-on project is a great way for kids (and adults!) to explore simple building skills while creating a fun marshmallow launcher. With just a few PVC pieces, you can build your own shooter and customize it however you like. Before you begin, make sure you have all your parts laid out and ready to go!
Materials Required
- (1) 1/2 in. PVC pipe cut in different size
- (5) 3 in. Pieces
- (1) 5 in. Piece
- (1) 7 in. Piece
- (2) PVC End Caps
- (2) PVC Tee's
- (2) PVC Elbows
Basic Design Principles
The marshmallow shooter operates on compressed air principles. Air pressure builds within the sealed chamber and releases rapidly when the valve opens, propelling the marshmallow forward through the barrel.
Step-by-Step Instructions
Step 1: Plan Your Build
Lay out all the PVC pieces to match the final shape of your marshmallow shooter. This step will help you visualize the build and make sure all the parts are in the right place before assembling. Refer to the image for guidance.
Step 2: Start with the First T-Connector
Grab one of the PVC Tee-connectors and insert the 7-inch PVC pipe into one of the side openings.
Next, take a 3-inch pipe and insert it into the bottom opening of the Tee (make sure the Tee is facing down).
Cap the end of the 3-inch pipe with a PVC end cap.
Step 3: Build Upward
Attach another 3-inch pipe to the open side of the Tee-connector you’ve been working with.
Then connect the second Tee-connector to the end of that pipe. This time, make sure the Tee is facing up.
Step 4: Build to the Side
Insert another 3-inch pipe into the side of the second Tee-connector.
Attach a PVC elbow to the end of this pipe, with the elbow facing down.
Step 5: Finish the Side Arm
Connect another 3-inch pipe to the elbow you just added.
Cap the end of this pipe with a PVC end cap.
Step 6: Create the Mouthpiece
Insert the final 3-inch pipe into the top opening of the second Tee-connector.
Attach the second elbow to this pipe, with the elbow facing forward.
Finish by connecting the 5-inch pipe to the open end of the elbow—this will be your mouthpiece.
Step 7: Decorate Your Shooter
Now that the build is complete, it's time to decorate! Customize your marshmallow shooter with paint, stickers, markers, and more. Make it your own!
Time to Play!
You did it—your marshmallow shooter is ready to go! Load a mini marshmallow into the mouthpiece, take a deep breath, and blow to launch. It’s the perfect mix of creativity, construction, and fun. Enjoy your new creation and see how far you can launch your marshmallows!
Supplies to Help You Get Started