

.png "DIY Wooden Turkey Sign for Thanksgiving")
Get into the Thanksgiving spirit with a fun, DIY wooden turkey sign! This simple project is perfect for kids and adults alike, letting everyone get creative while making a festive decoration for your home. Plus, you can find all the supplies you need right at Niehaus Lumber.
Inspiration for the Wooden Turkey Sign
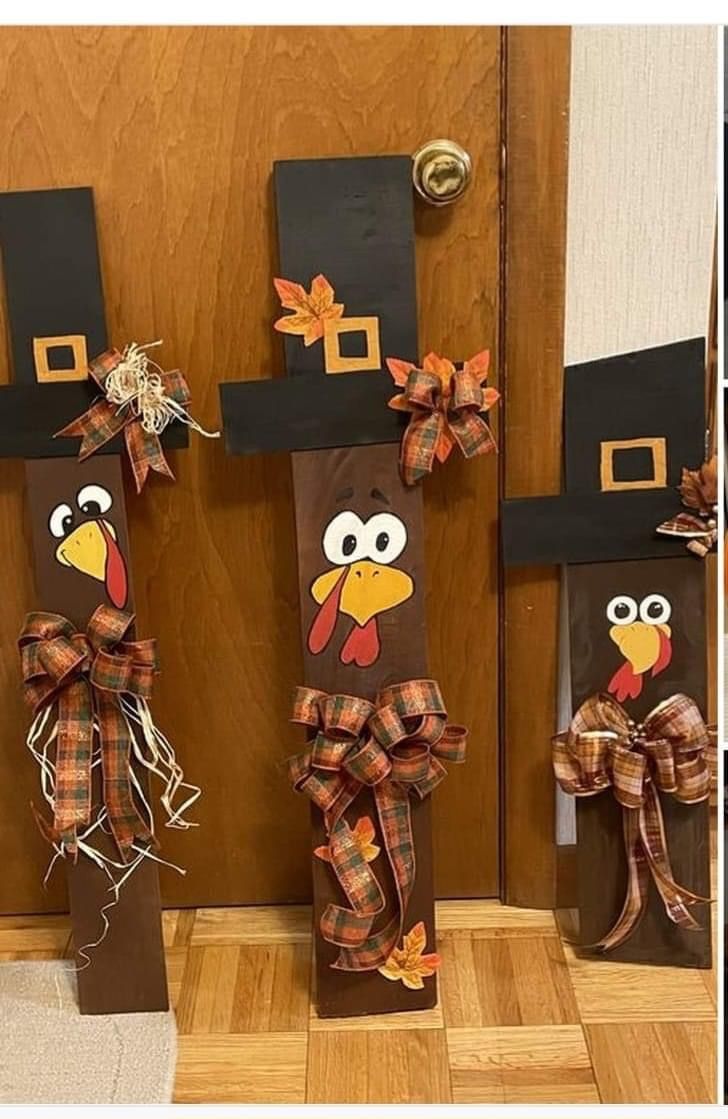
Pinterest pin by @jennieallard
Materials Needed
- (1) 1 in. x 2 in. X 6 in. wood piece with pre drilled hole (A)
- (1) 1 in. x 4 in. x 24 in. wood piece with pre drilled hole (B)
- (1) 1-1/2 in. framing nails
- Hammer
- Pencil
- Turkey face template on piece of paper
- Paint, chalk markers, stickers, ribons, and more.
- Safety glasses
How to Create Your Wooden Turkey Sign - Download Physical Instructions
Step 1: Identify Your Pieces
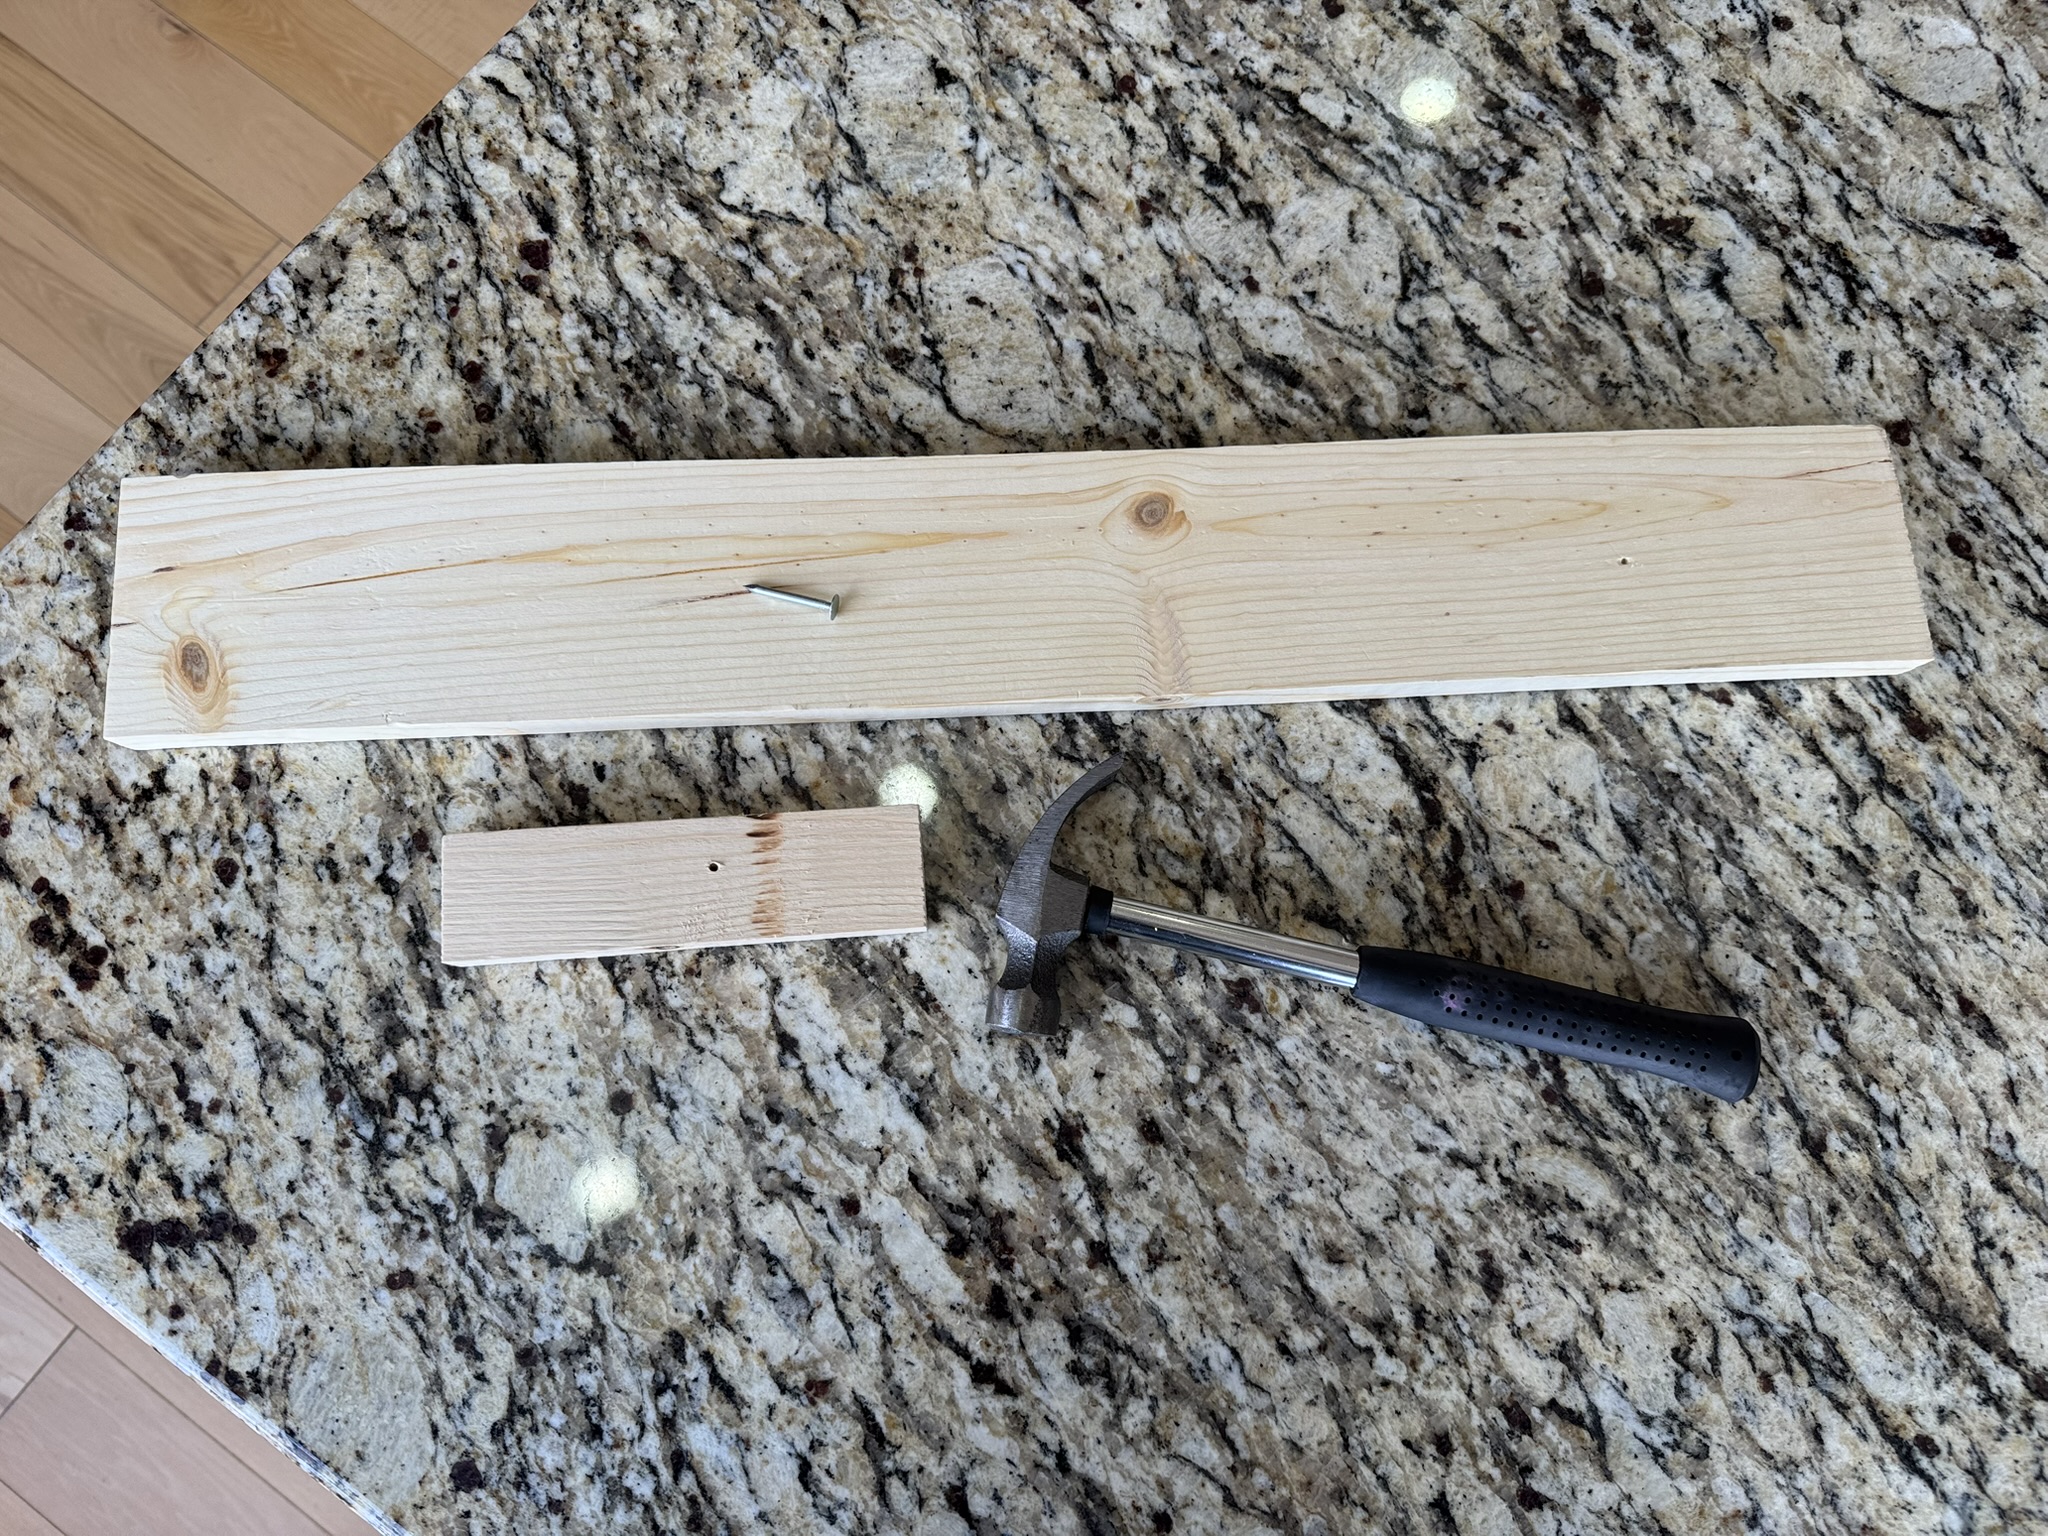
Find pieces A and B, and gather your decoration materials. You can use chalk markers or acrylic paint.
Step 2: Secure the Pieces Together
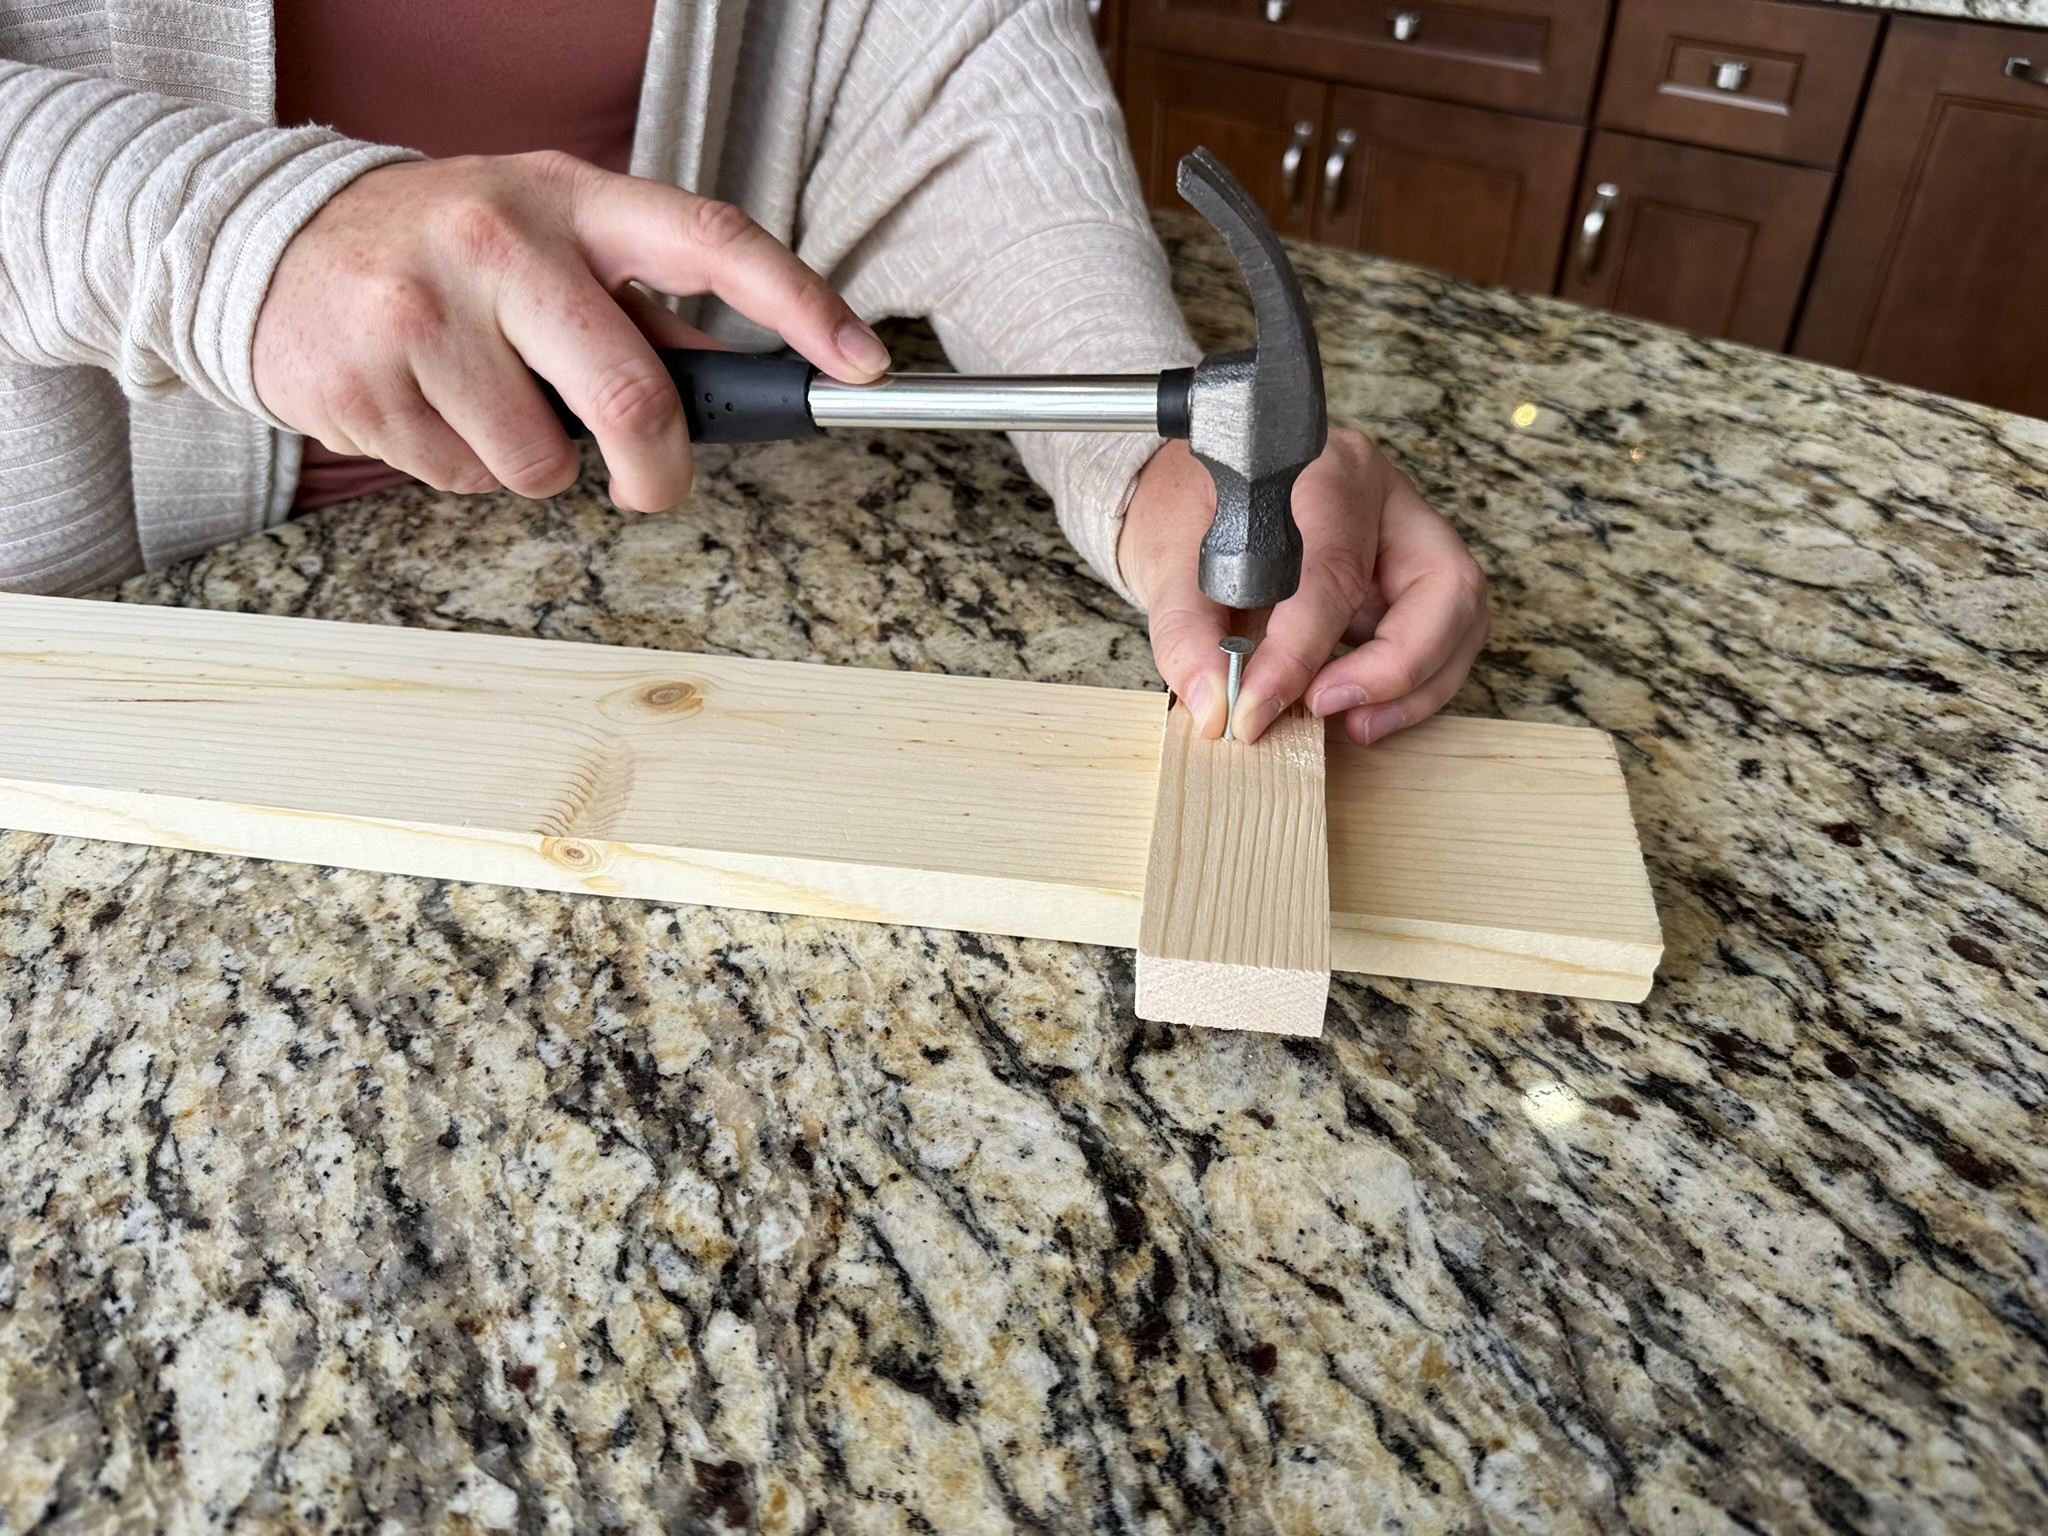
Align the predrilled holes on pieces A and B. Insert a nail through B into A to secure them together.
Step 3: Prepare the Turkey Face Transfer
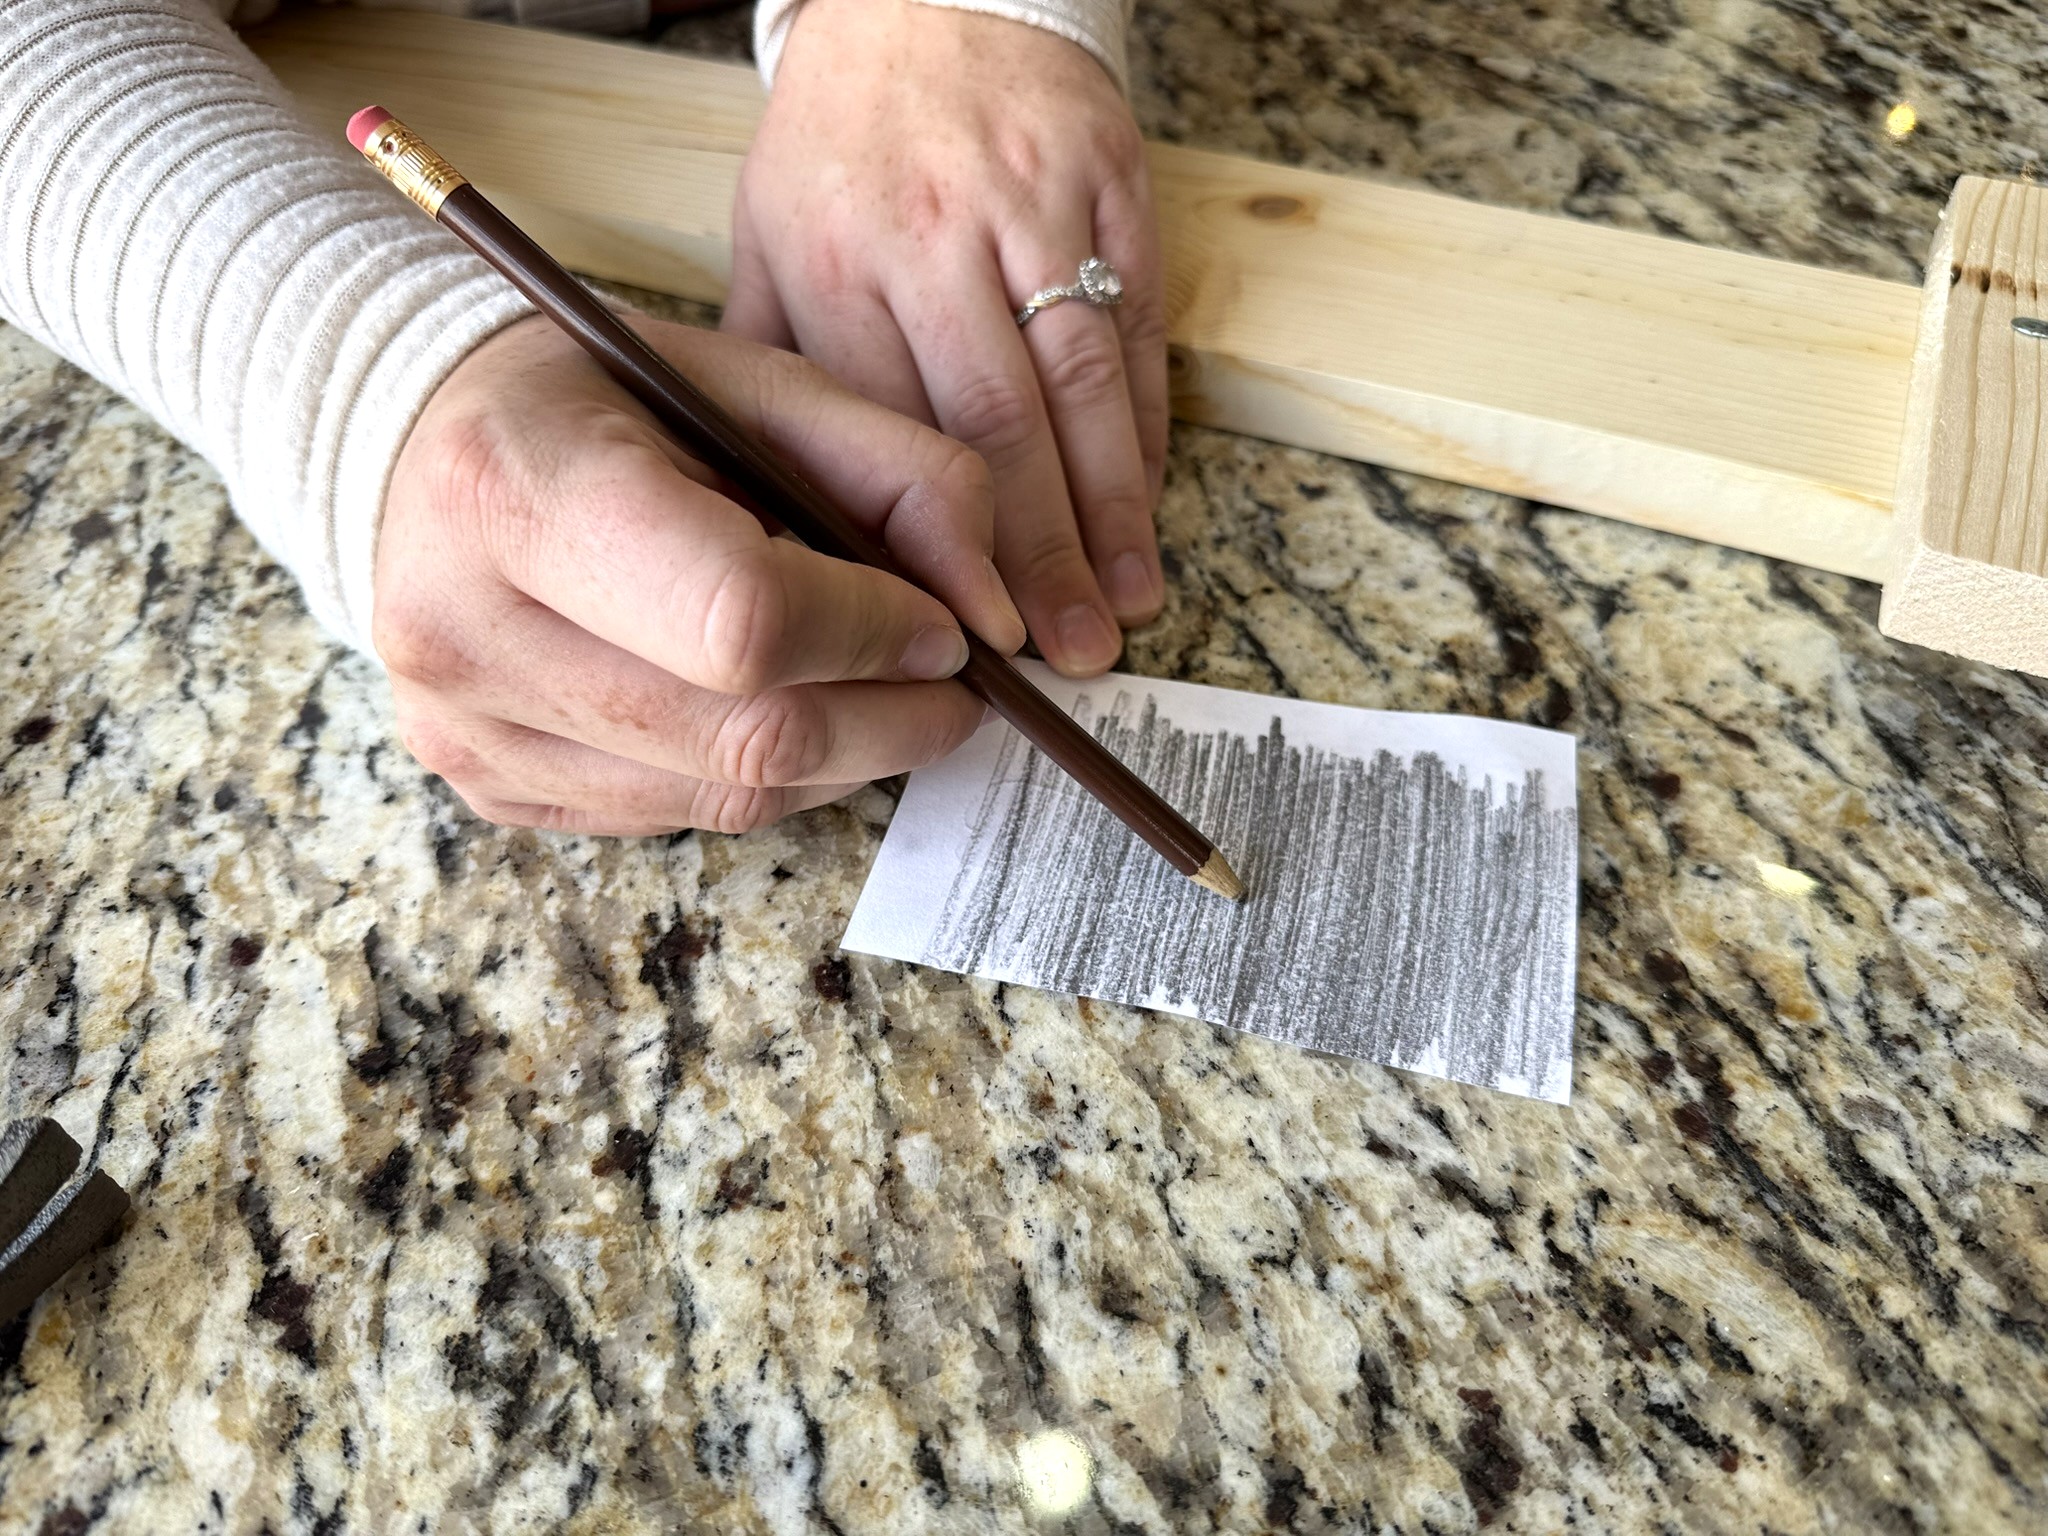
Shade the back of the small paper with your chosen turkey face using a pencil to create a carbon-like transfer.
Step 4: Position and Trace the Turkey
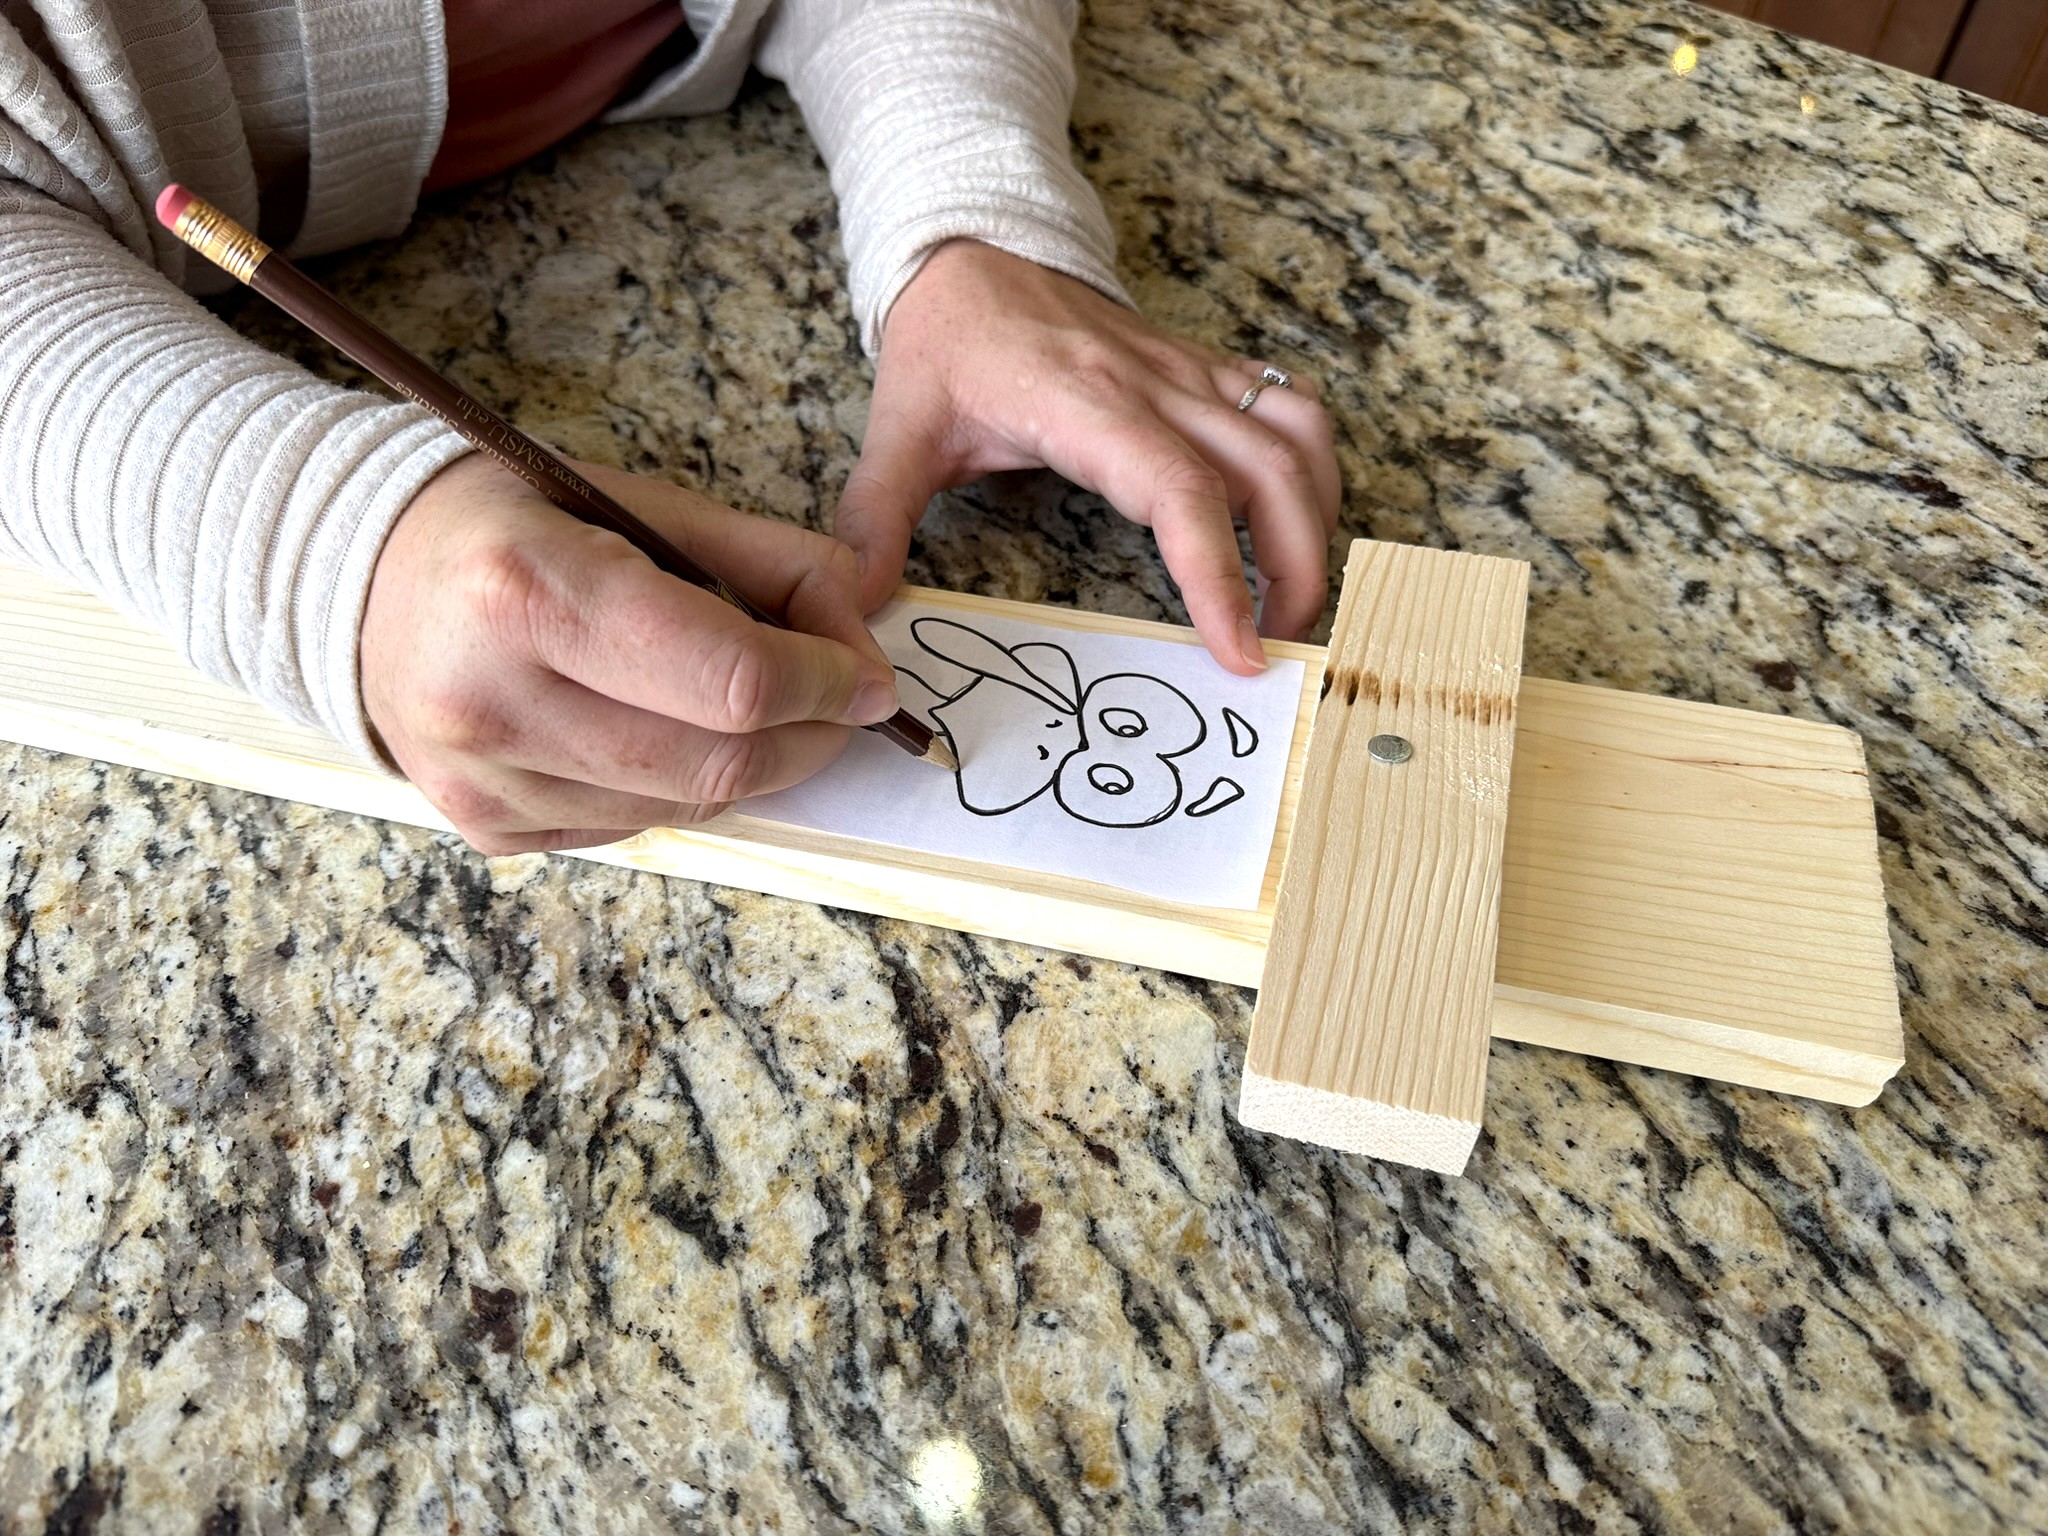
Place the turkey drawing (A) on the wood with the shaded side facing down. Make sure the turkey’s face is where you want it, then trace the outline onto the wood.
Step 5: Retrace for Clarity
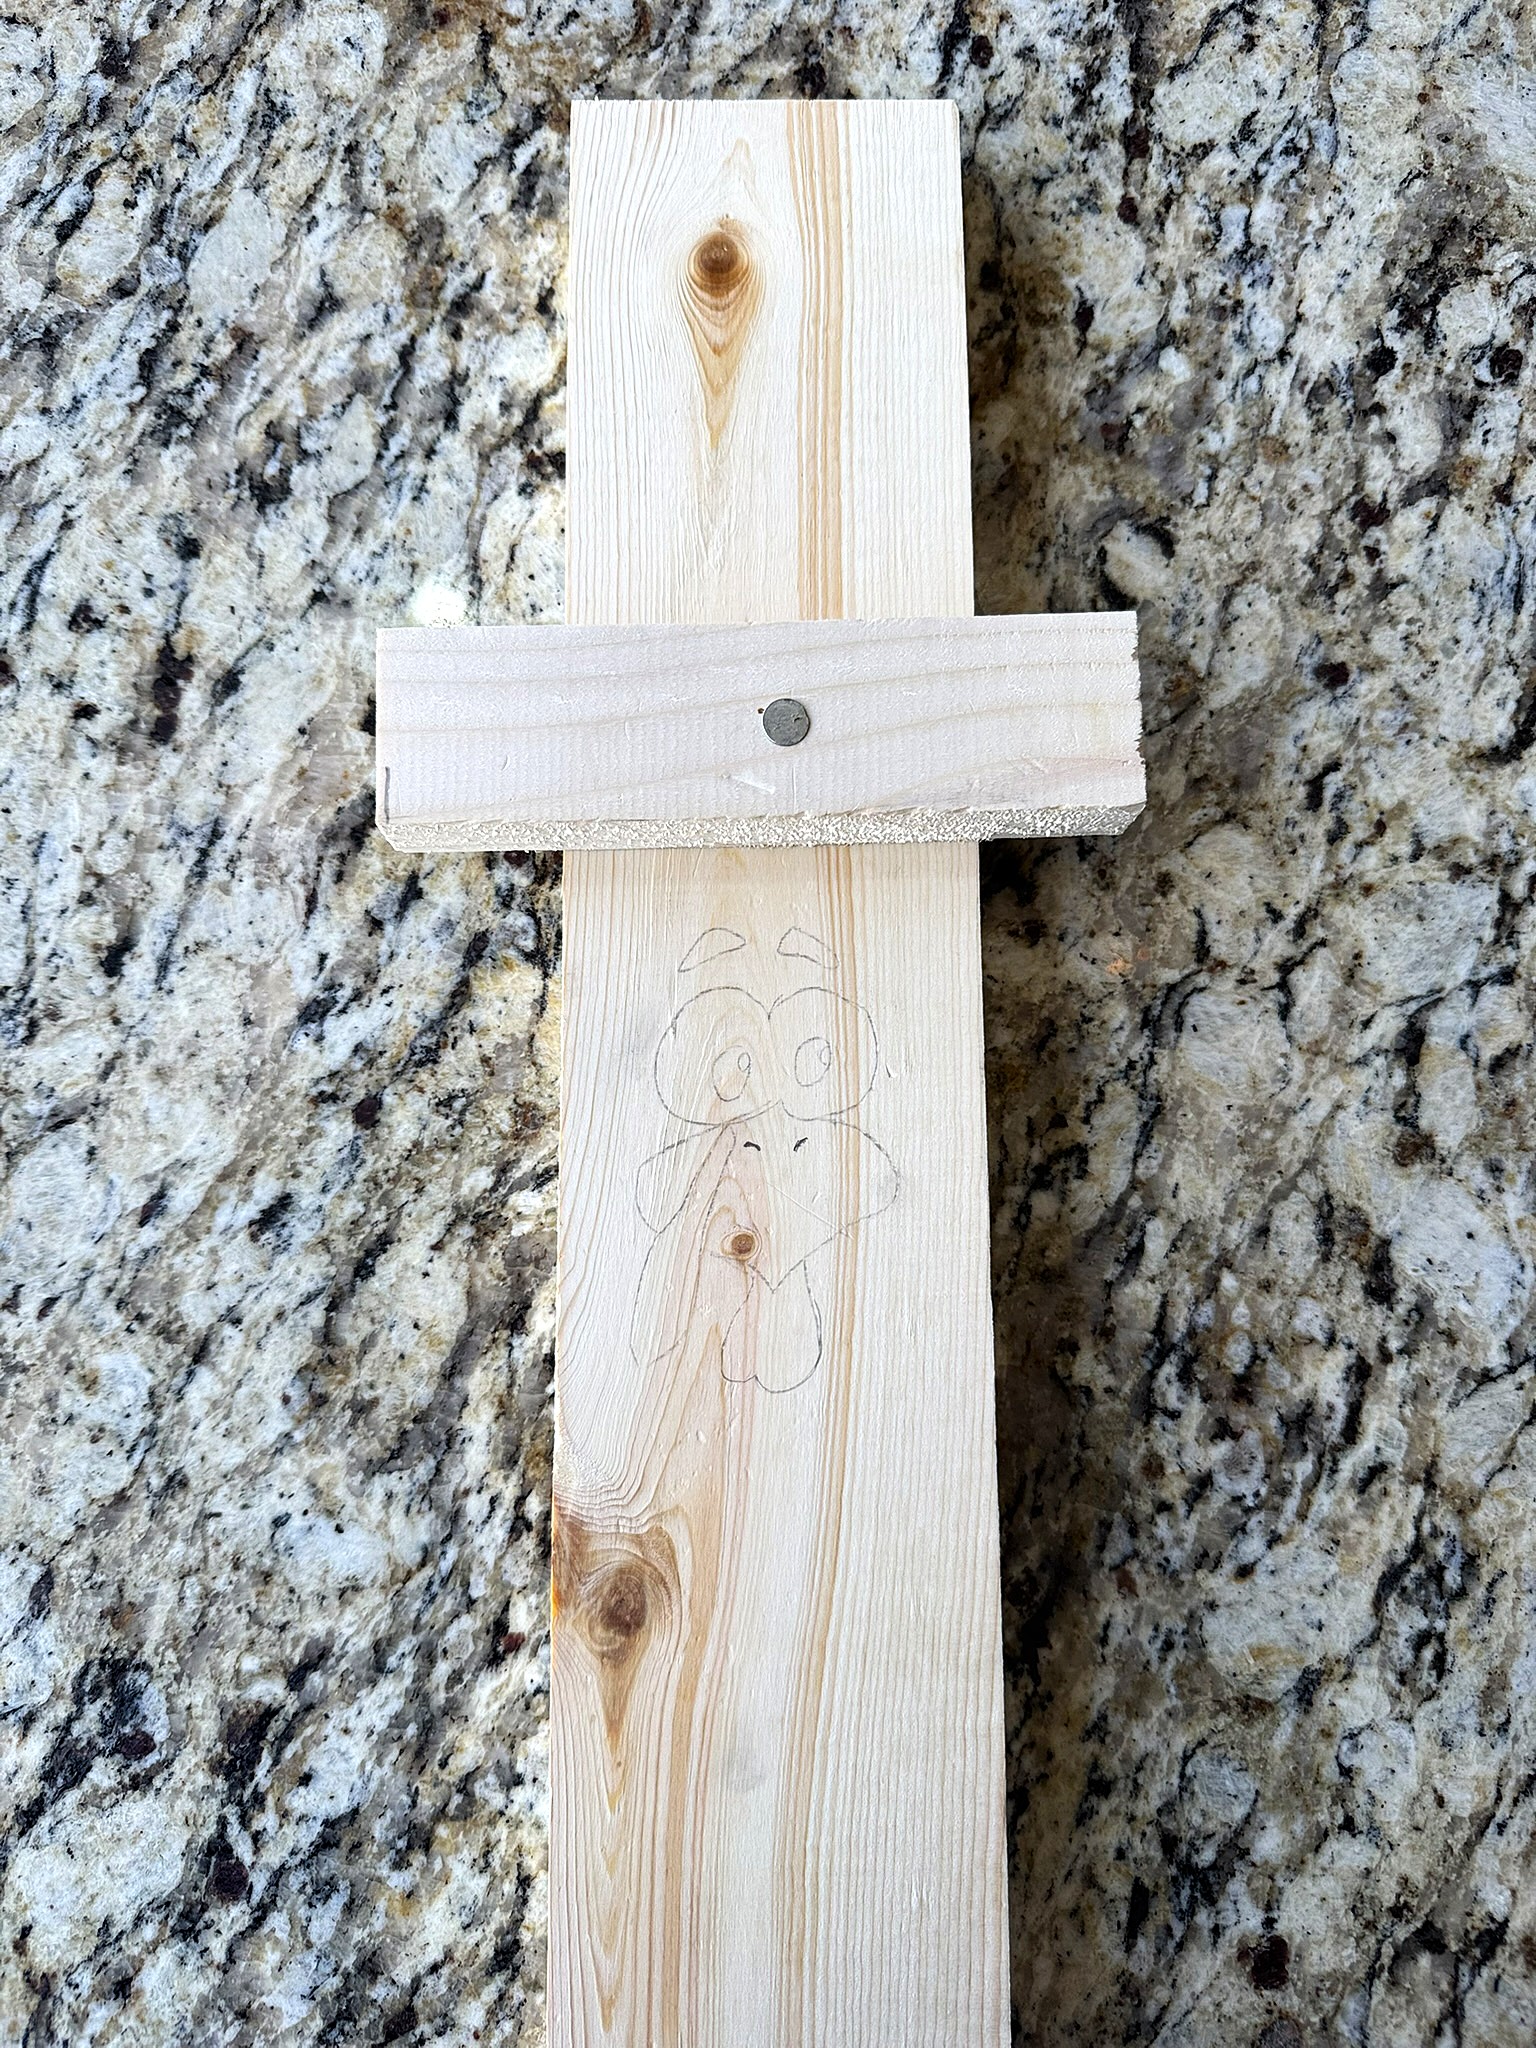
Retrace the turkey face outlines with a pencil to make them clearer and easier to decorate.
Step 6: Decorate Your Turkey
.JPEG)
Use chalk markers or acrylic paint to decorate your turkey. Add ribbons, stickers, crystals, or any other materials to make it uniquely yours!
Conclusion
Making your own wooden turkey sign is a fun way to celebrate the season and add a personal touch to your Thanksgiving decor. With a few simple supplies and some creativity, you’ll have a festive decoration that’s uniquely yours—and all your materials are conveniently available at Niehaus Lumber.
Get into the Thanksgiving spirit with a fun, DIY wooden turkey sign! This simple project is perfect for kids and adults alike, letting everyone get creative while making a festive decoration for your home. Plus, you can find all the supplies you need right at Niehaus Lumber.
Inspiration for the Wooden Turkey Sign
Pinterest pin by @jennieallard
Materials Needed
- (1) 1 in. x 2 in. X 6 in. wood piece with pre drilled hole (A)
- (1) 1 in. x 4 in. x 24 in. wood piece with pre drilled hole (B)
- (1) 1-1/2 in. framing nails
- Hammer
- Pencil
- Turkey face template on piece of paper
- Paint, chalk markers, stickers, ribons, and more.
- Safety glasses
How to Create Your Wooden Turkey Sign - Download Physical Instructions
Step 1: Identify Your Pieces
Find pieces A and B, and gather your decoration materials. You can use chalk markers or acrylic paint.
Step 2: Secure the Pieces Together
Align the predrilled holes on pieces A and B. Insert a nail through B into A to secure them together.
Step 3: Prepare the Turkey Face Transfer
Shade the back of the small paper with your chosen turkey face using a pencil to create a carbon-like transfer.
Step 4: Position and Trace the Turkey
Place the turkey drawing (A) on the wood with the shaded side facing down. Make sure the turkey’s face is where you want it, then trace the outline onto the wood.
Step 5: Retrace for Clarity
Retrace the turkey face outlines with a pencil to make them clearer and easier to decorate.
Step 6: Decorate Your Turkey
Use chalk markers or acrylic paint to decorate your turkey. Add ribbons, stickers, crystals, or any other materials to make it uniquely yours!
Conclusion
Making your own wooden turkey sign is a fun way to celebrate the season and add a personal touch to your Thanksgiving decor. With a few simple supplies and some creativity, you’ll have a festive decoration that’s uniquely yours—and all your materials are conveniently available at Niehaus Lumber.