
.png)
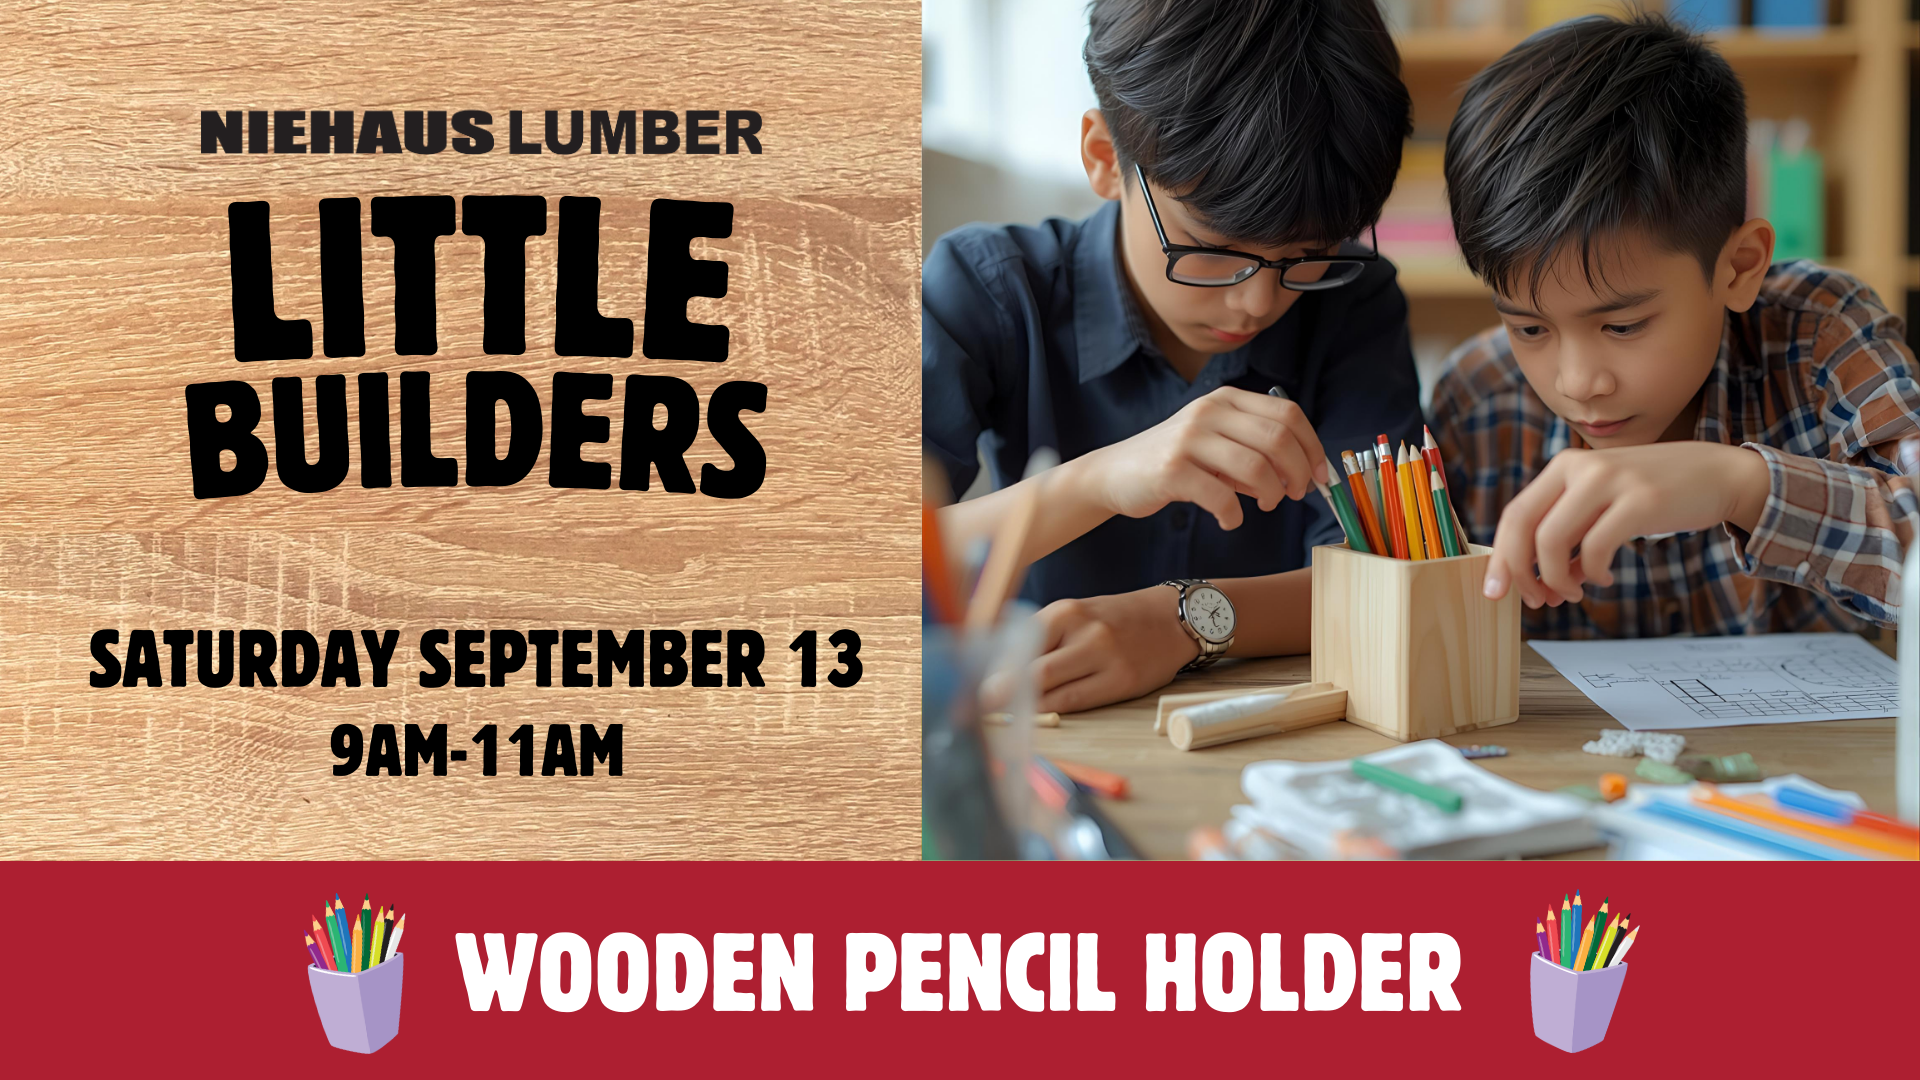
Creating a personalized wooden pencil holder is an excellent way to introduce children to basic woodworking skills while producing a practical item for their desk or study area. This step-by-step guide will help young crafters build their own custom organizer with minimal tools and maximum creativity.
Materials Needed
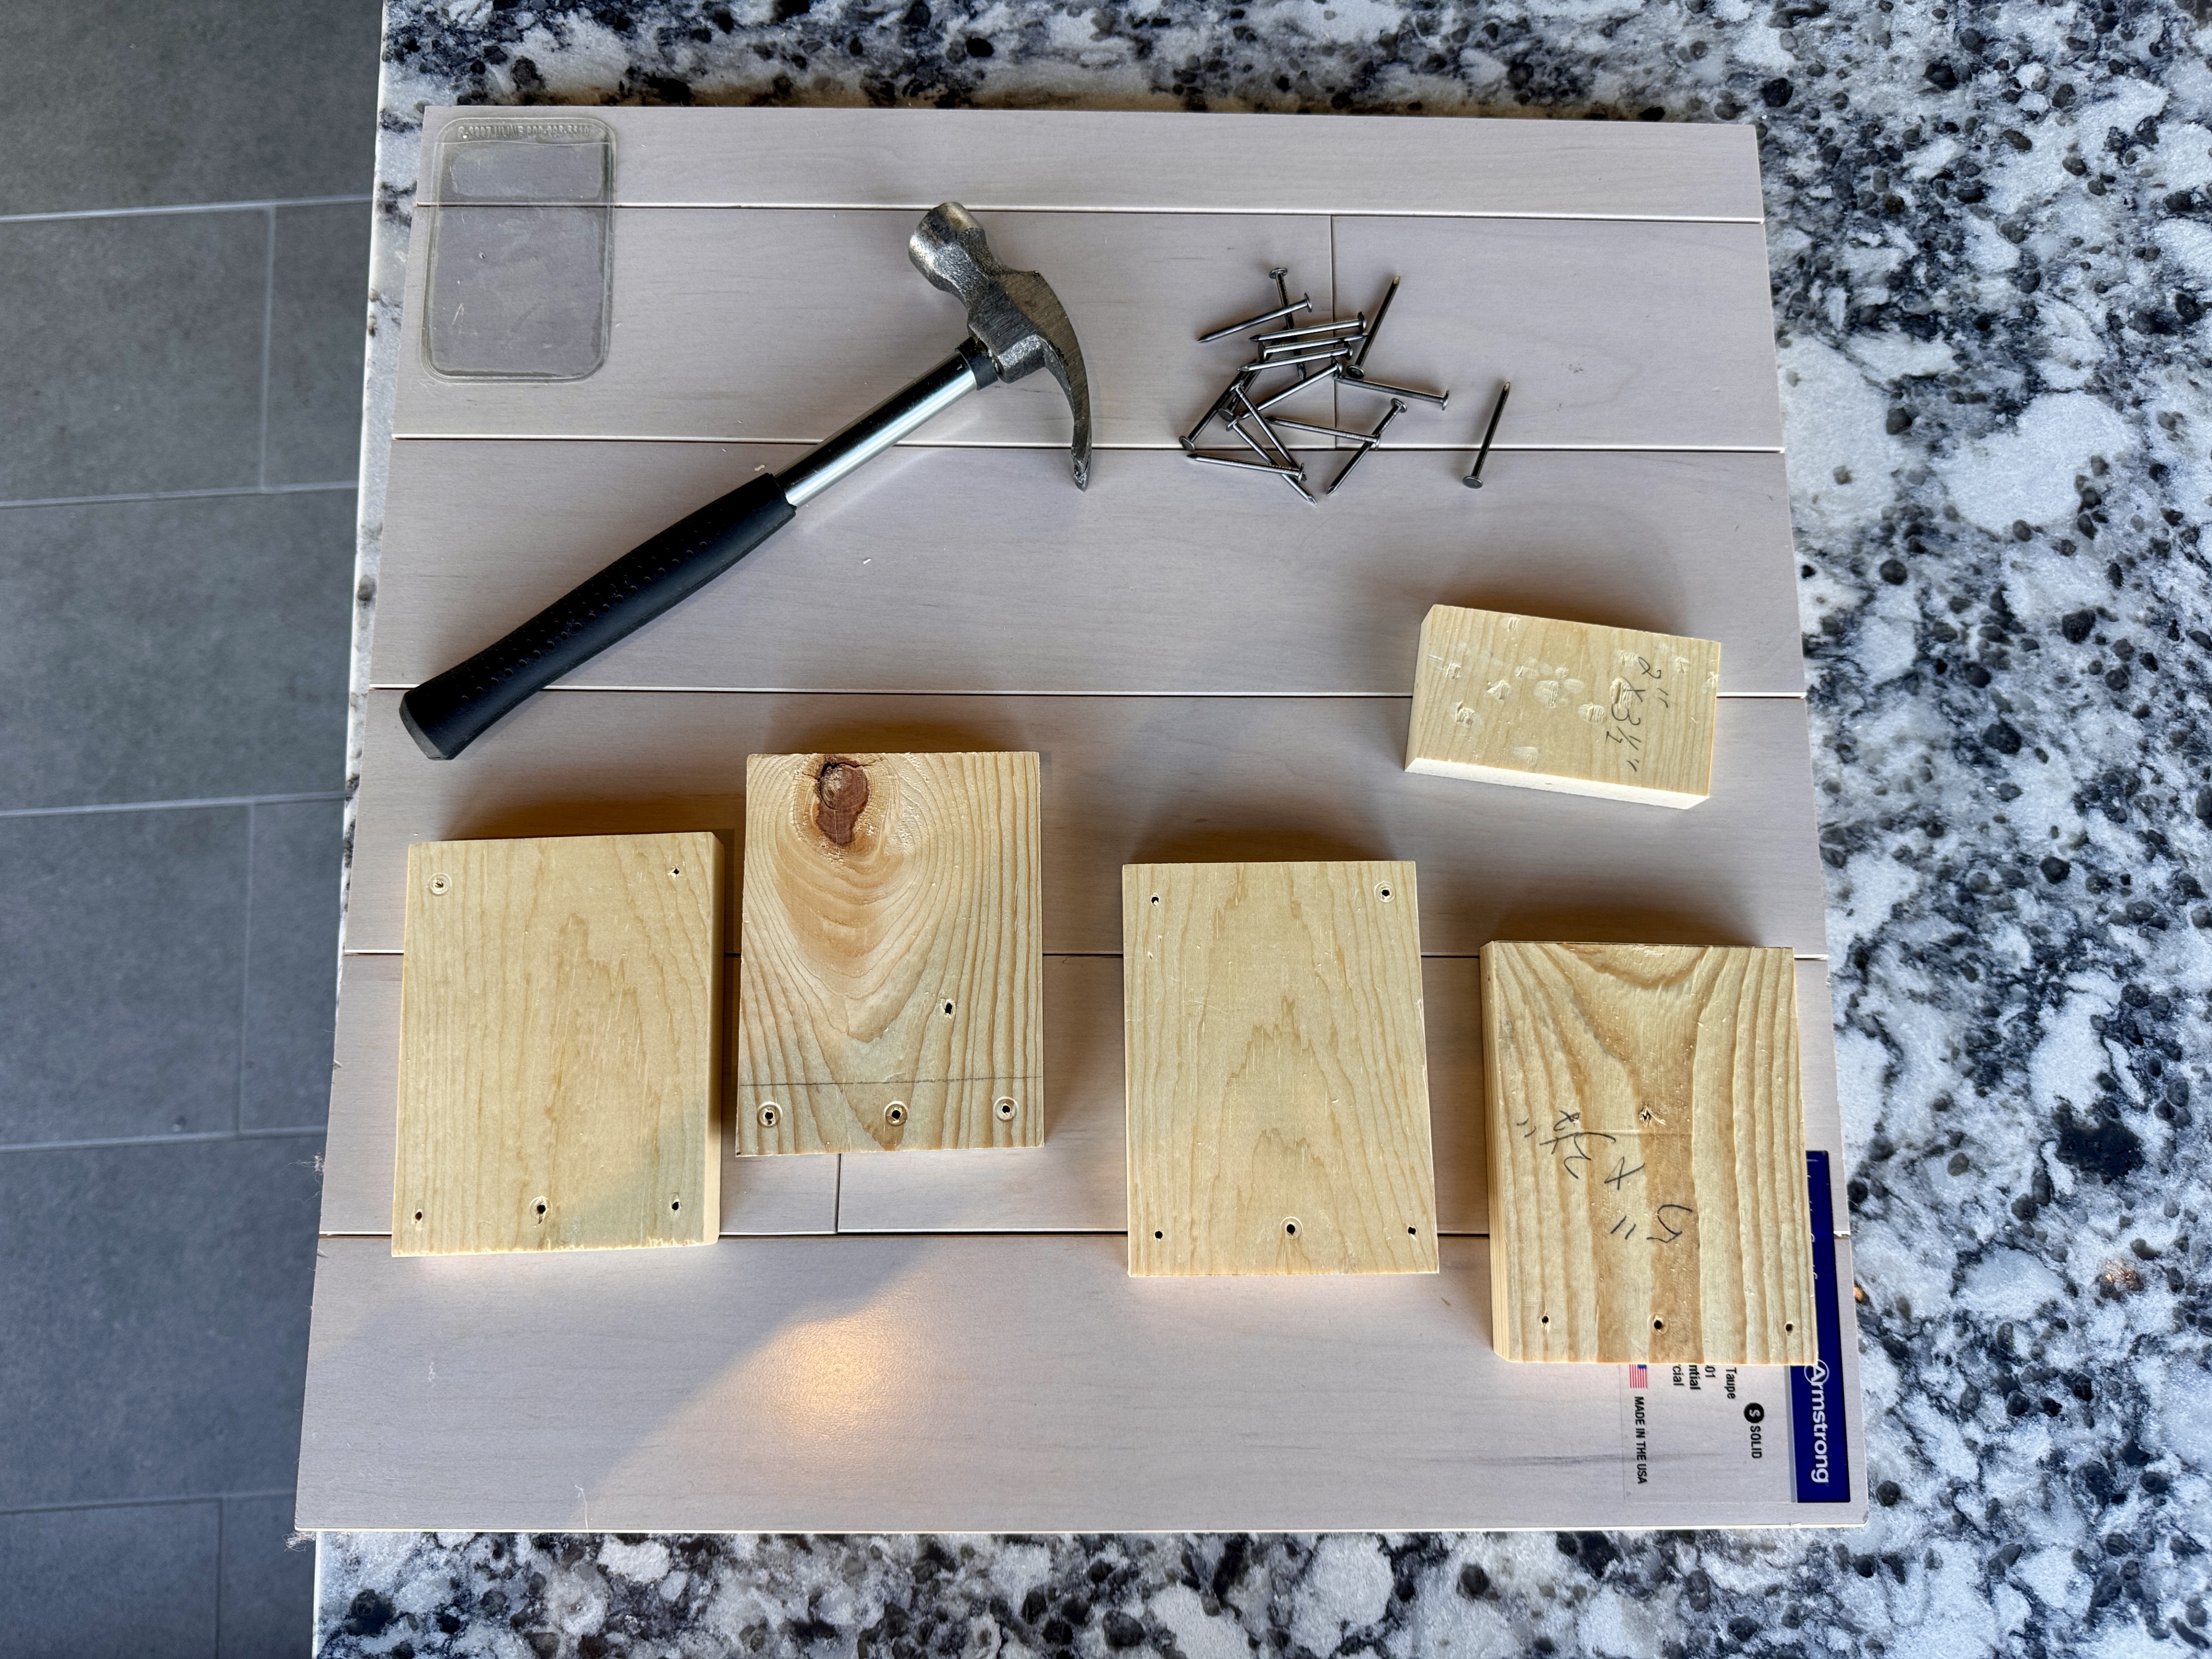
- (2) 1 in. x 5 in. X 3-1/2 in. wood piece with 5 pre drilled holes (A)
- (2) 1 in. x 5 in. X 3-1/2 in. wood piece with 3 pre drilled holes (B)
- (1) 1 in. x 2 in. x 3-1/2 in. wood piece (C)
- (16) 1-1/2 in. framing nails
- Hammer
- Wood stain or paint (optional)
- Safety glasses
Step-by-Step Instructions - Download Help Guide Here
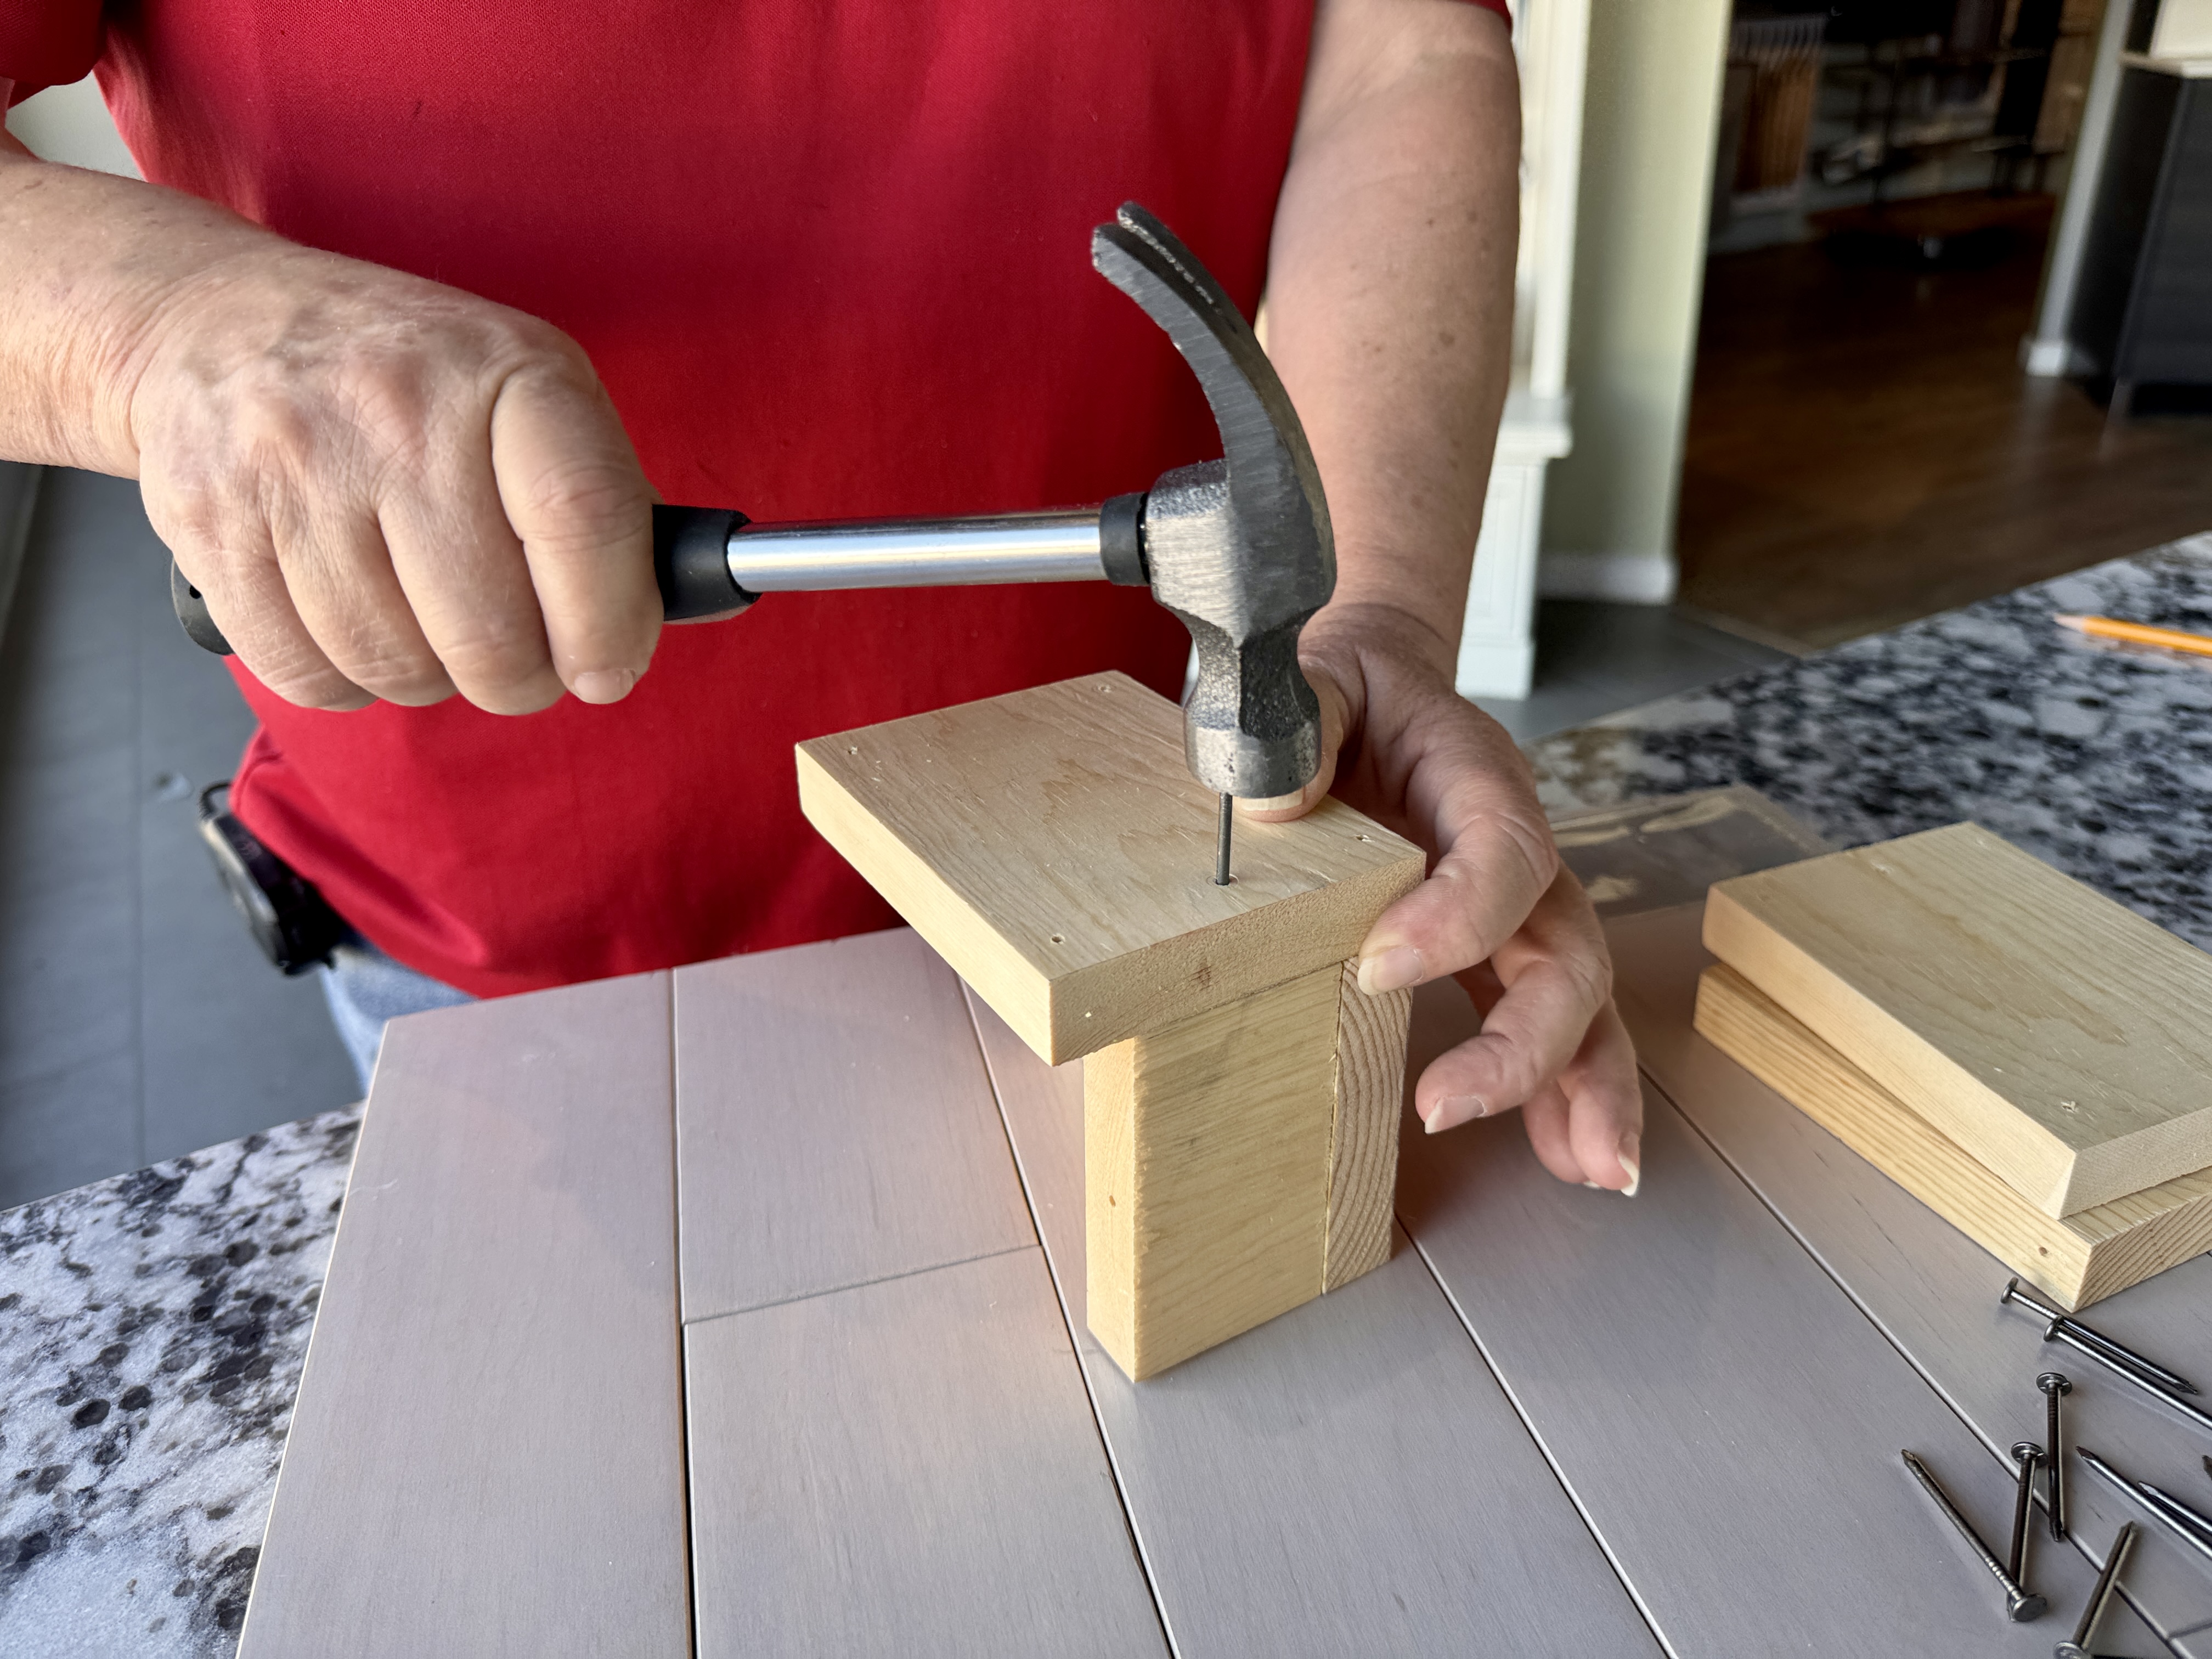
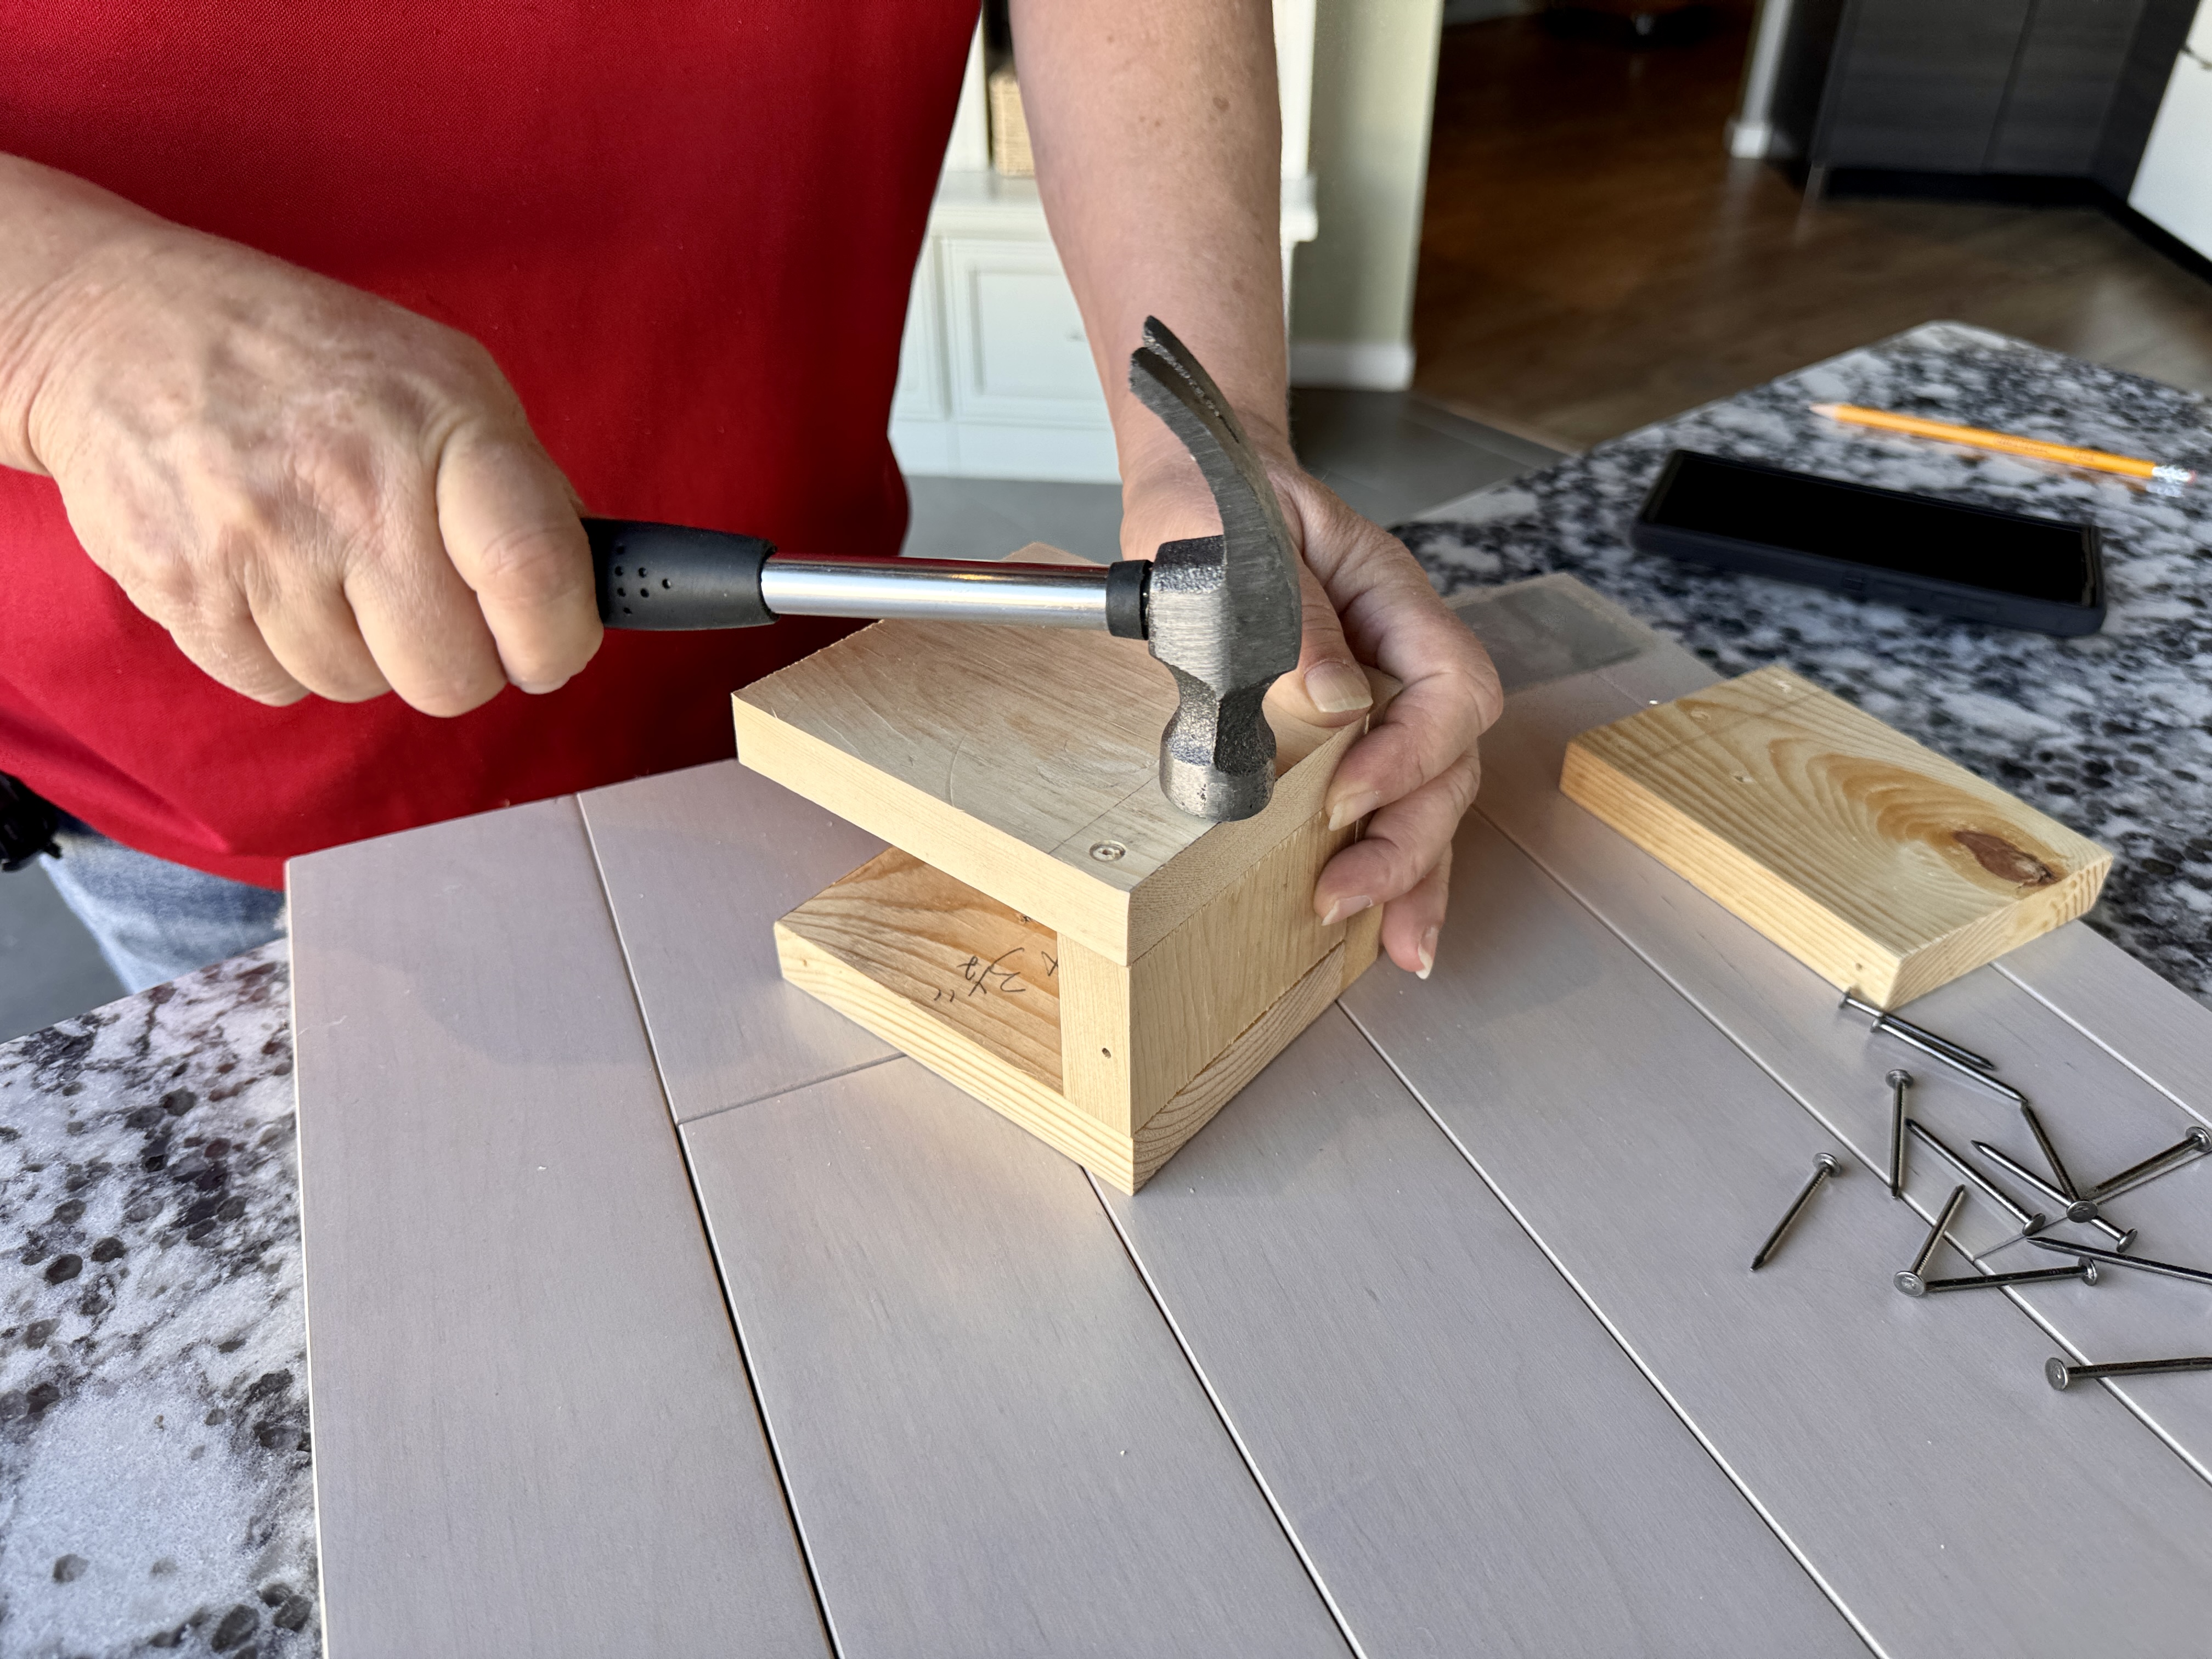
Step 1: Start the first side (attach B to C)
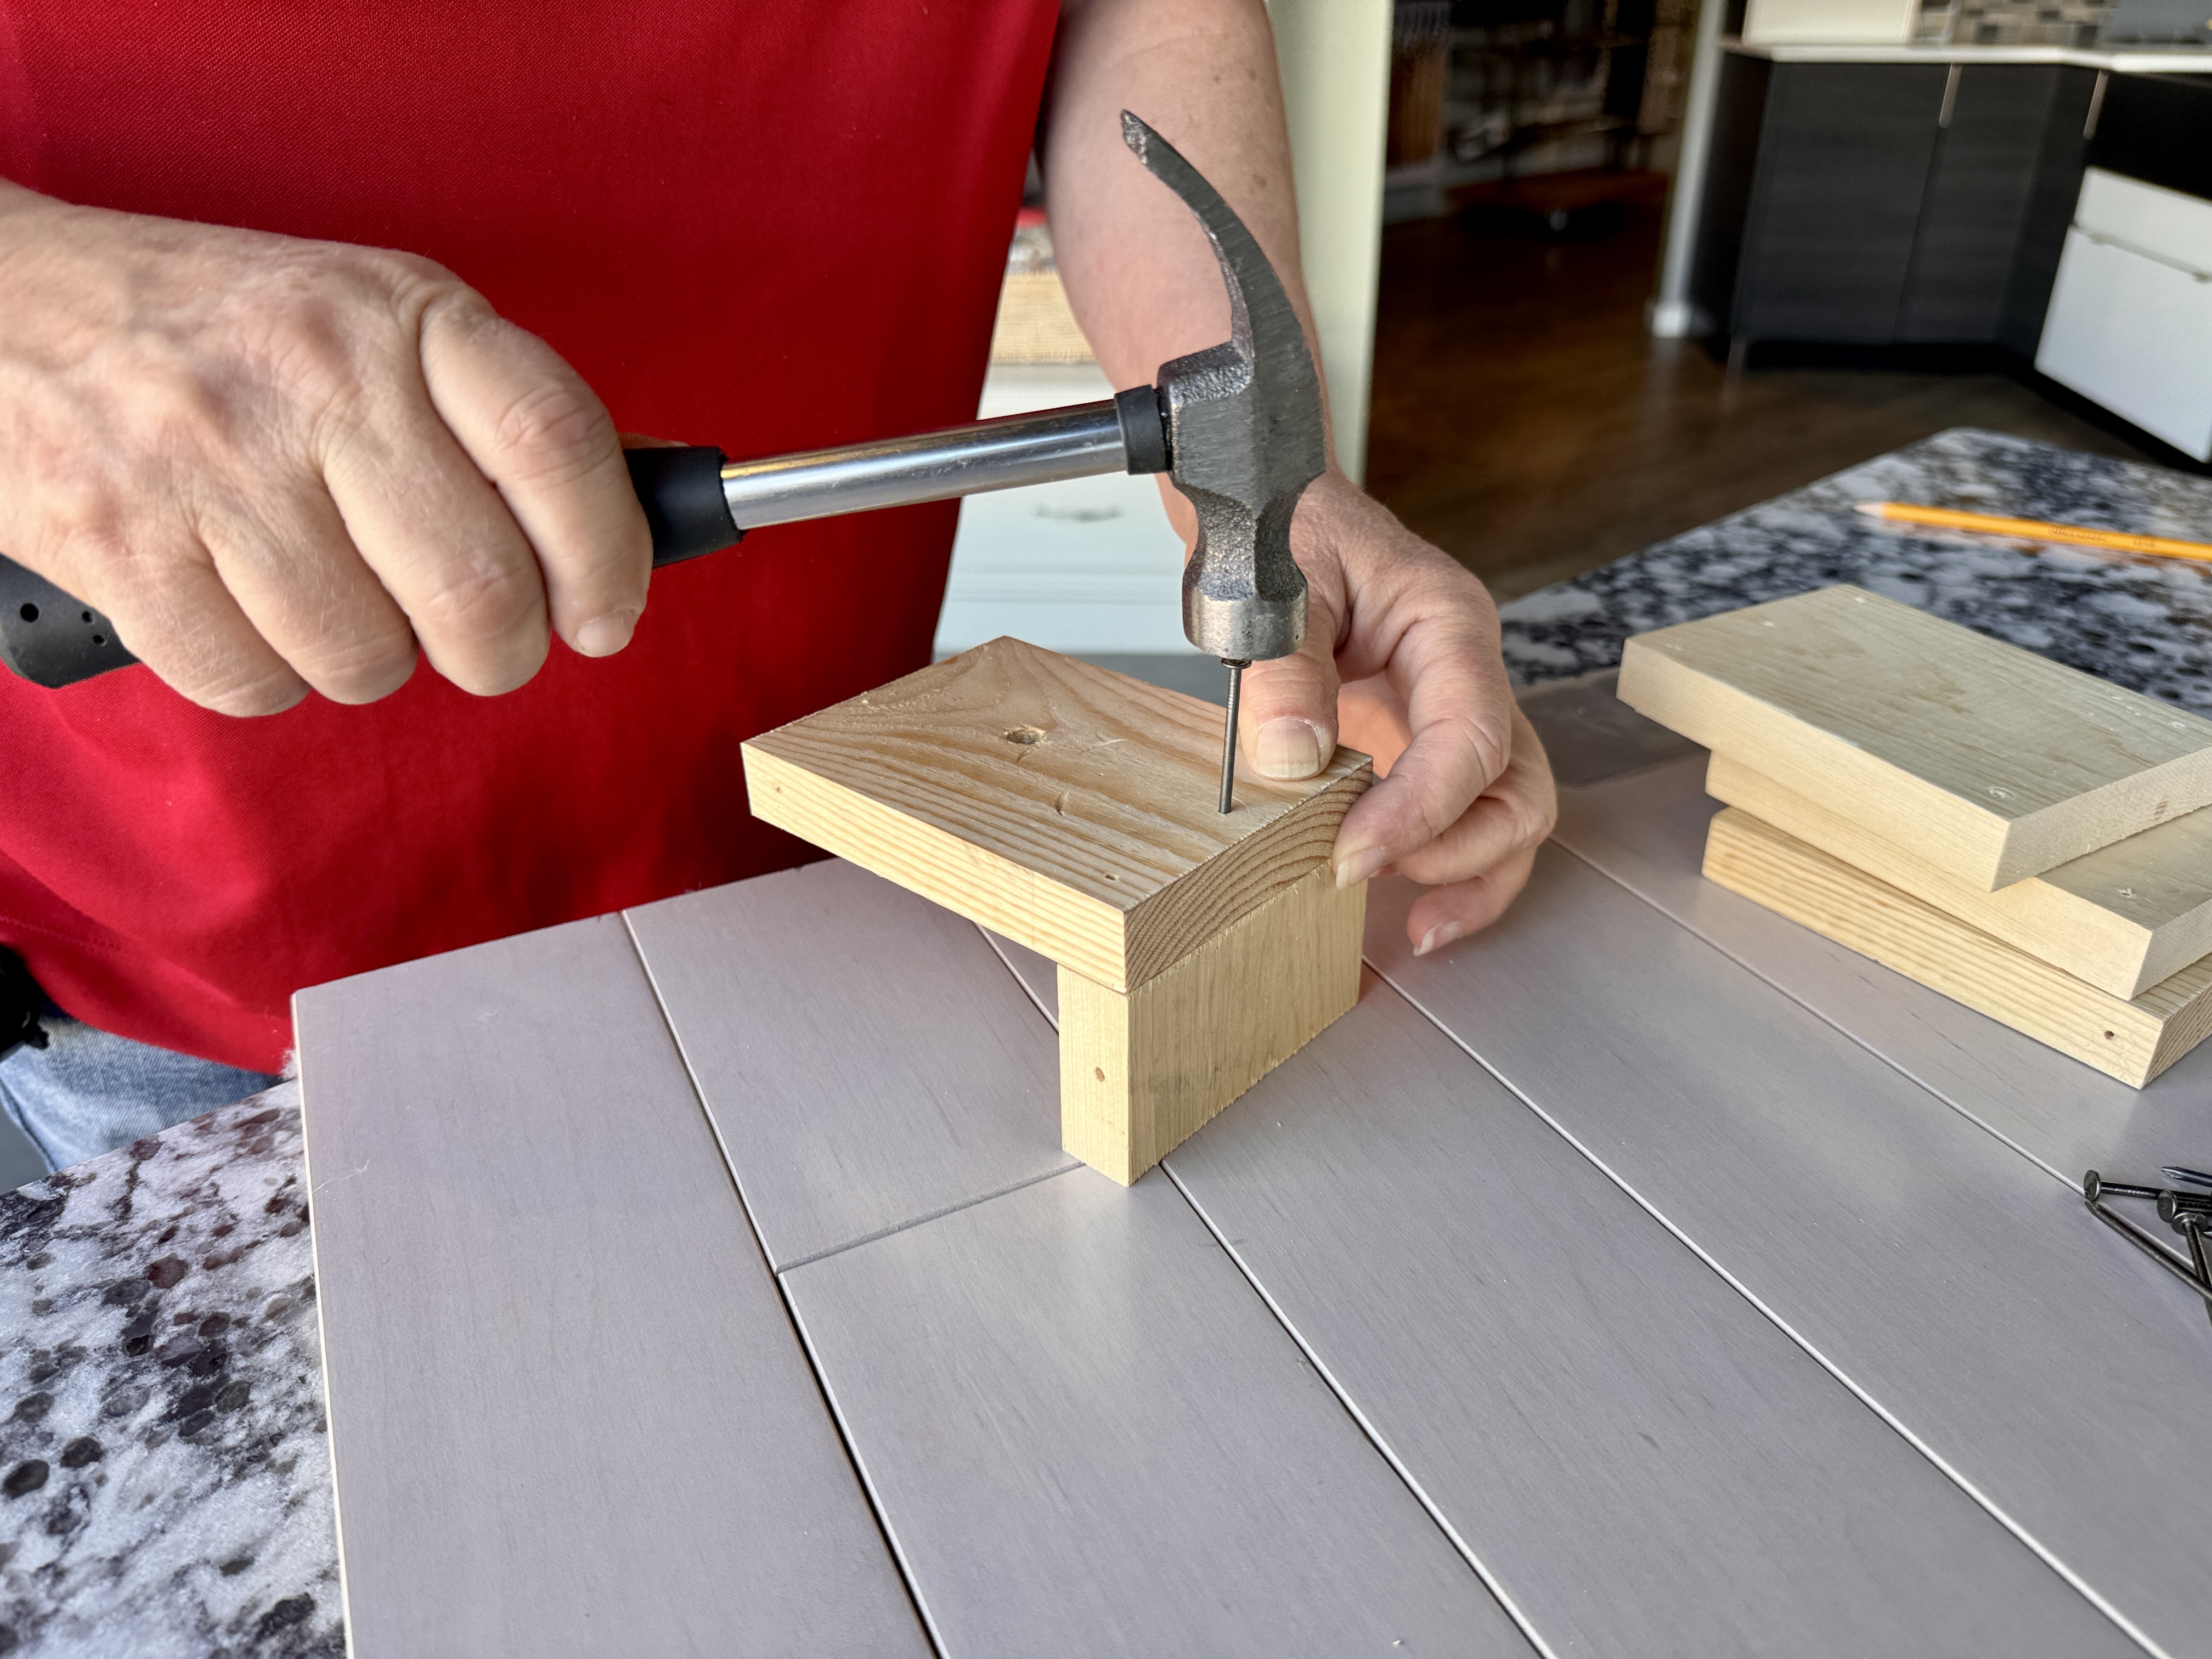
Lay everything out on your work surface with the pre-drilled holes facing outward (so you can see and use them).
-
Place C flat on the work surface.
-
Take one B (3-hole side) and stand it up at the long edge of C.
-
Using the middle pre-drilled hole in B, drive one nail through that hole into C.
-
Check that the top and bottom edges of B are flush with C and that B is perpendicular to C.
Tip: Have a helper holding B while you set the first nail makes this much easier.
Step 2: Attach the first Side A (second side)
-
Pick one A (5-hole side). Align it along the opposite long edge of C where it belongs.
-
Use the middle pre-drilled hole in A to drive a nail into C.
-
Check alignment: the face of A should be level with the face of the already-attached B (use a small level across the top edge or visually align the top edges). Adjust before fully setting nails.
Step 3: Attach the second B (third side)
-
Take the remaining B and align it with the remaining edge of C.
-
Drive a nail through its middle hole into C, leaving it partway set.
-
Make sure this B is parallel to the first B and that spacing/gaps around the box are even.
Step 4: Attach the final A (fourth side)
-
Align the remaining A with the last open edge of C.
-
Use the middle pre-drilled hole to insert a nail partway.
-
Check that all four sides are square, parallel, and level with each other. Adjust any partially-set nails if needed.
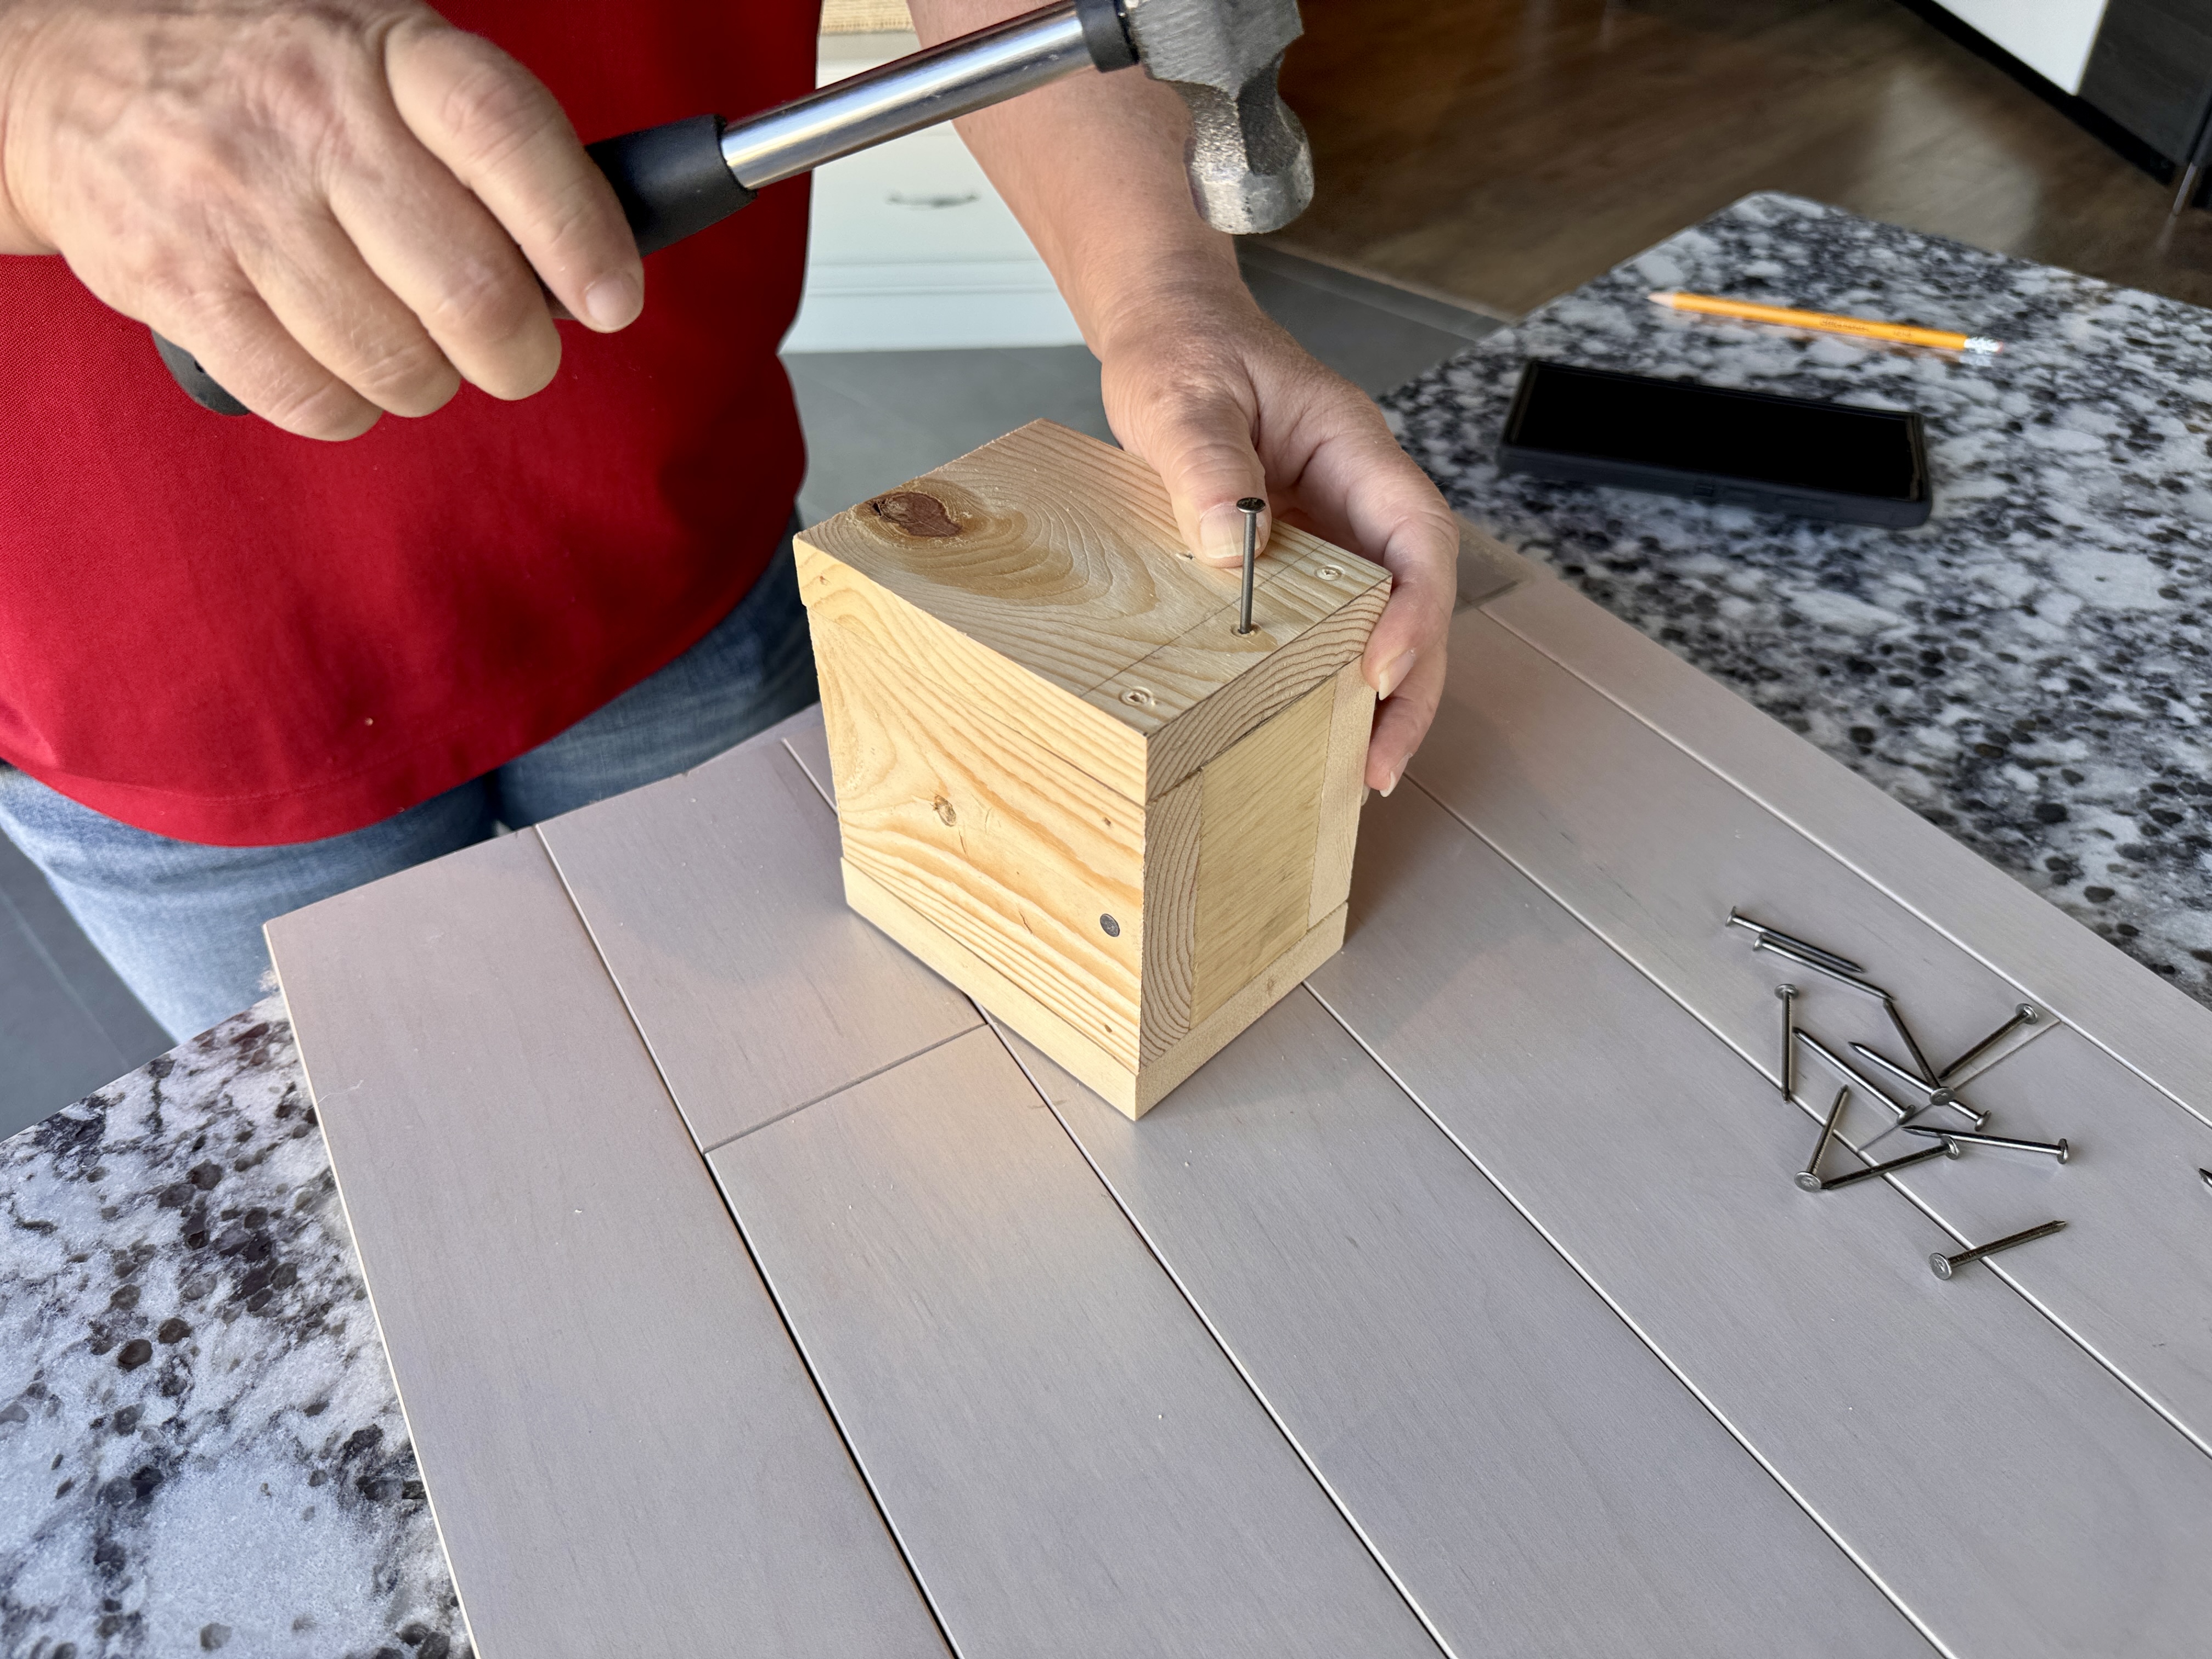
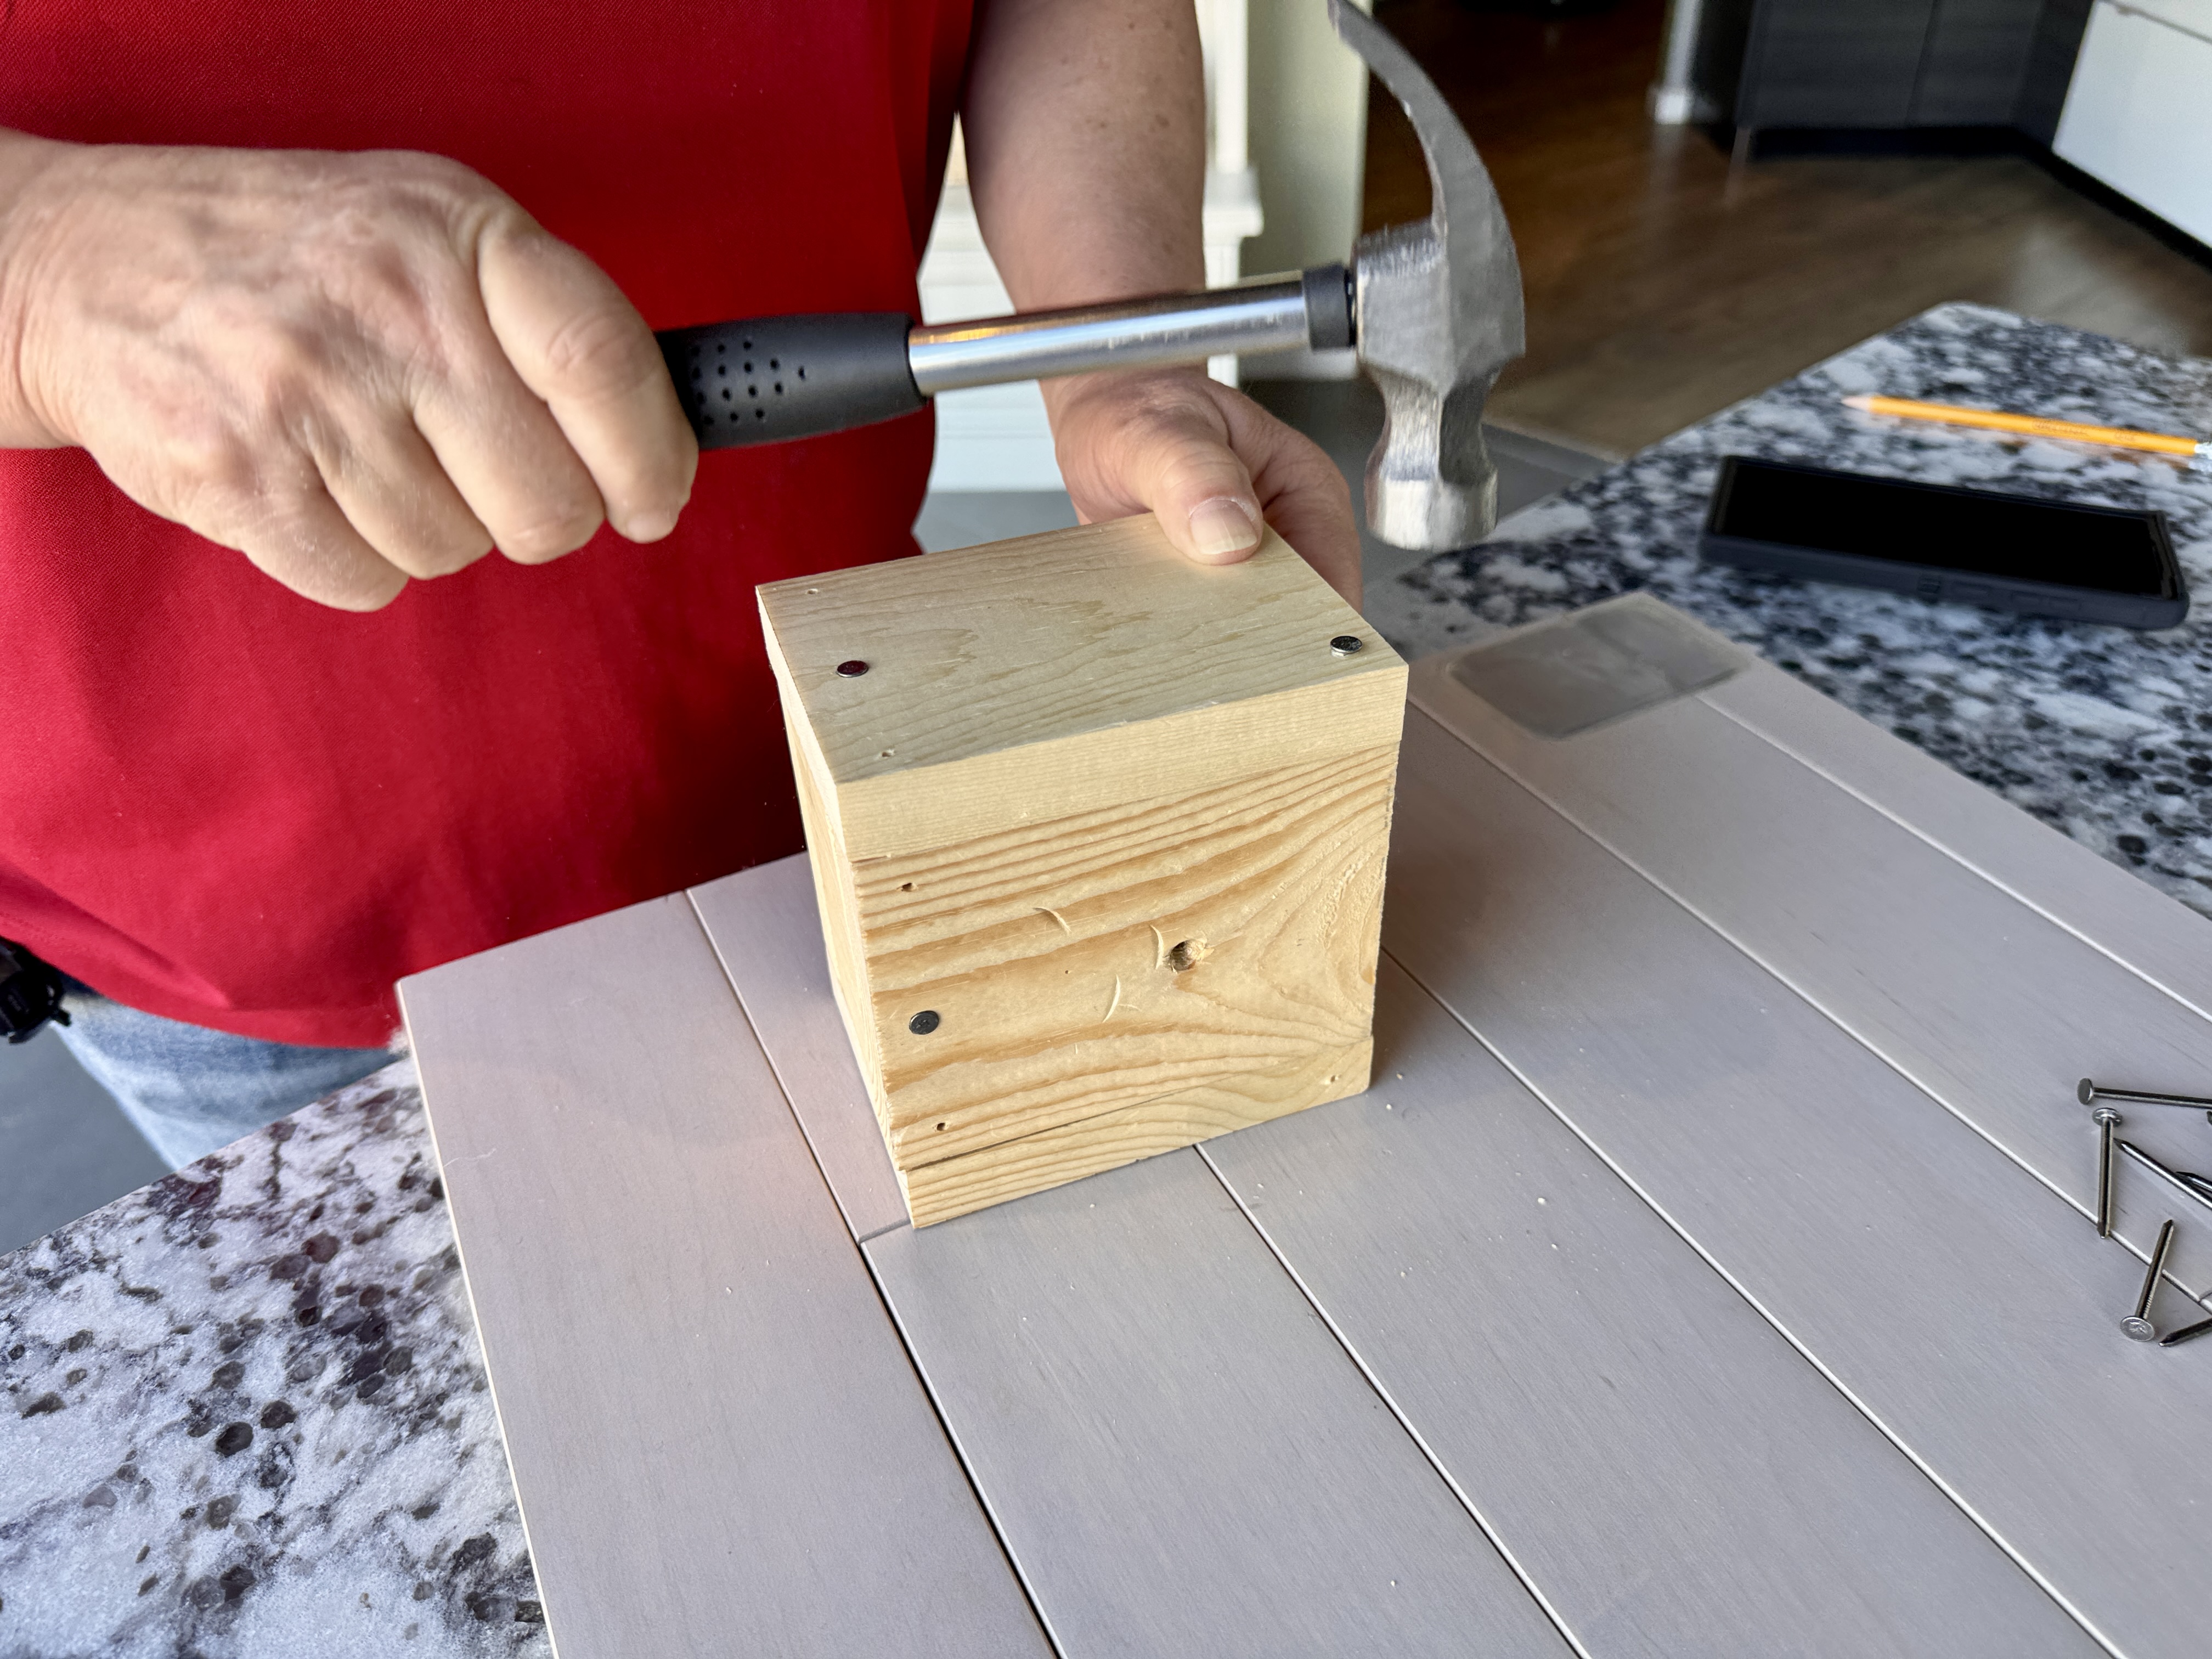
Step 5: Final fastening (drive all remaining nails)
-
Once everything lines up and the box is square, fully drive the remaining pre-drilled holes with nails. There should be 12 remaining holes total: 2 on each B (2×2 = 4) and 4 on each A (4×2 = 8) → 4 + 8 = 12.
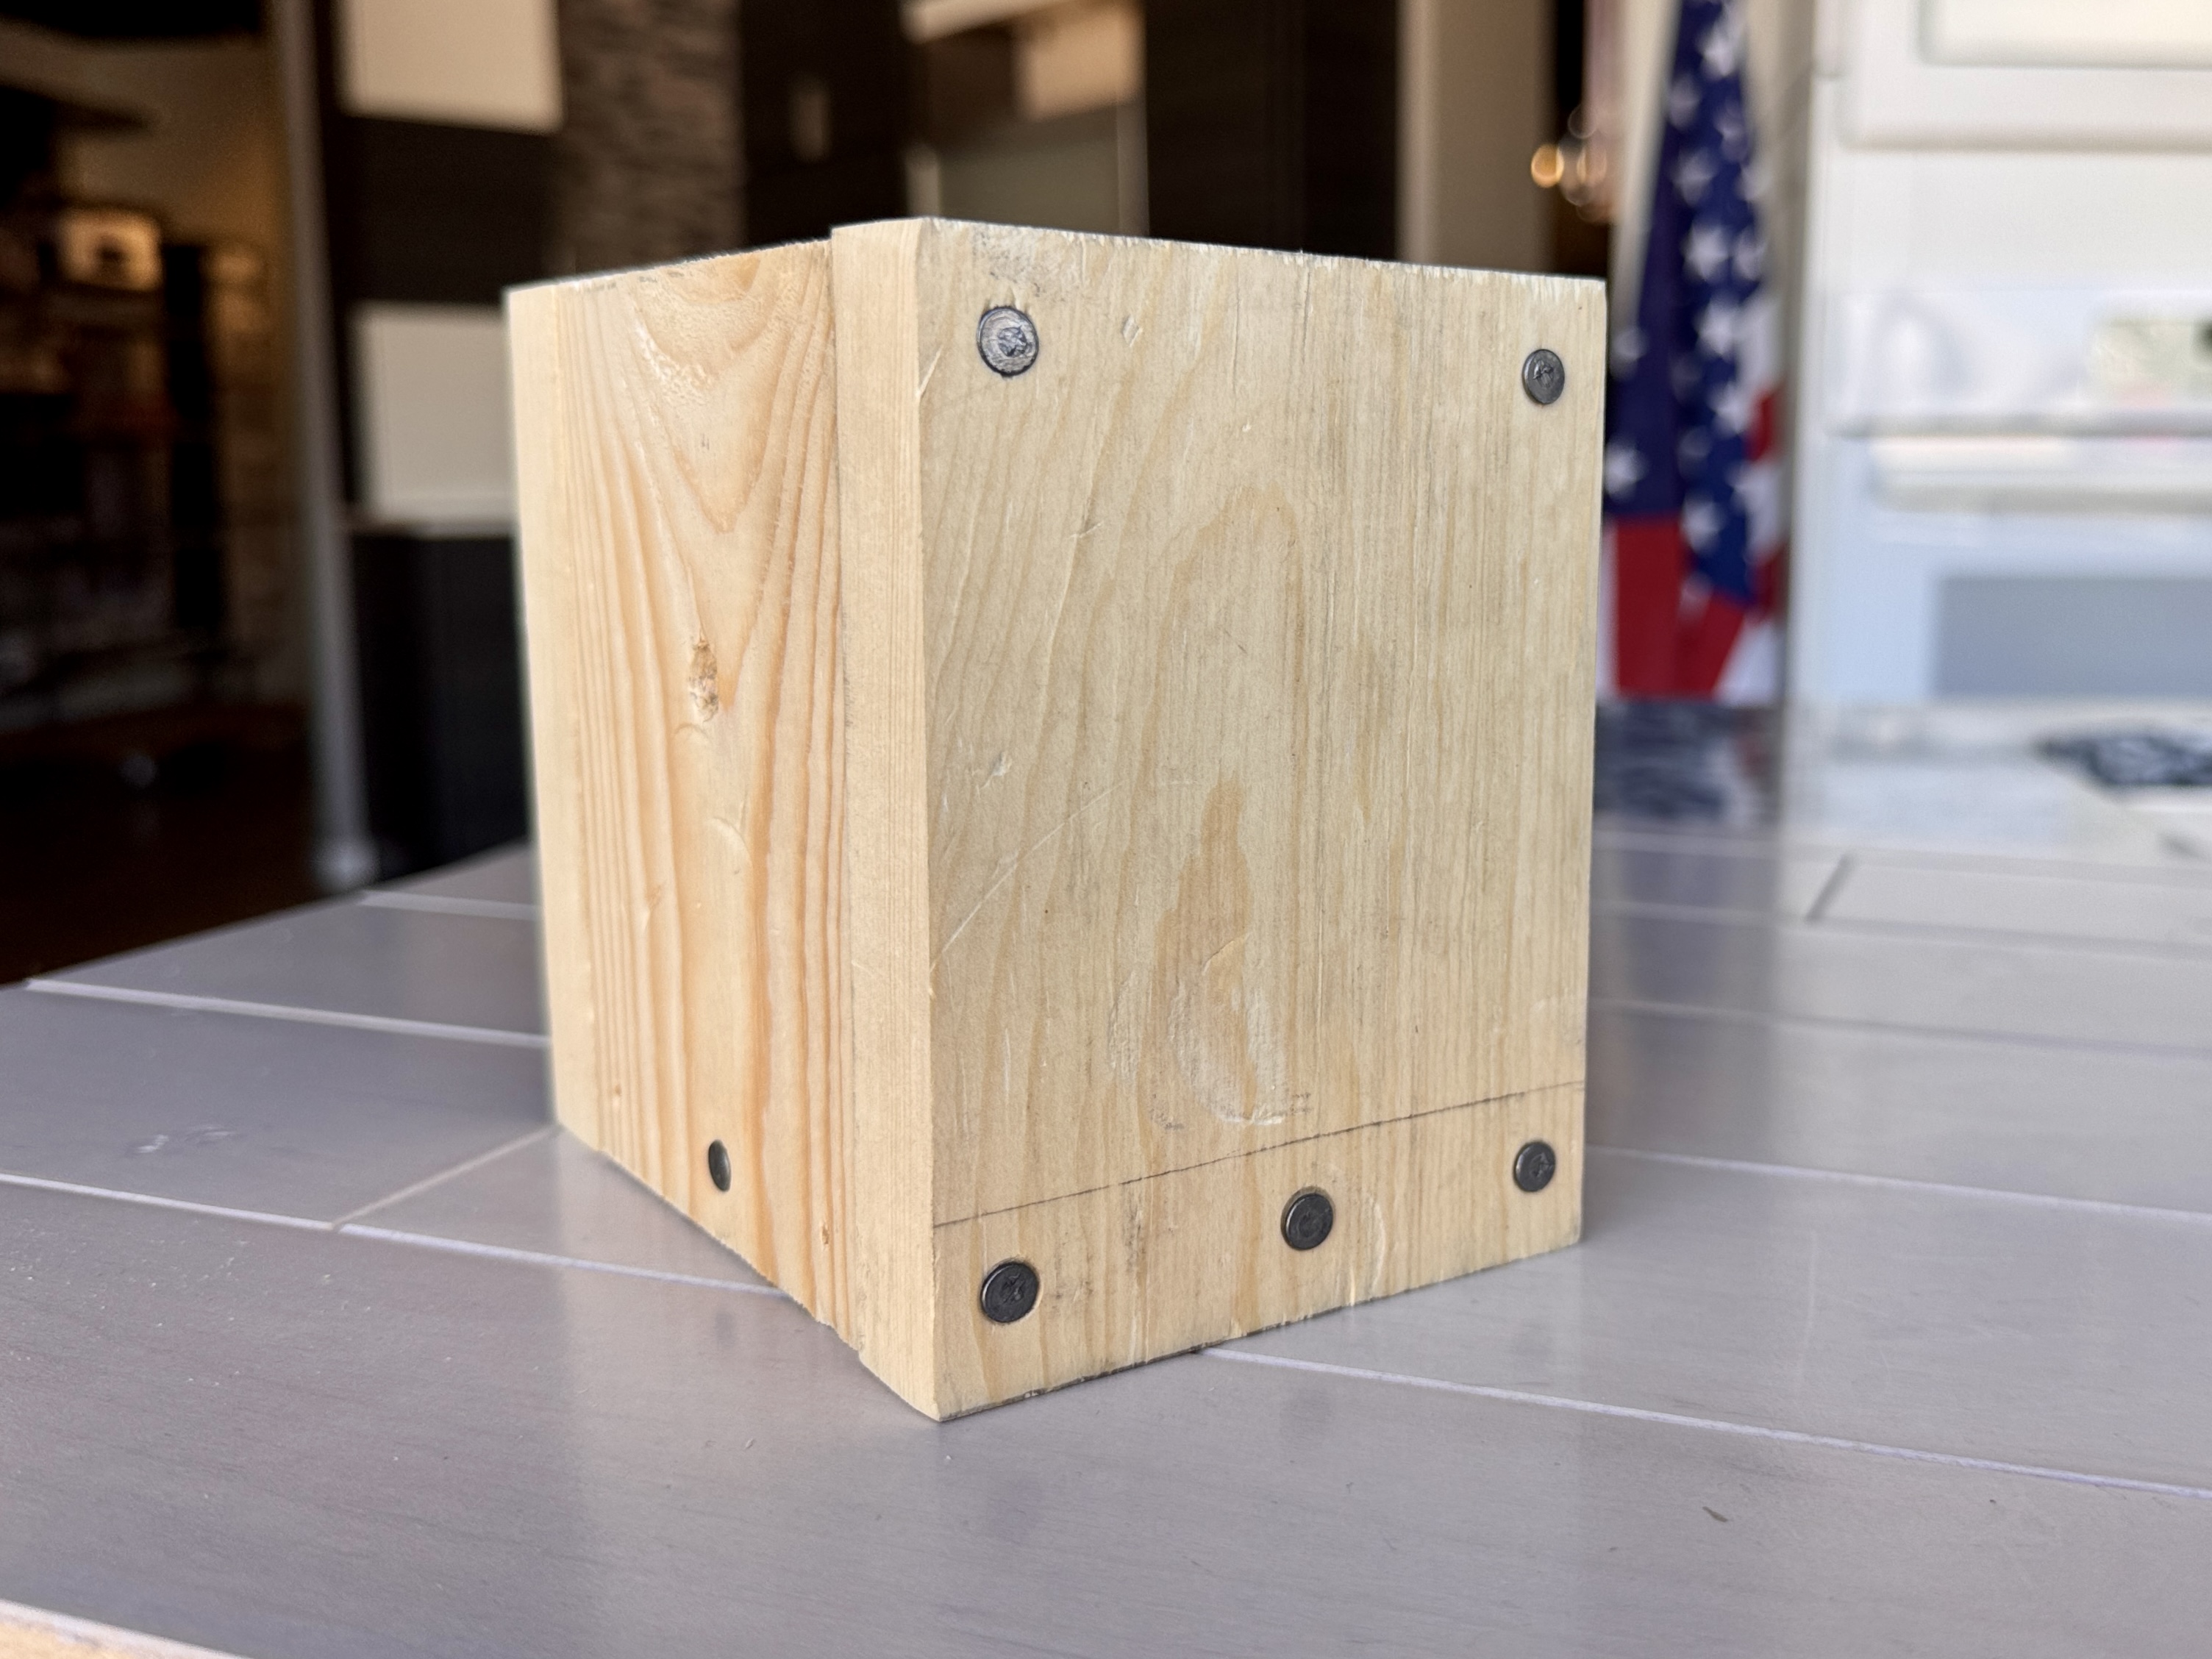
Step 6: Decorate
-
Paint, stain, add stickers, or apply a clear sealer—decorate as you like.
-
Let paint/sealer dry fully before using the pencil holder.
Conclusion
Building your own pencil holder is a simple and rewarding DIY project. With just a few nails and some careful alignment, you’ll have a sturdy and functional organizer for your desk. Once the structure is complete, the fun part begins—customizing it with paint, stickers, or other decorations to match your style. Not only will you end up with a practical item, but you’ll also enjoy the satisfaction of creating something with your own hands.
Creating a personalized wooden pencil holder is an excellent way to introduce children to basic woodworking skills while producing a practical item for their desk or study area. This step-by-step guide will help young crafters build their own custom organizer with minimal tools and maximum creativity.
Materials Needed
- (2) 1 in. x 5 in. X 3-1/2 in. wood piece with 5 pre drilled holes (A)
- (2) 1 in. x 5 in. X 3-1/2 in. wood piece with 3 pre drilled holes (B)
- (1) 1 in. x 2 in. x 3-1/2 in. wood piece (C)
- (16) 1-1/2 in. framing nails
- Hammer
- Wood stain or paint (optional)
- Safety glasses
Step-by-Step Instructions - Download Help Guide Here
Step 1: Start the first side (attach B to C)
Lay everything out on your work surface with the pre-drilled holes facing outward (so you can see and use them).
-
Place C flat on the work surface.
-
Take one B (3-hole side) and stand it up at the long edge of C.
-
Using the middle pre-drilled hole in B, drive one nail through that hole into C.
-
Check that the top and bottom edges of B are flush with C and that B is perpendicular to C.
Tip: Have a helper holding B while you set the first nail makes this much easier.
Step 2: Attach the first Side A (second side)
-
Pick one A (5-hole side). Align it along the opposite long edge of C where it belongs.
-
Use the middle pre-drilled hole in A to drive a nail into C.
-
Check alignment: the face of A should be level with the face of the already-attached B (use a small level across the top edge or visually align the top edges). Adjust before fully setting nails.
Step 3: Attach the second B (third side)
-
Take the remaining B and align it with the remaining edge of C.
-
Drive a nail through its middle hole into C, leaving it partway set.
-
Make sure this B is parallel to the first B and that spacing/gaps around the box are even.
Step 4: Attach the final A (fourth side)
-
Align the remaining A with the last open edge of C.
-
Use the middle pre-drilled hole to insert a nail partway.
-
Check that all four sides are square, parallel, and level with each other. Adjust any partially-set nails if needed.
Step 5: Final fastening (drive all remaining nails)
-
Once everything lines up and the box is square, fully drive the remaining pre-drilled holes with nails. There should be 12 remaining holes total: 2 on each B (2×2 = 4) and 4 on each A (4×2 = 8) → 4 + 8 = 12.
Step 6: Decorate
-
Paint, stain, add stickers, or apply a clear sealer—decorate as you like.
-
Let paint/sealer dry fully before using the pencil holder.
Conclusion
Building your own pencil holder is a simple and rewarding DIY project. With just a few nails and some careful alignment, you’ll have a sturdy and functional organizer for your desk. Once the structure is complete, the fun part begins—customizing it with paint, stickers, or other decorations to match your style. Not only will you end up with a practical item, but you’ll also enjoy the satisfaction of creating something with your own hands.