

.png "Build Your Own Sail Boat or Butterfly House")
Summer is the perfect time to engage in hands-on crafting projects that combine creativity with learning. Today, we'll walk you through two exciting DIY projects that are perfect for families, educators, or anyone looking to create something beautiful and functional. We'll cover how to build a classic wooden sailboat and construct an inviting butterfly house that will attract these magnificent pollinators to your garden.
Project 1: Building Your Wooden Sailboat
Materials You'll Need
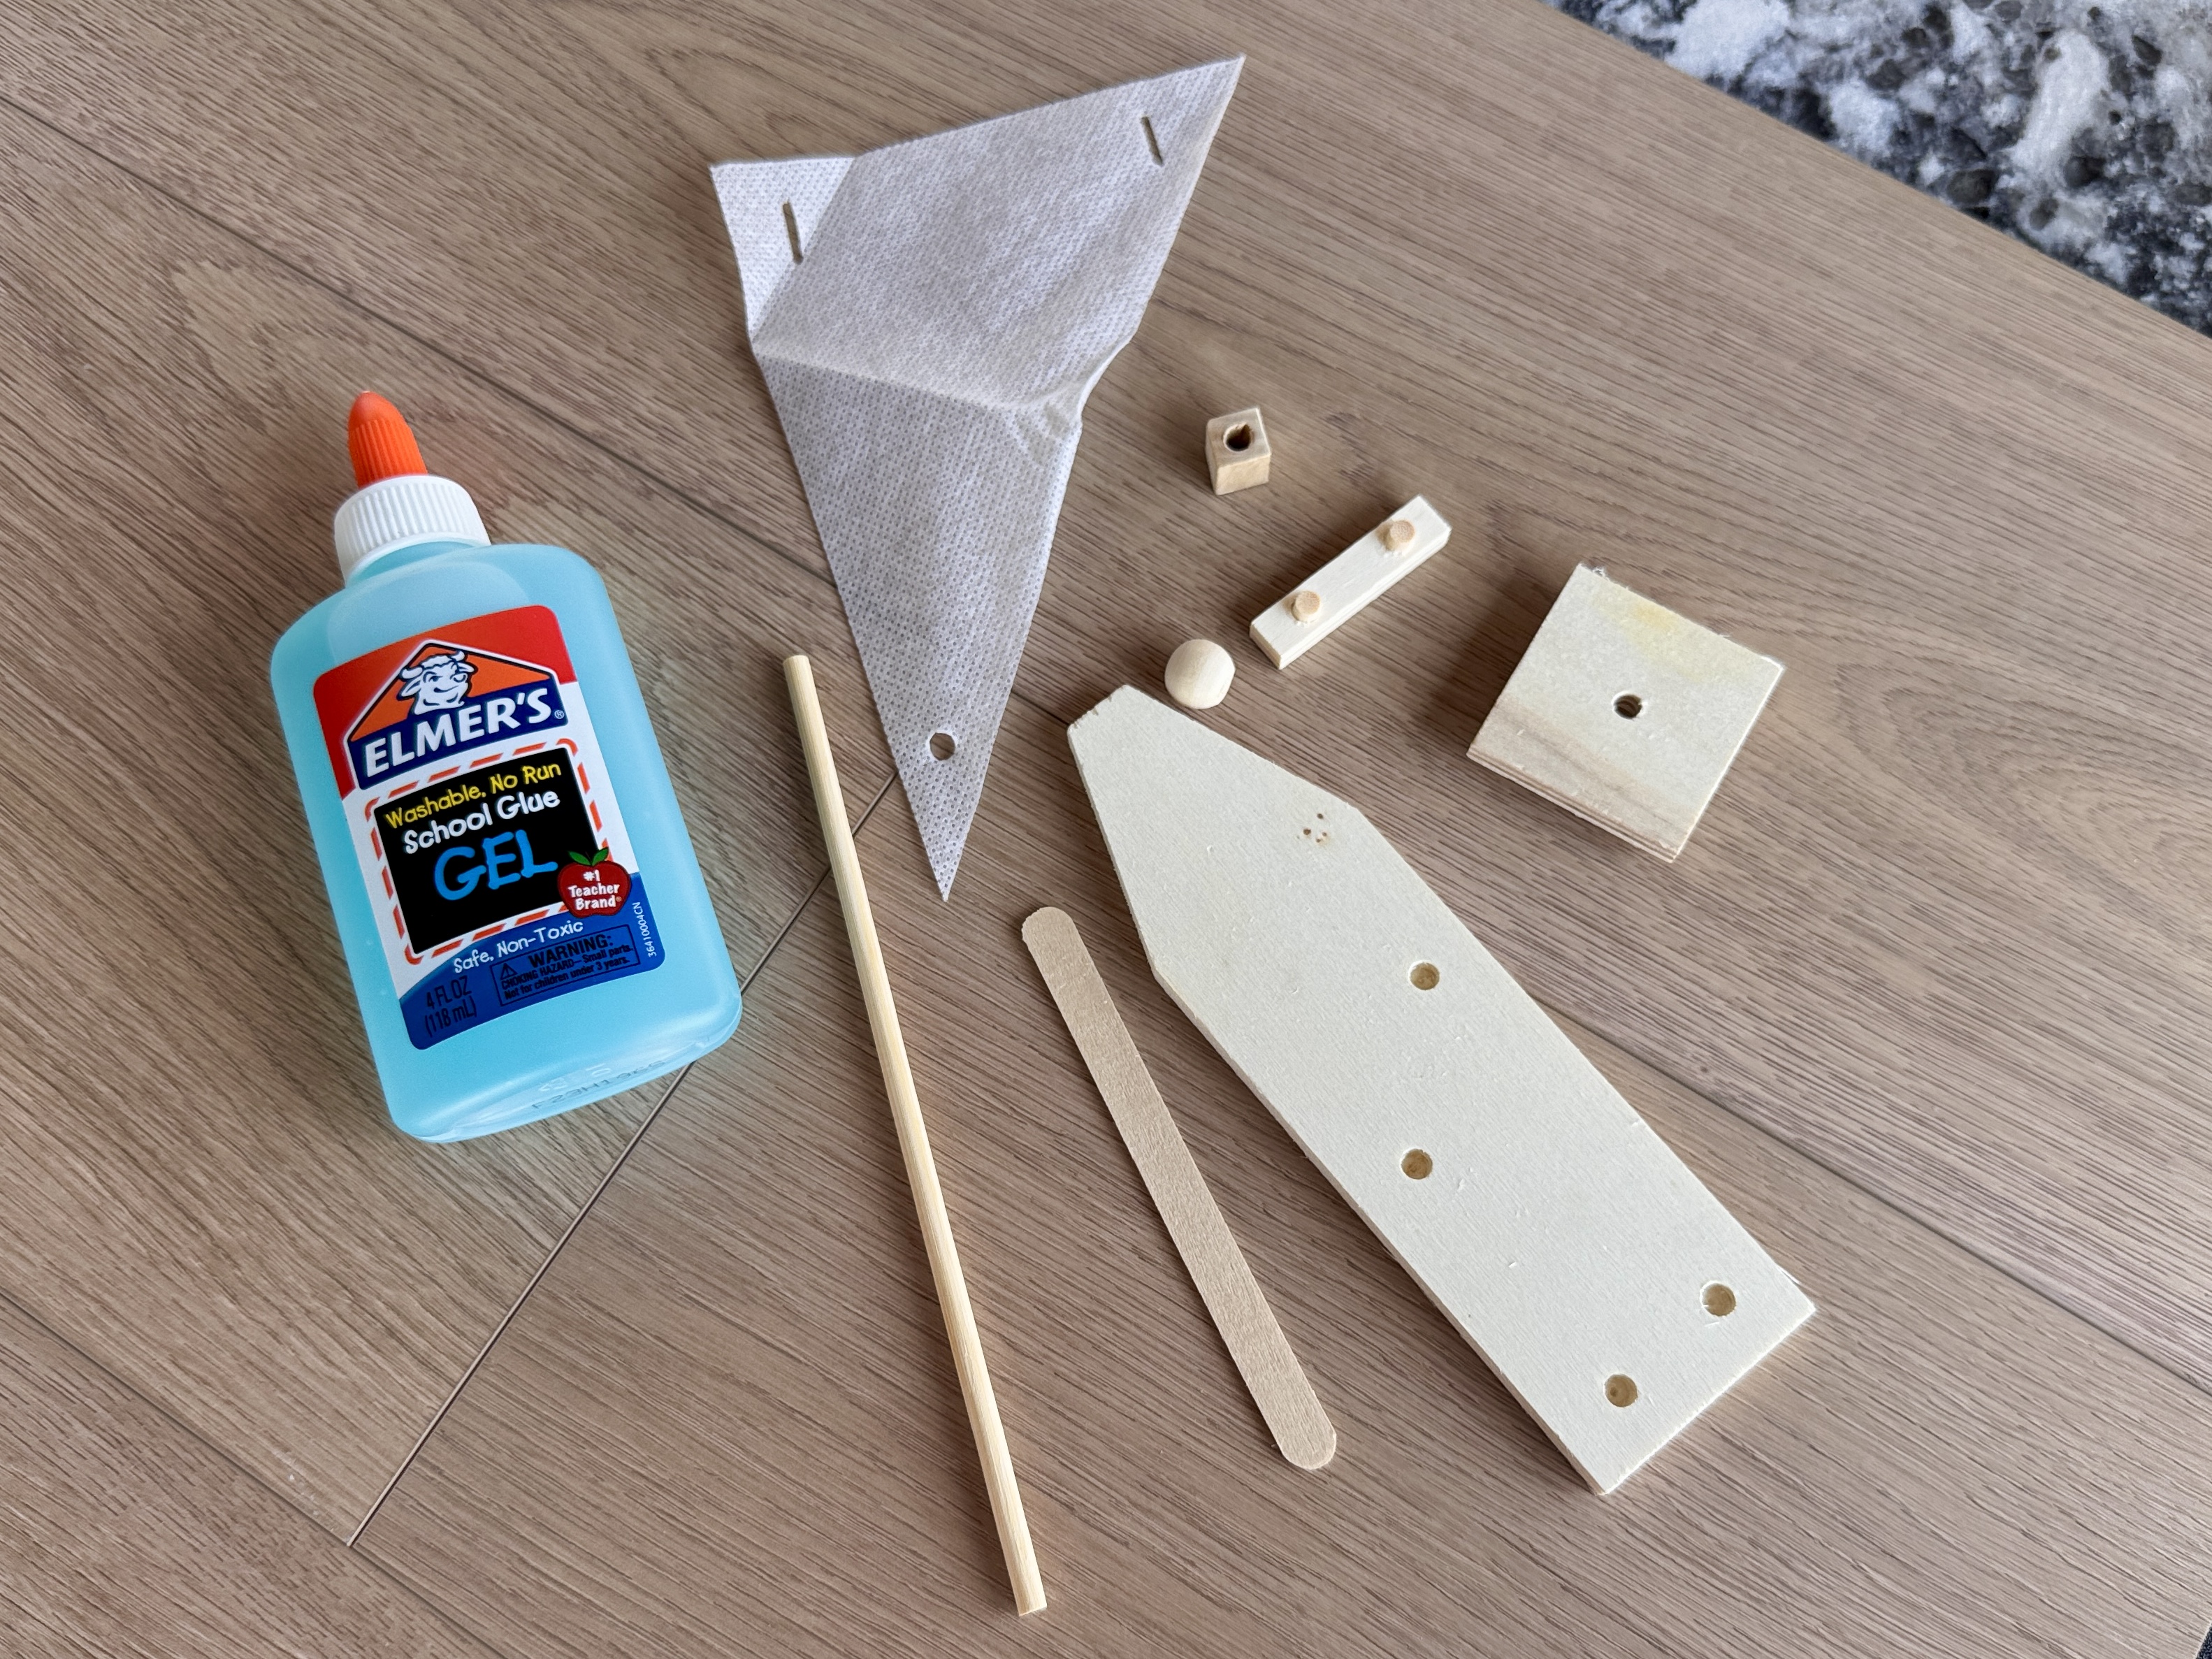
- Pre-cut wooden sailboat kit pieces
- Sailboat base
- Mast Support
- Rudder Support
- Craft Stick
- Dowel Mast
- Squared Bead
- Fabric Sail
- Round Bead
- Wood glue
- Acrylic paints or wood stain
- Paintbrushes
Step-by-Step Instructions
Step 1: Attach the Base and Supports
.JPG)
Lay down the wooden sailboat base. Glue the mast support and rudder support into place, making sure the holes and pegs align correctly.
Step 2: Insert the Mast and Bead
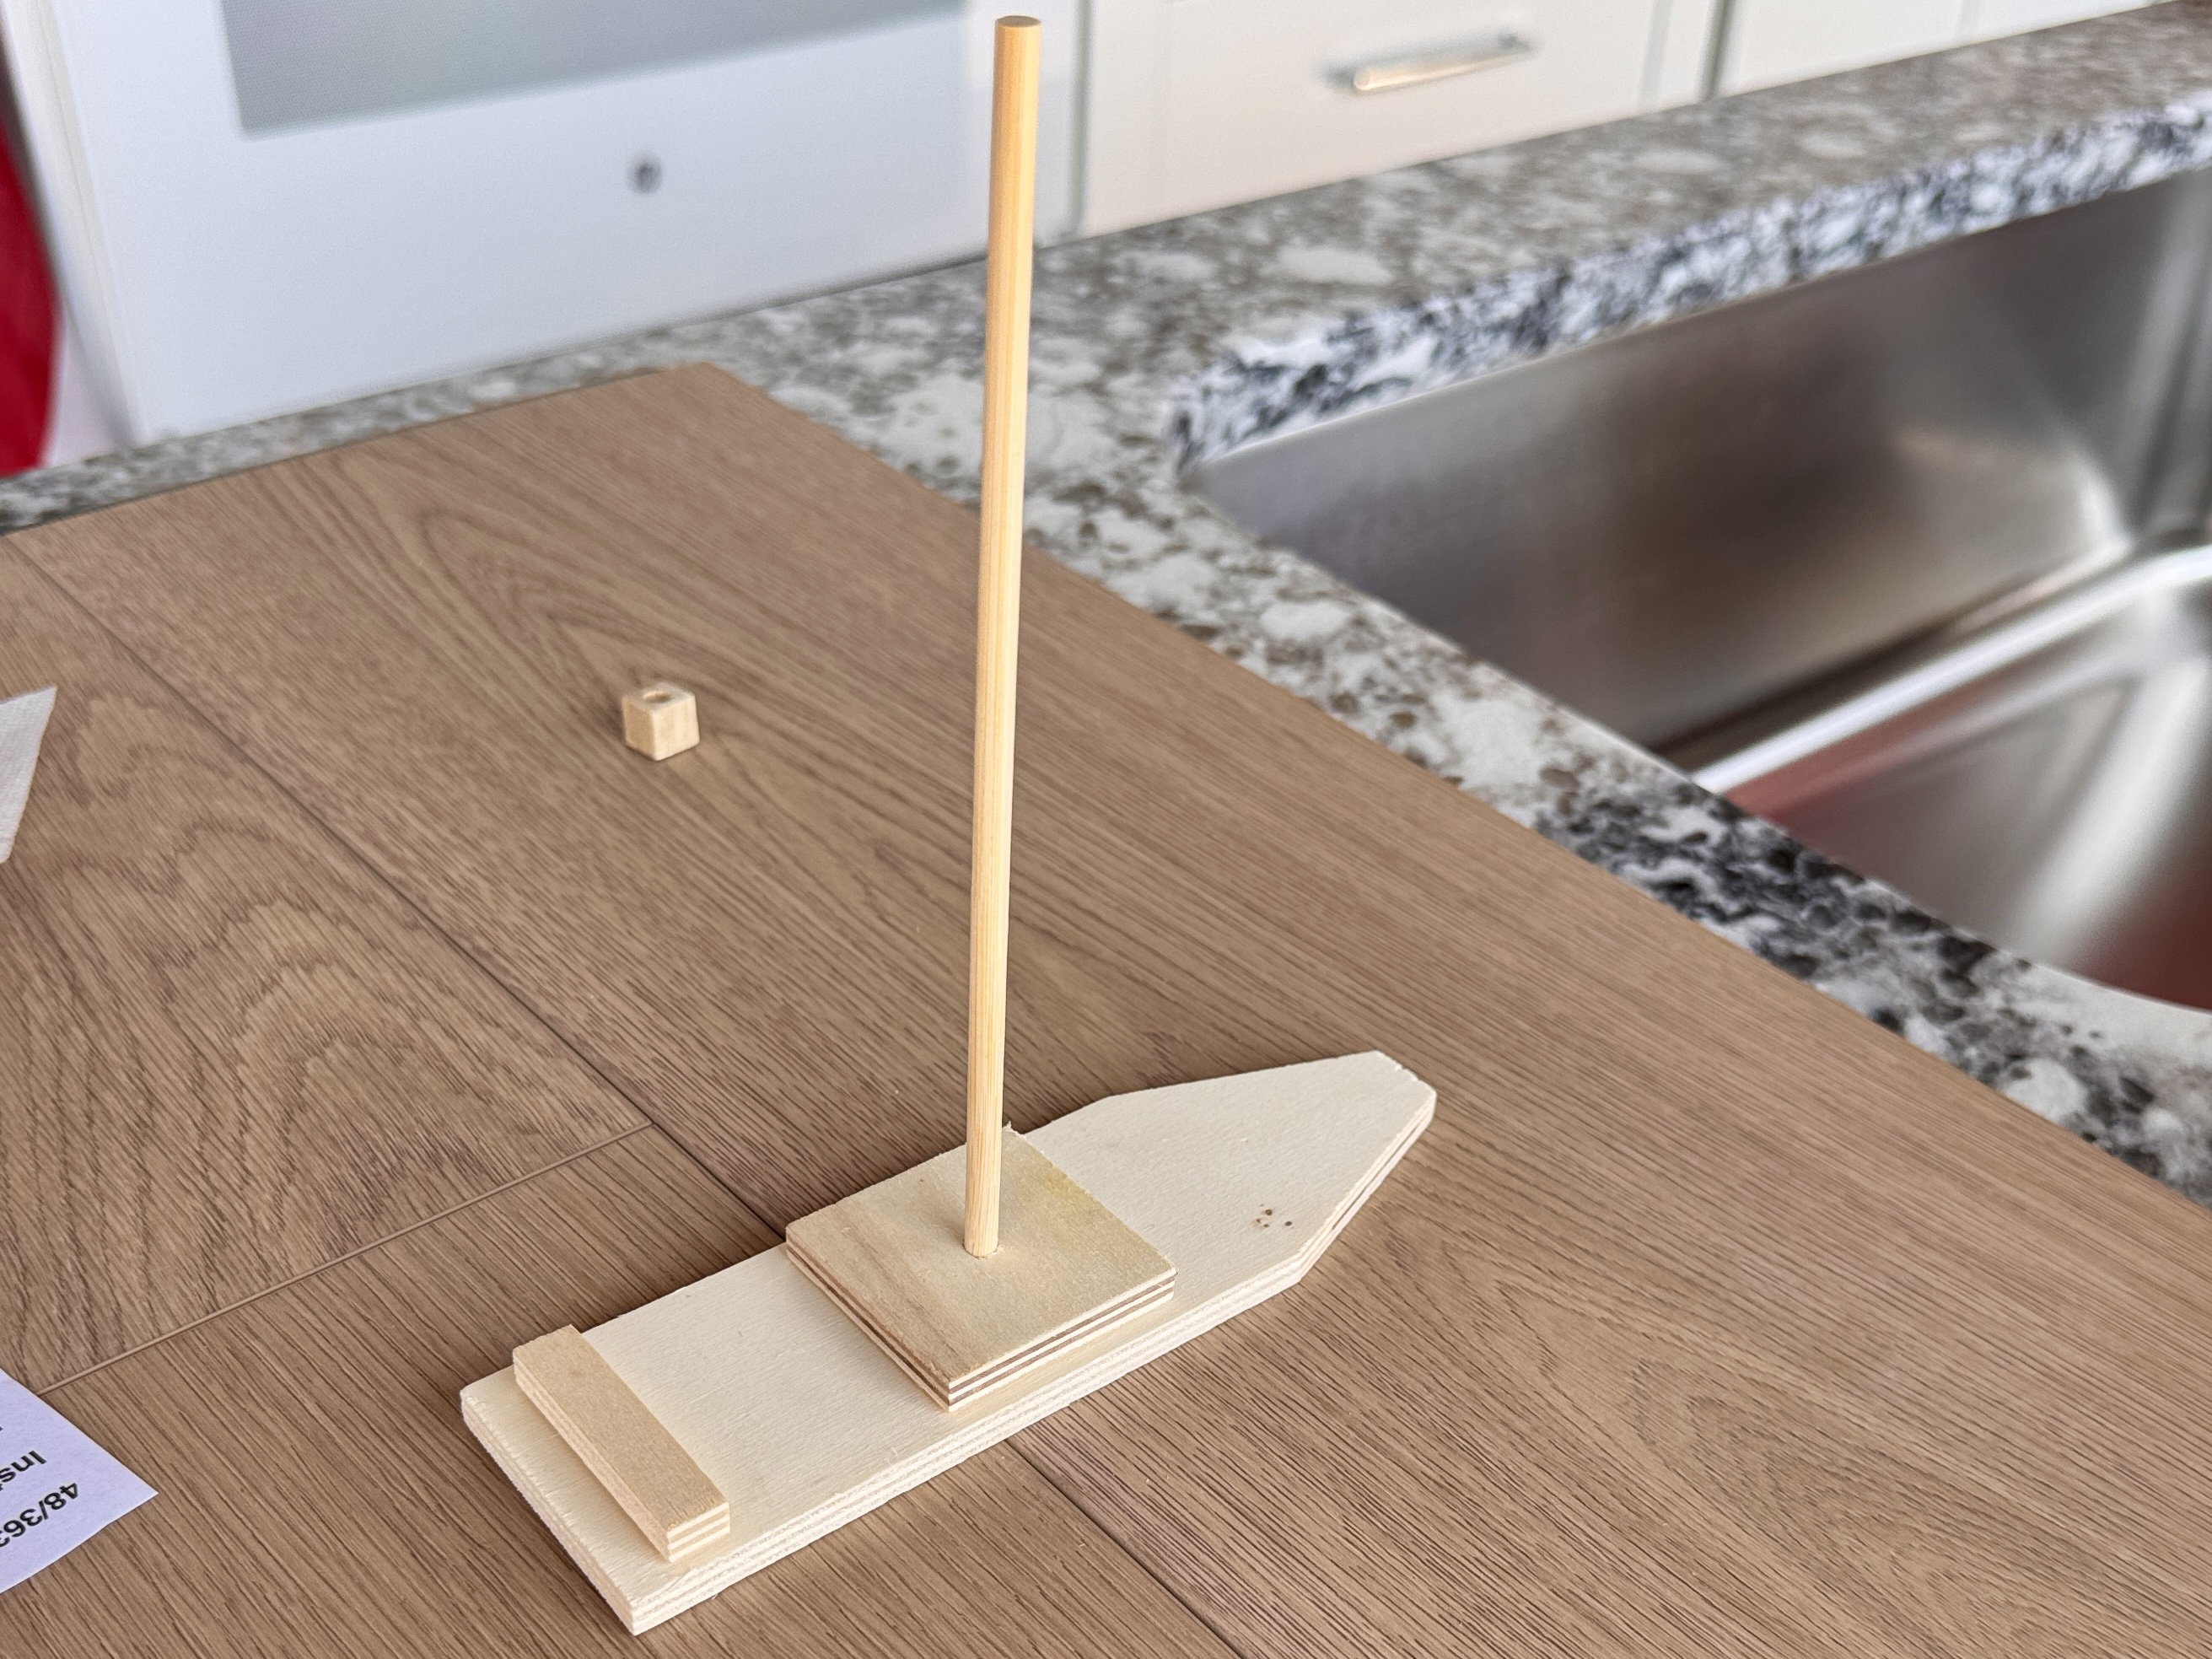
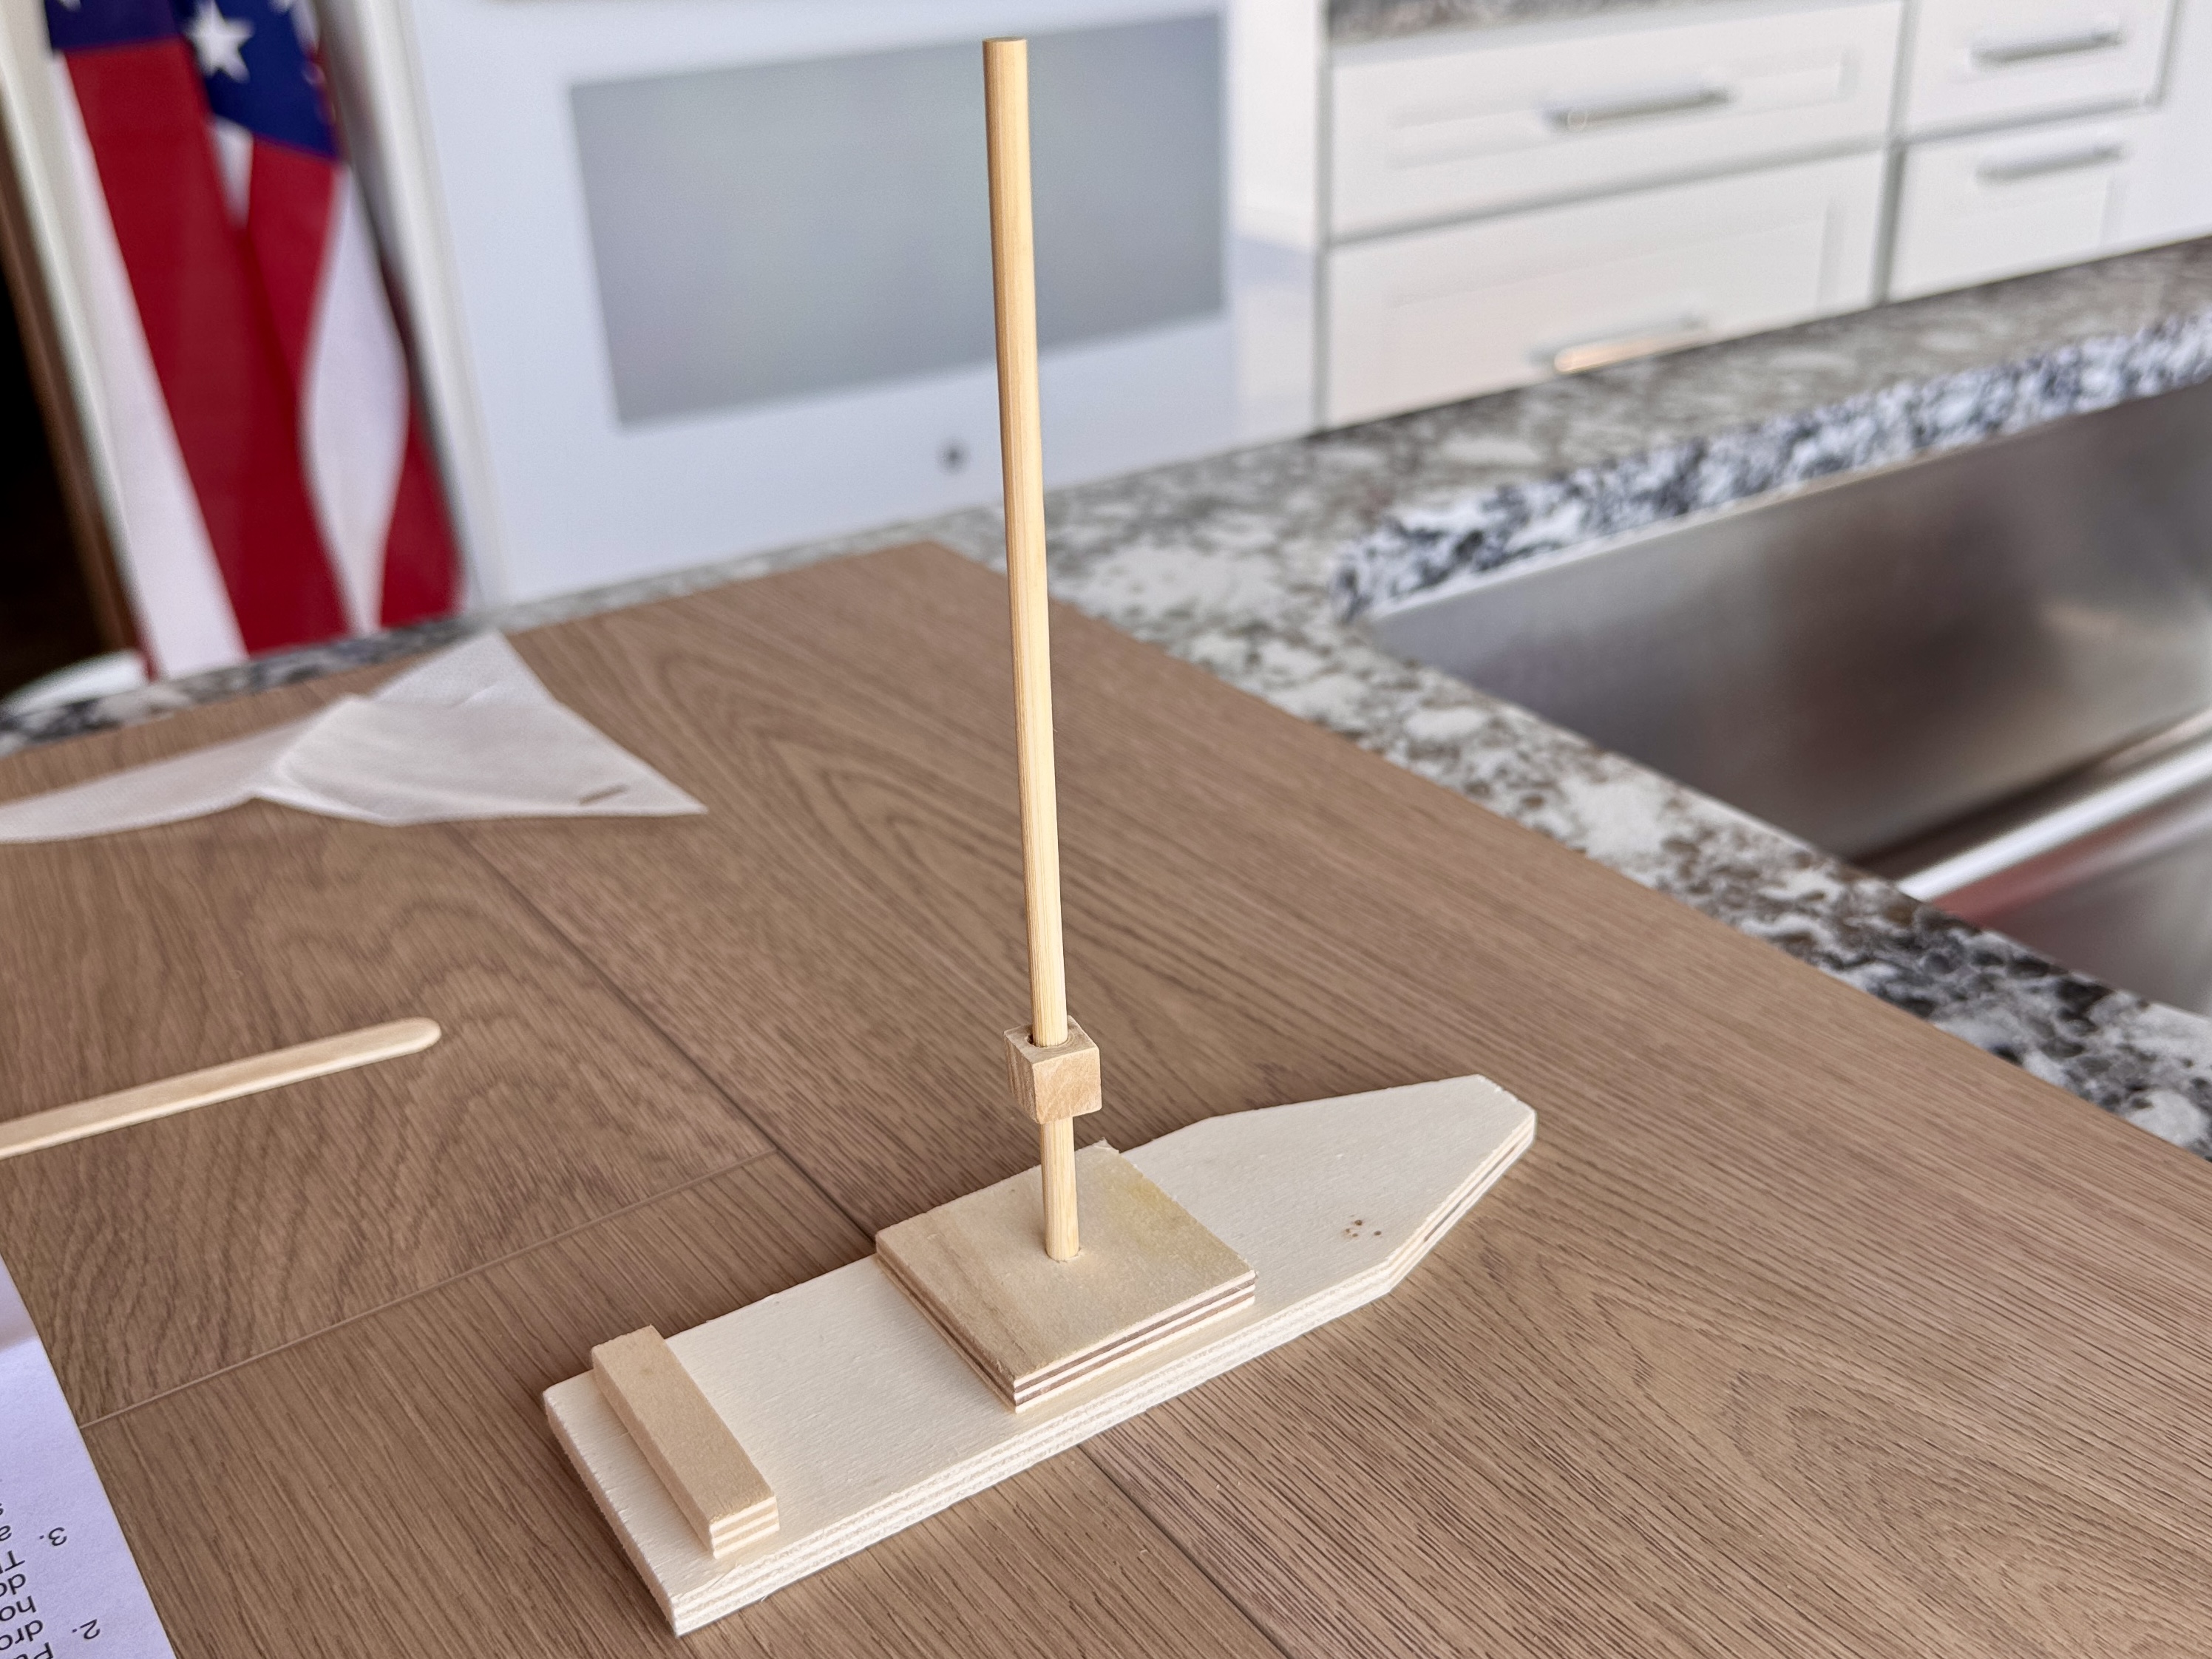
Glue the wooden dowel mast into the mast support. Then slide the square wooden bead down the mast to your desired height.
Step 3: Add the Sail and Top Bead
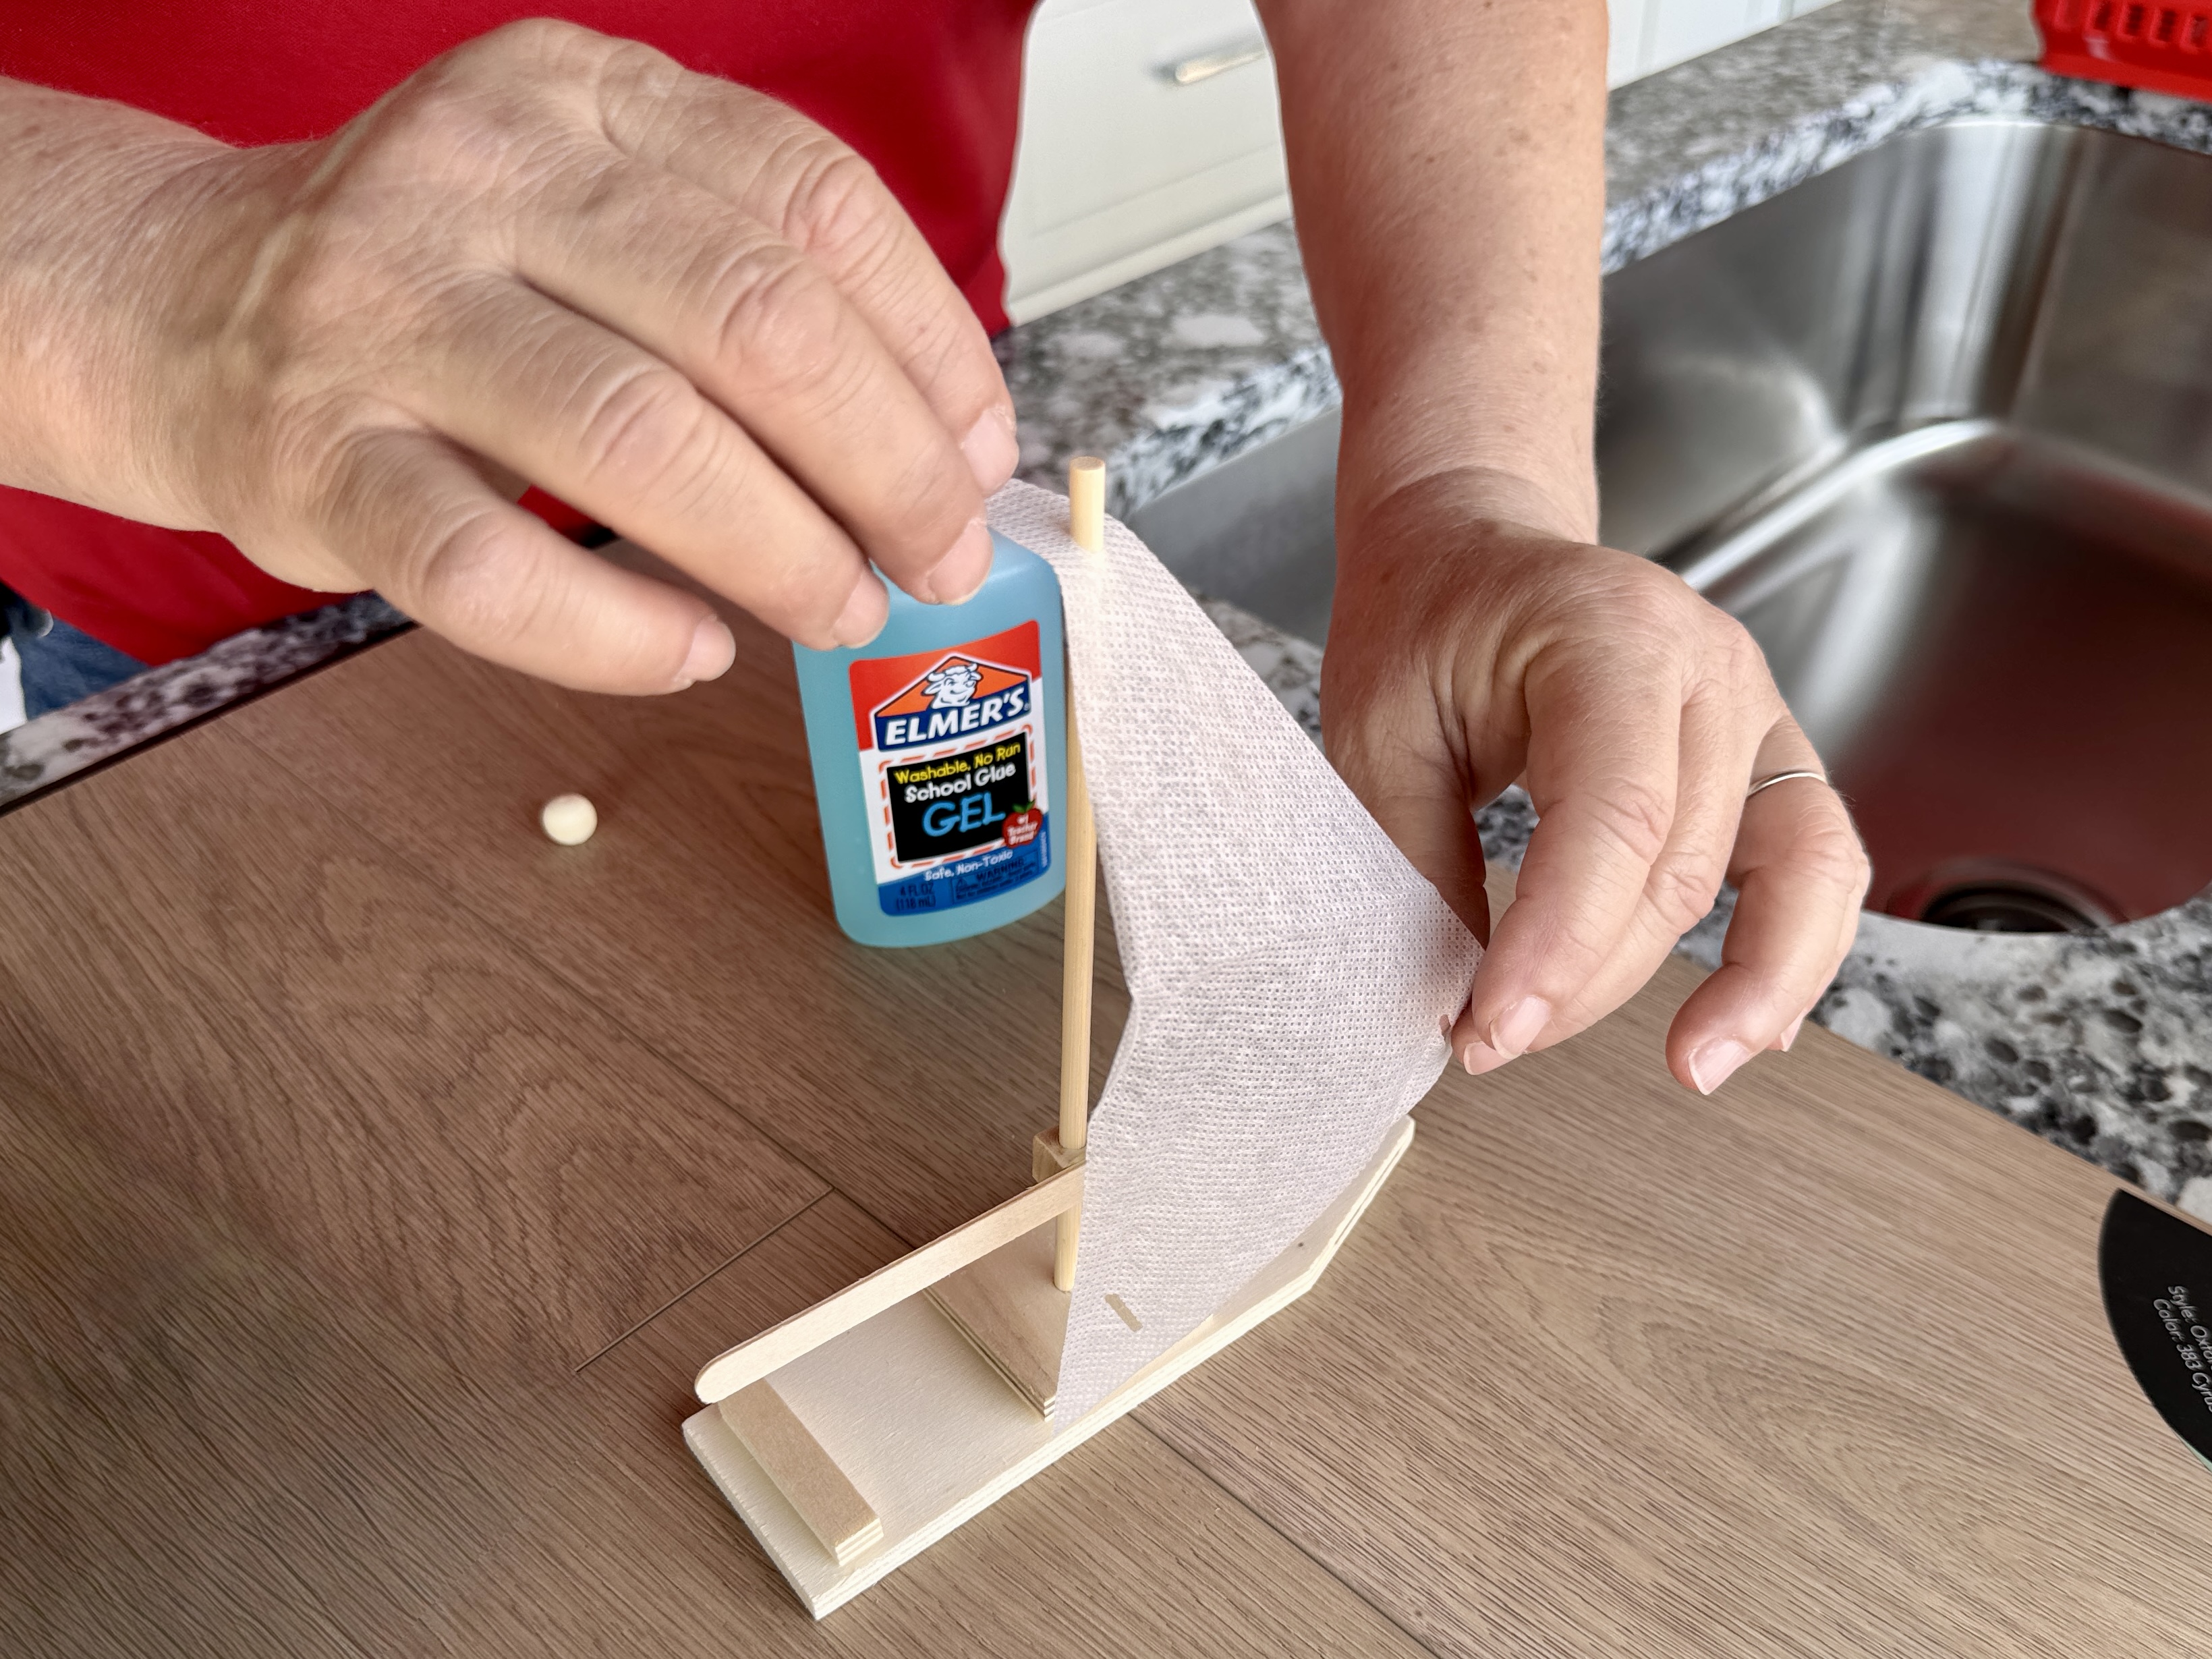
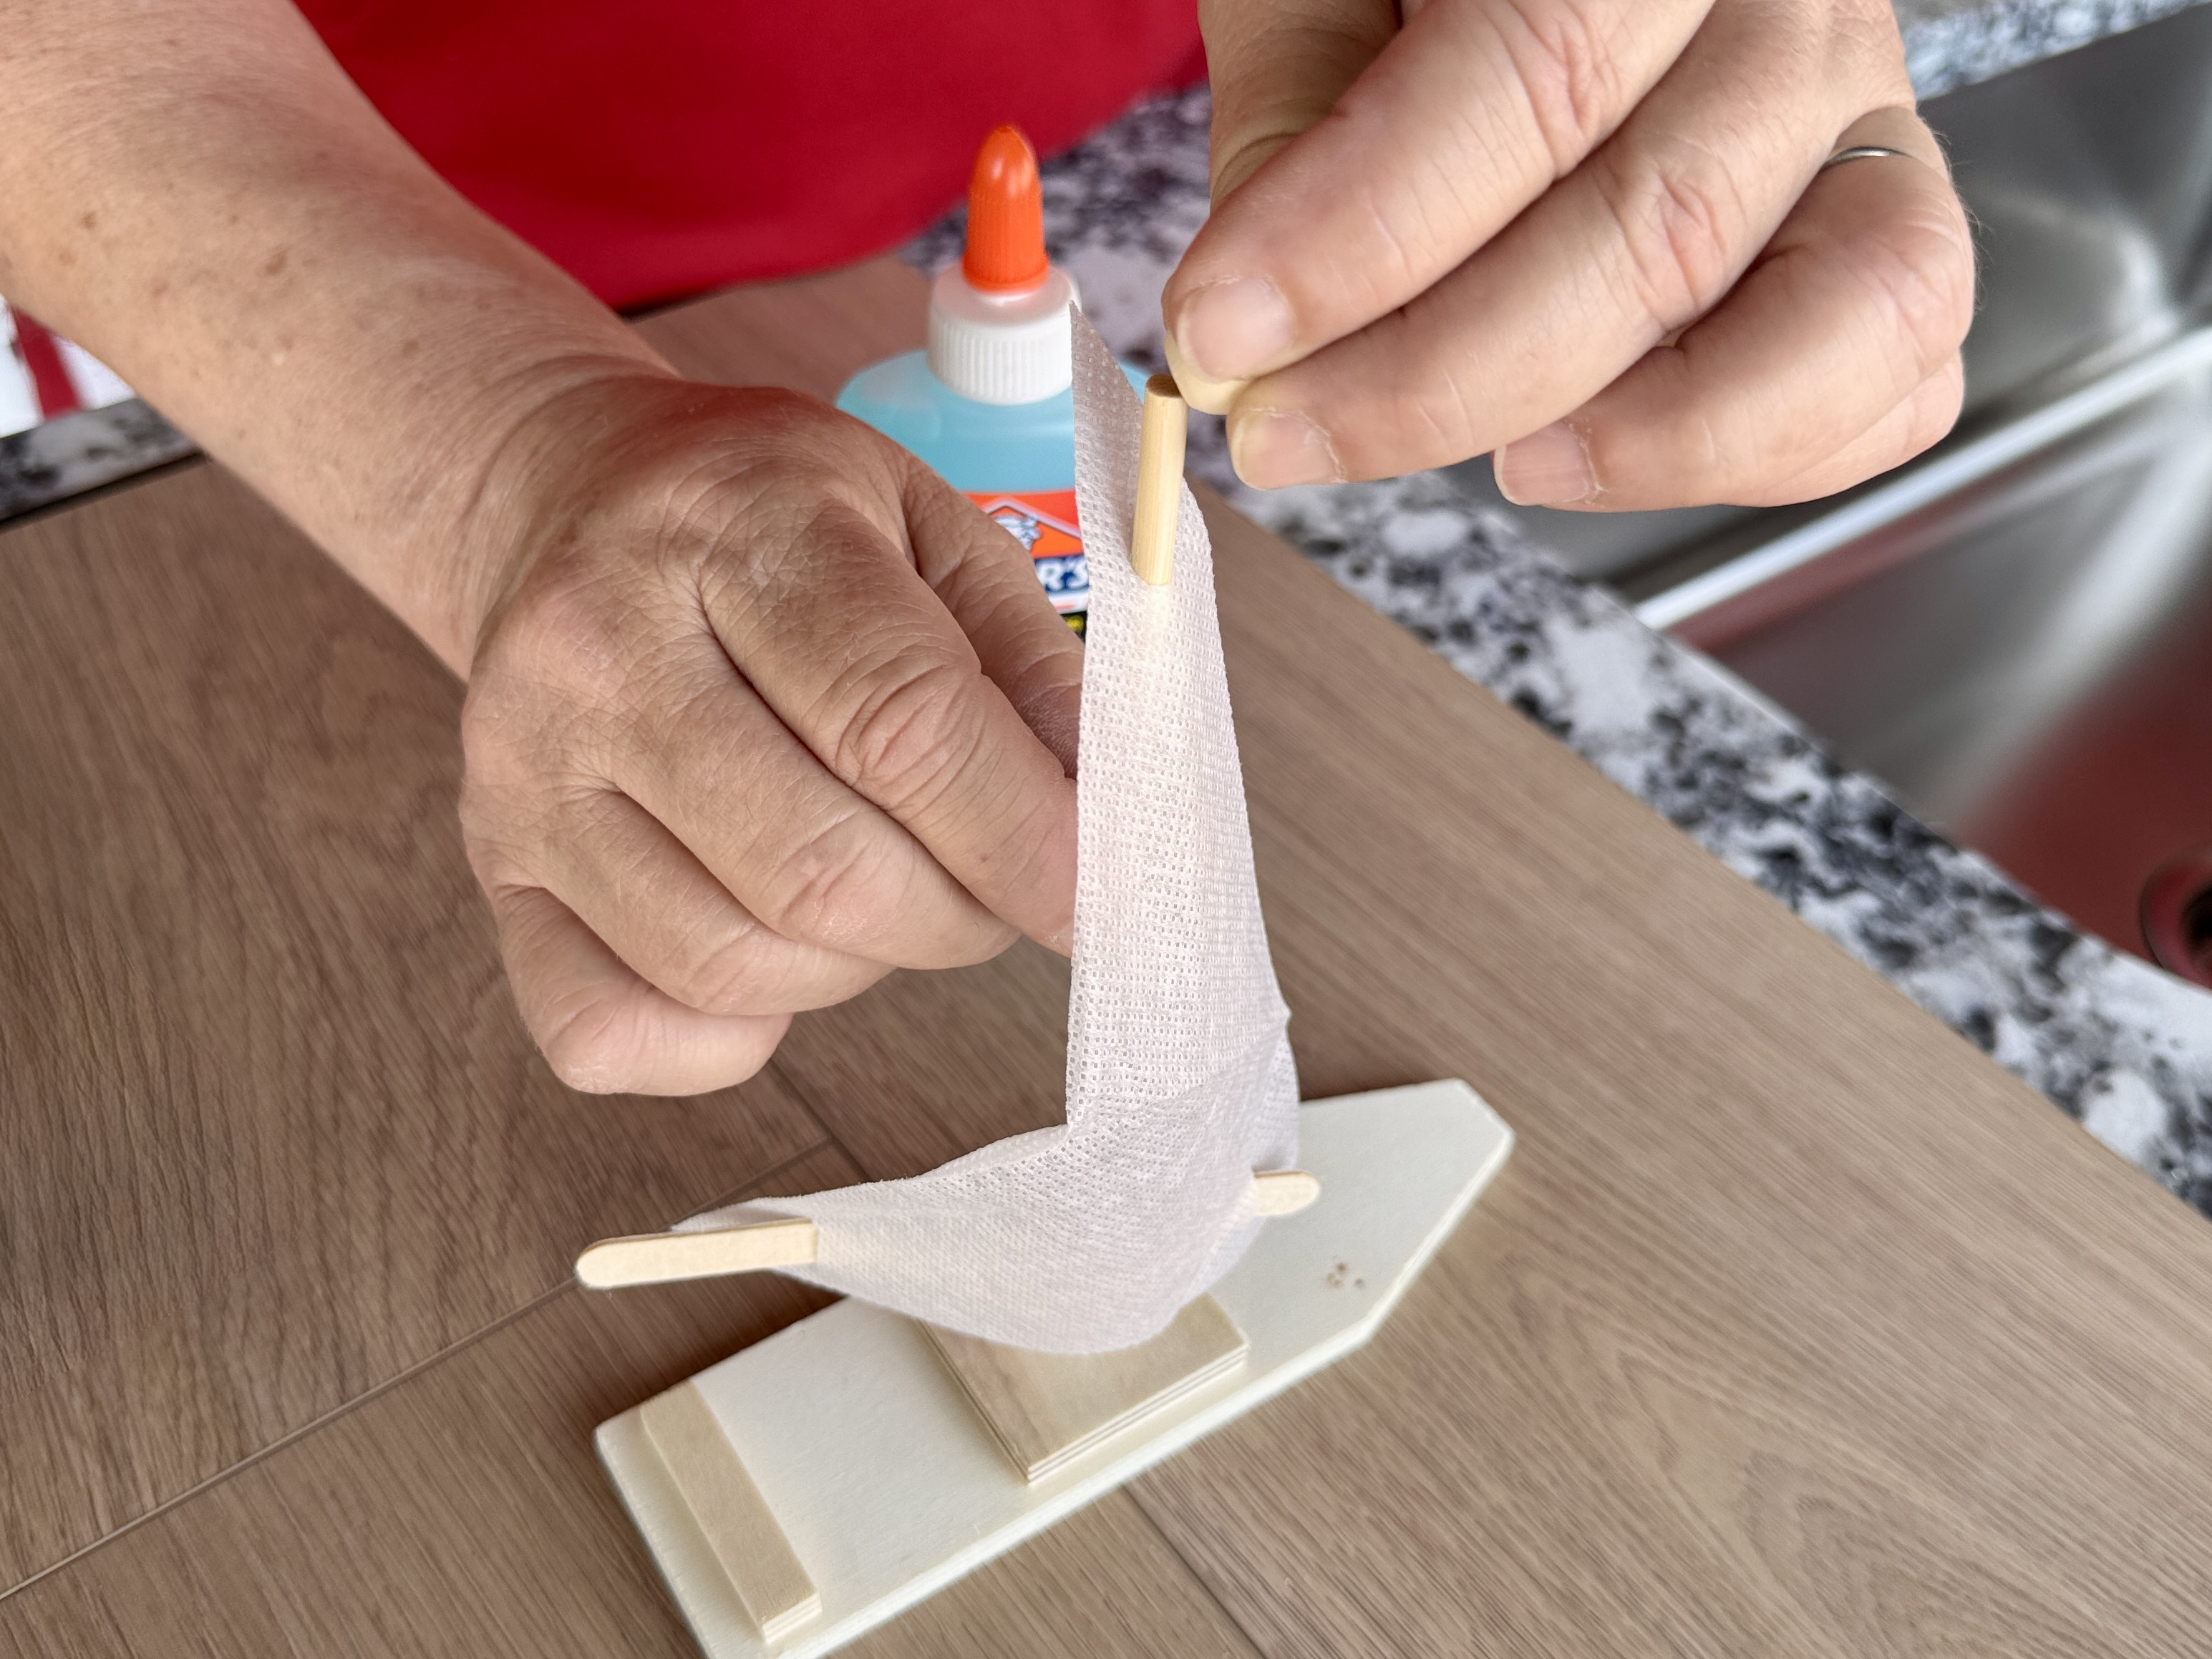
Apply glue to the square bead to keep it in place. Slide the fabric sail onto the mast through the round hole. Then place the round bead on top of the mast to finish the top.
Step 4: Secure the Bottom of the Sail

Thread the wood craft stick through the holes at the bottom of the sail. Glue the stick into the square bead, then glue the sail to the stick. Let everything dry completely.
Step 5: Time to Decorate!

Once your sailboat is dry, it’s time to decorate! Use paint, stickers, or any fun materials to make it uniquely yours.
Project 2: Constructing Your Butterfly House
Materials You'll Need
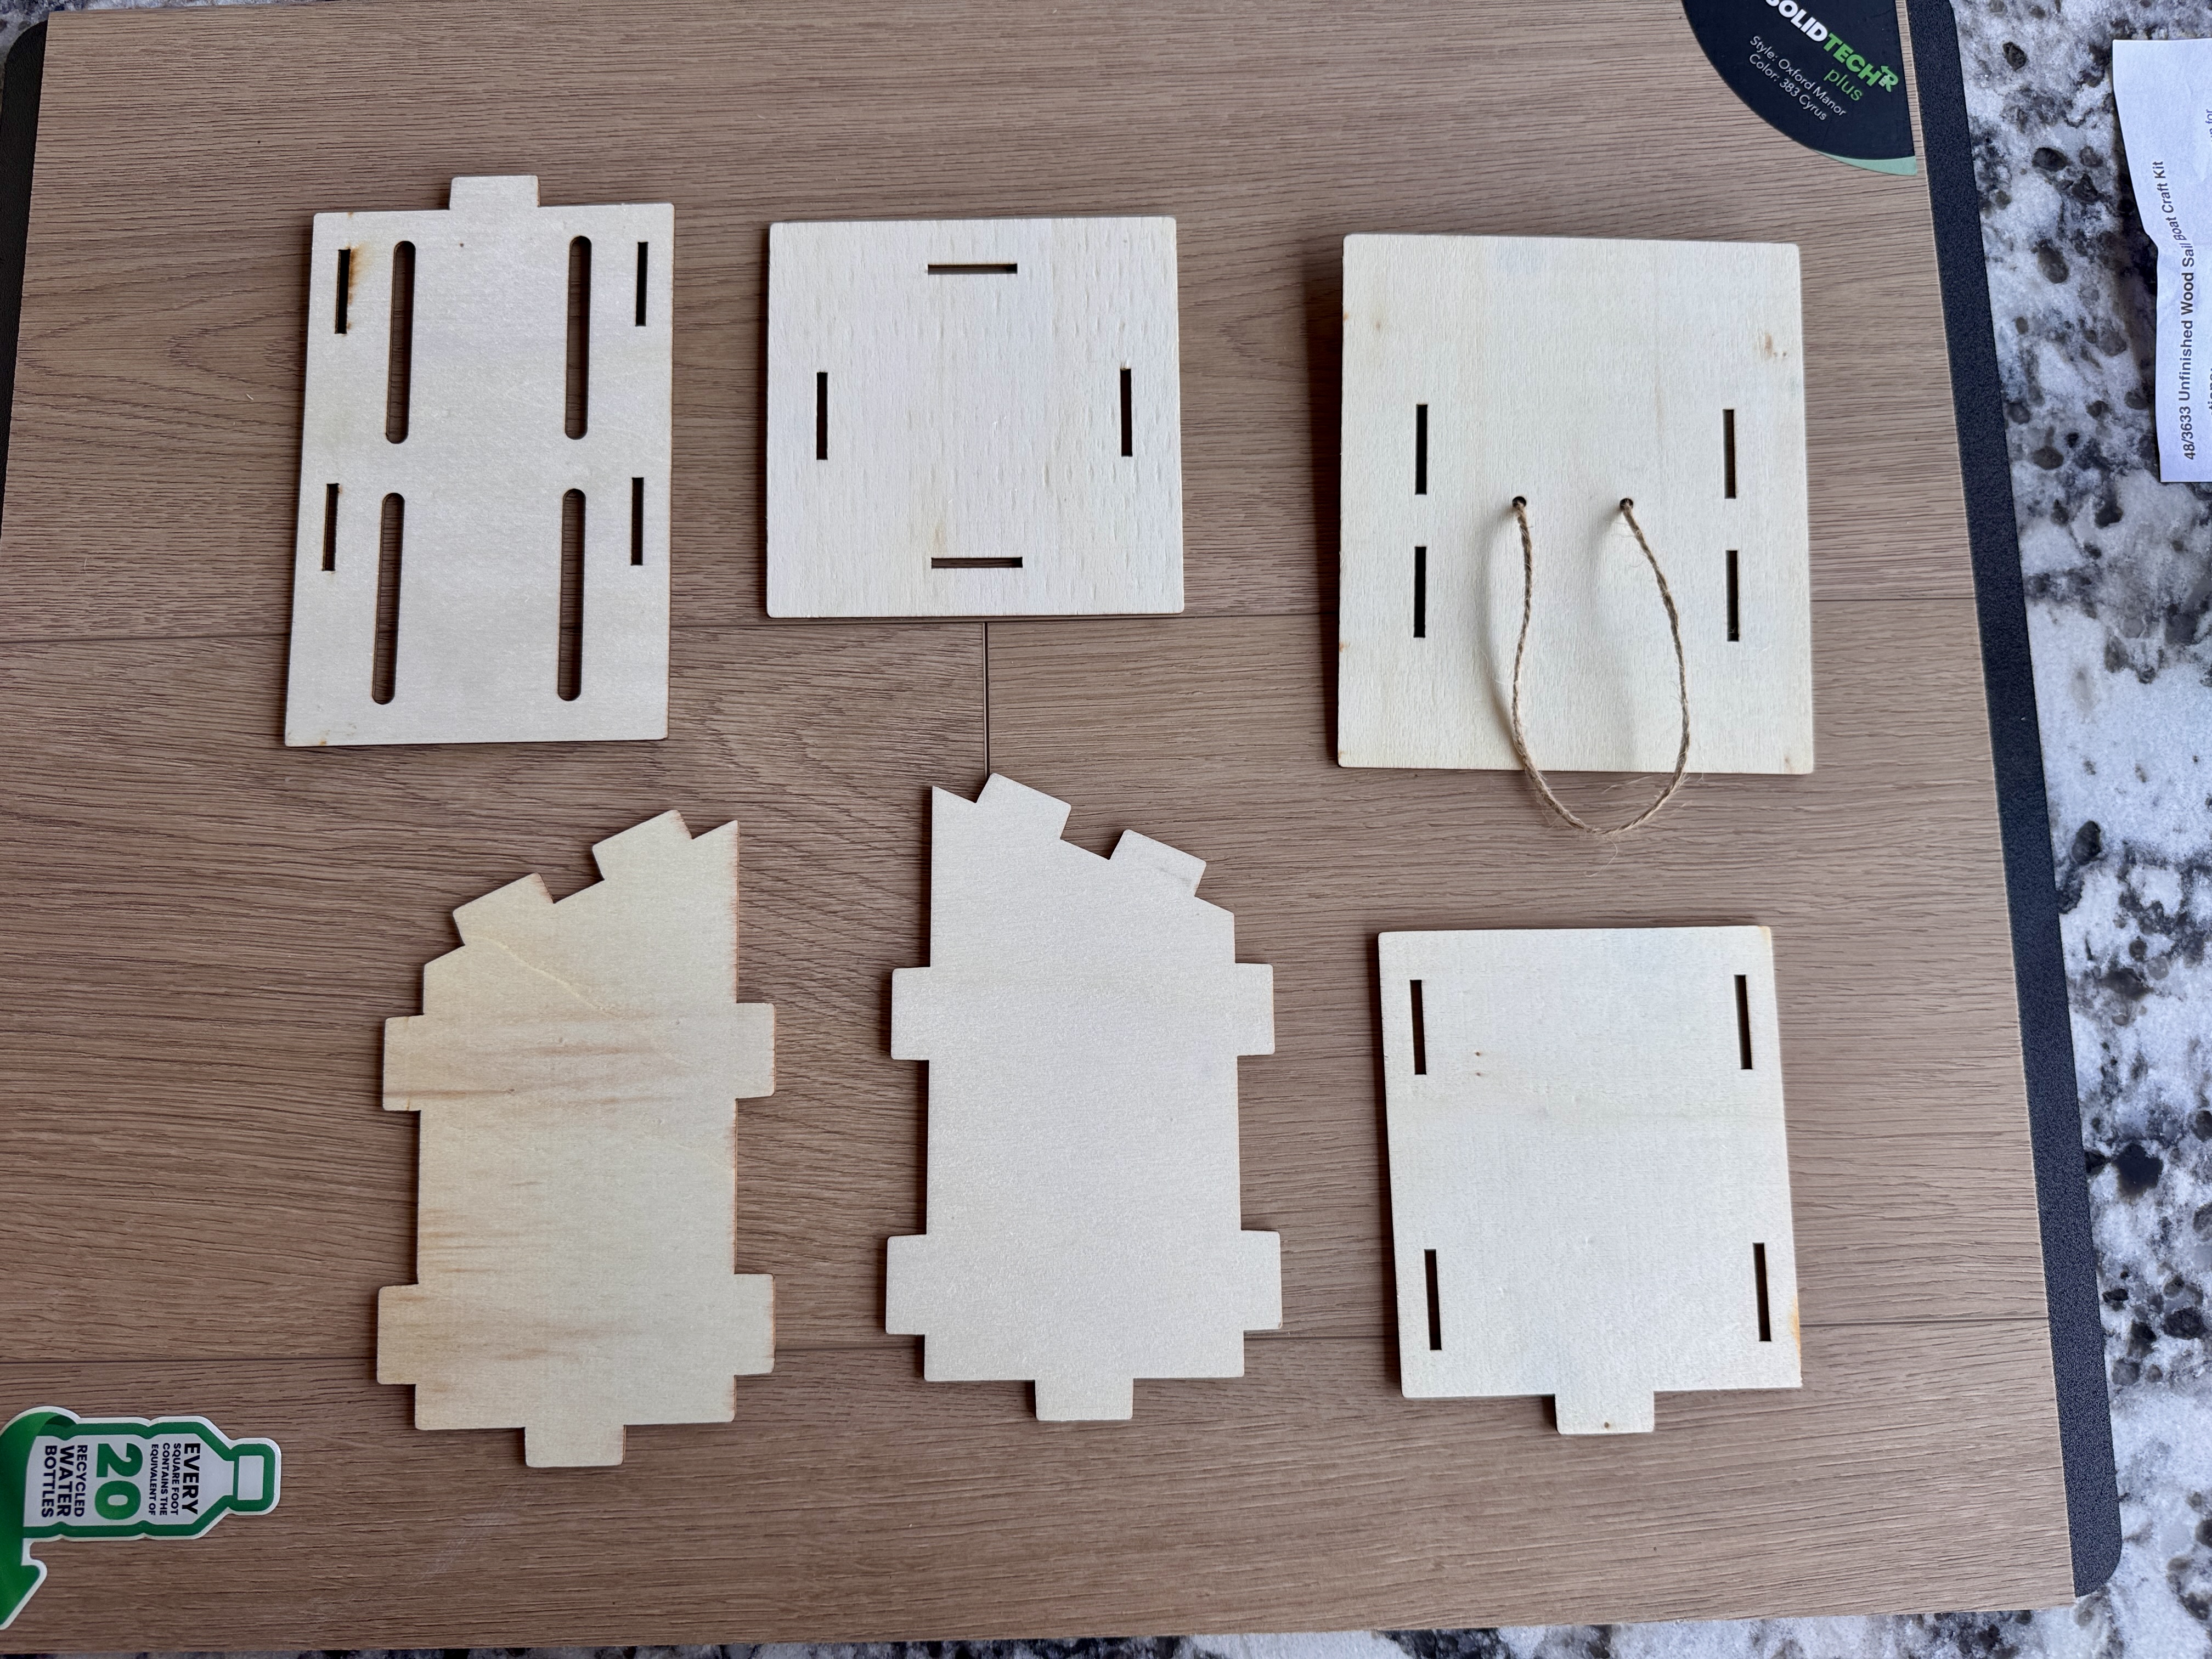
- Pre-cut butterfly house kit pieces
- Two Side Pieces (A & B)
- Back Piece (C)
- Front Piece with long holes (D)
- Botton Square Piece (E)
- Top Piece (F)
- String
- Wood glue
- Paint
Step-by-Step Instructions
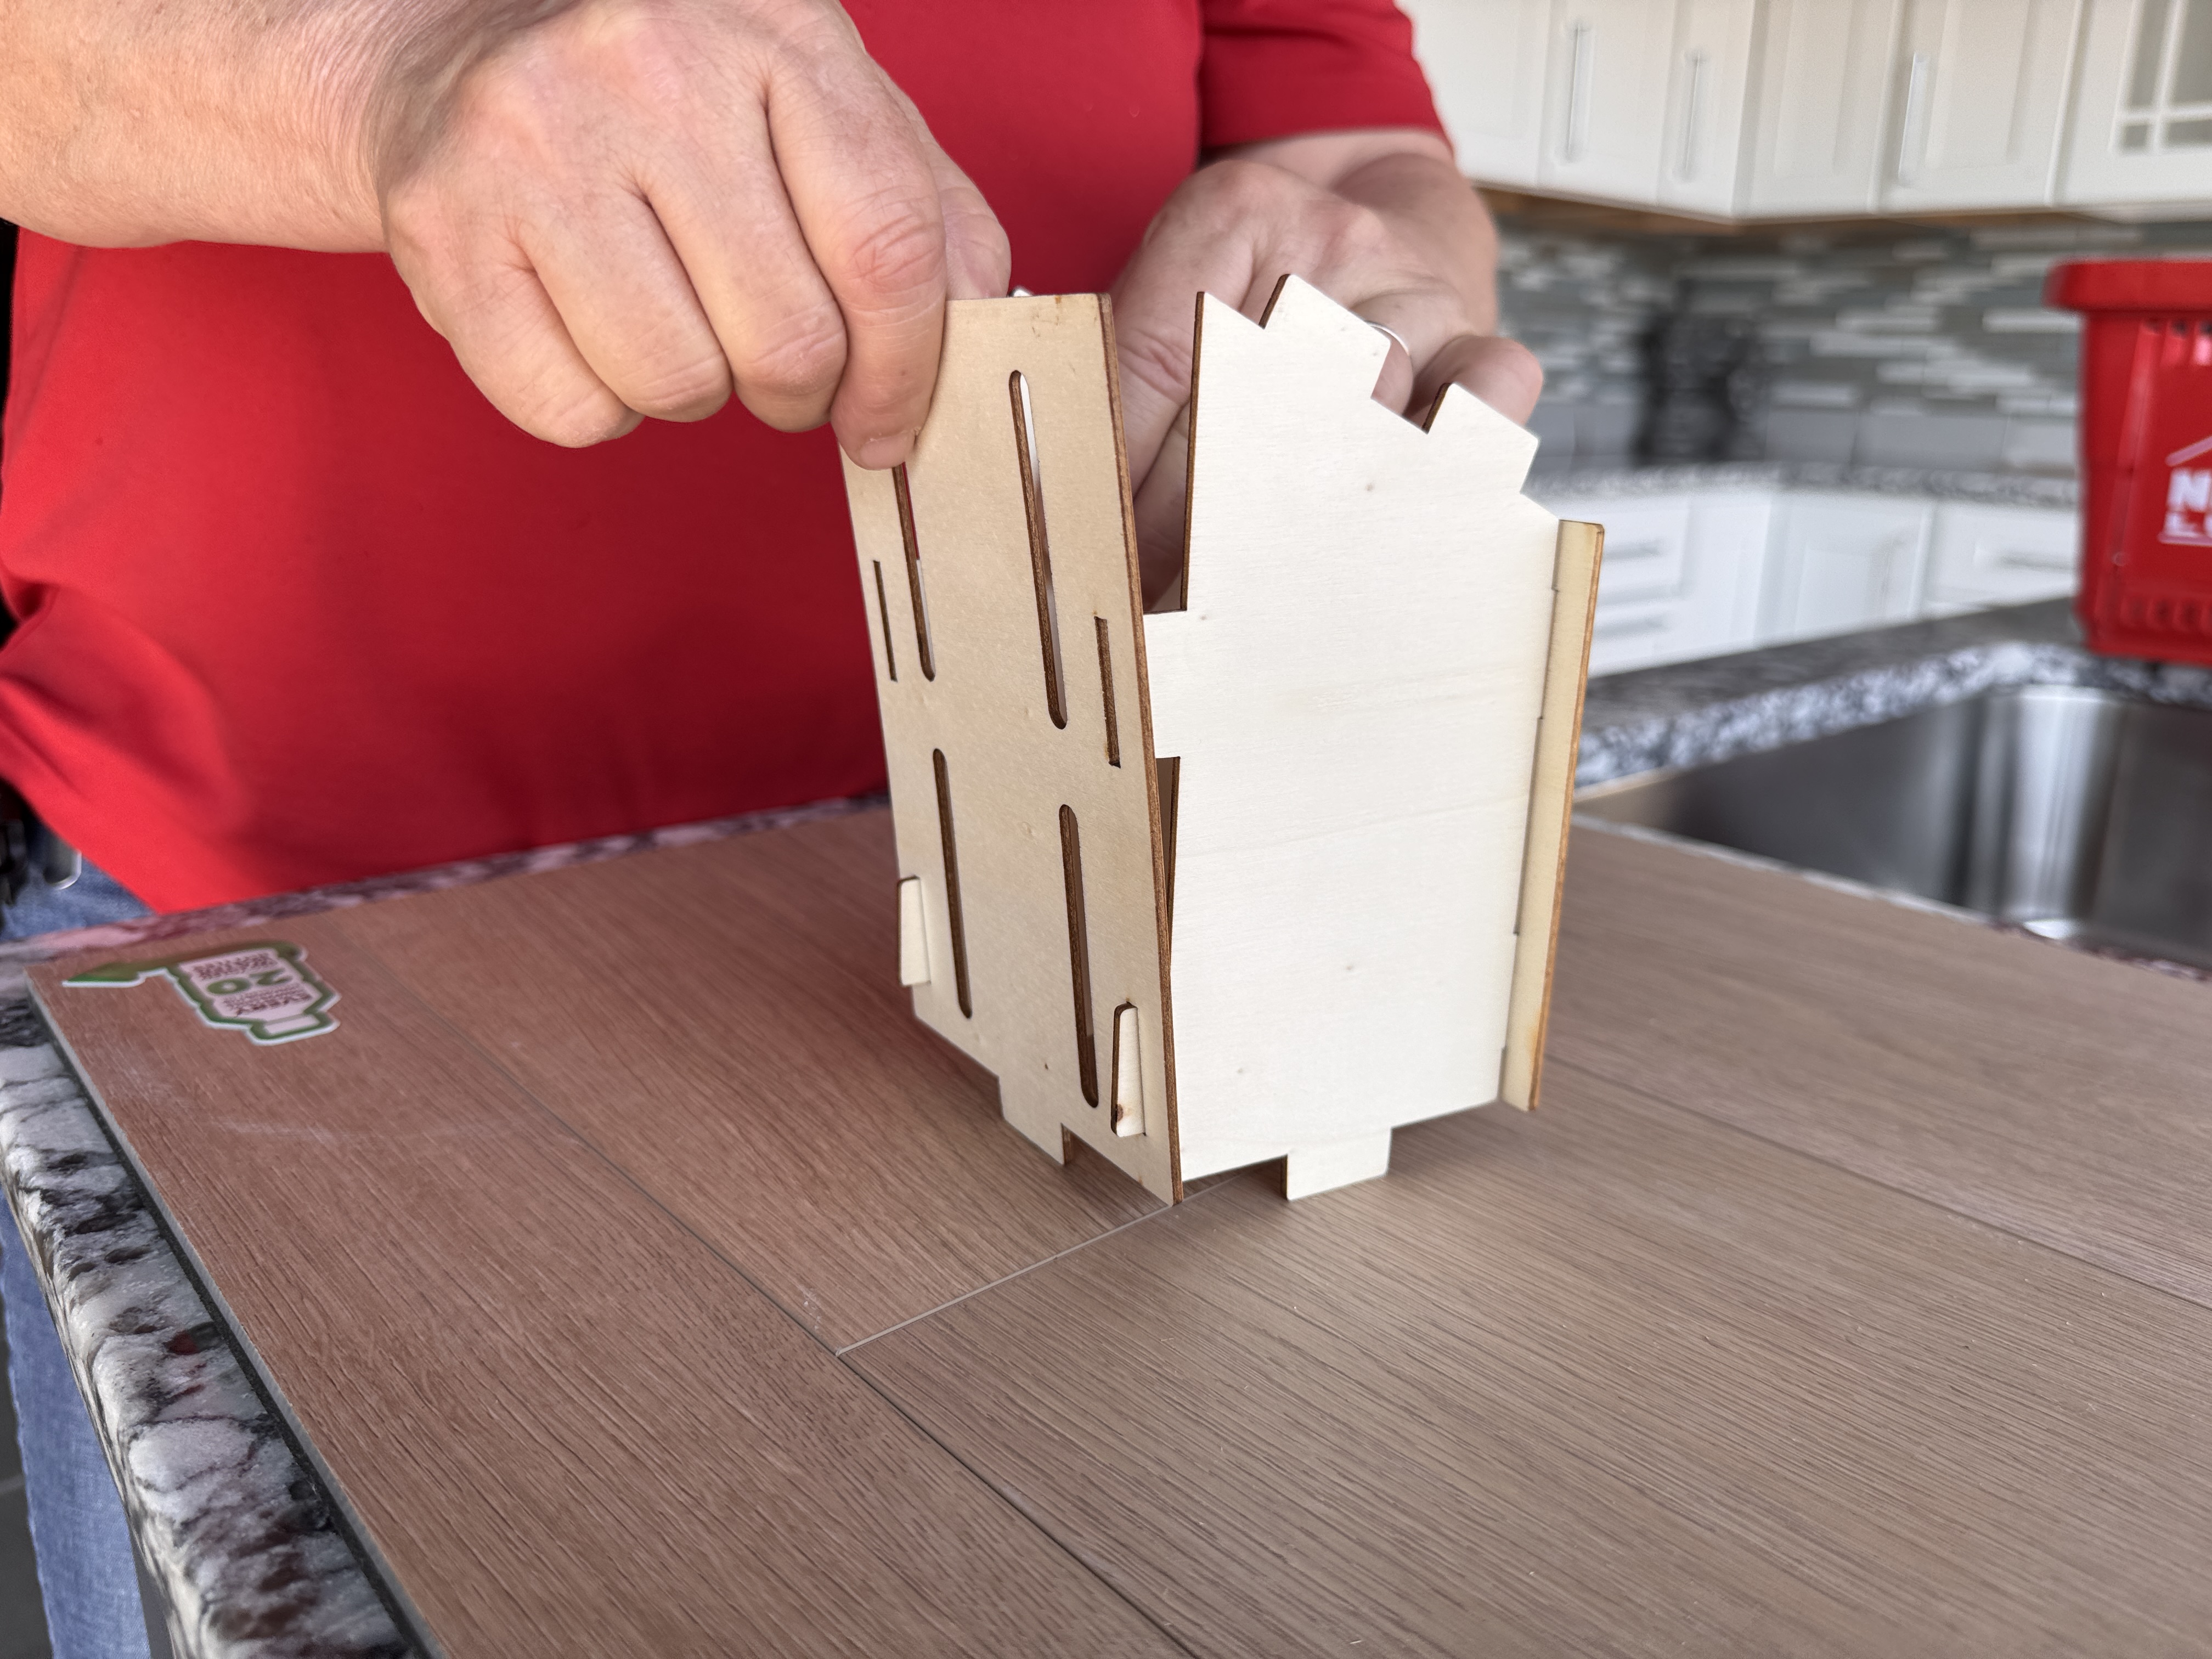
Step 1: Assemble the Sides and Back
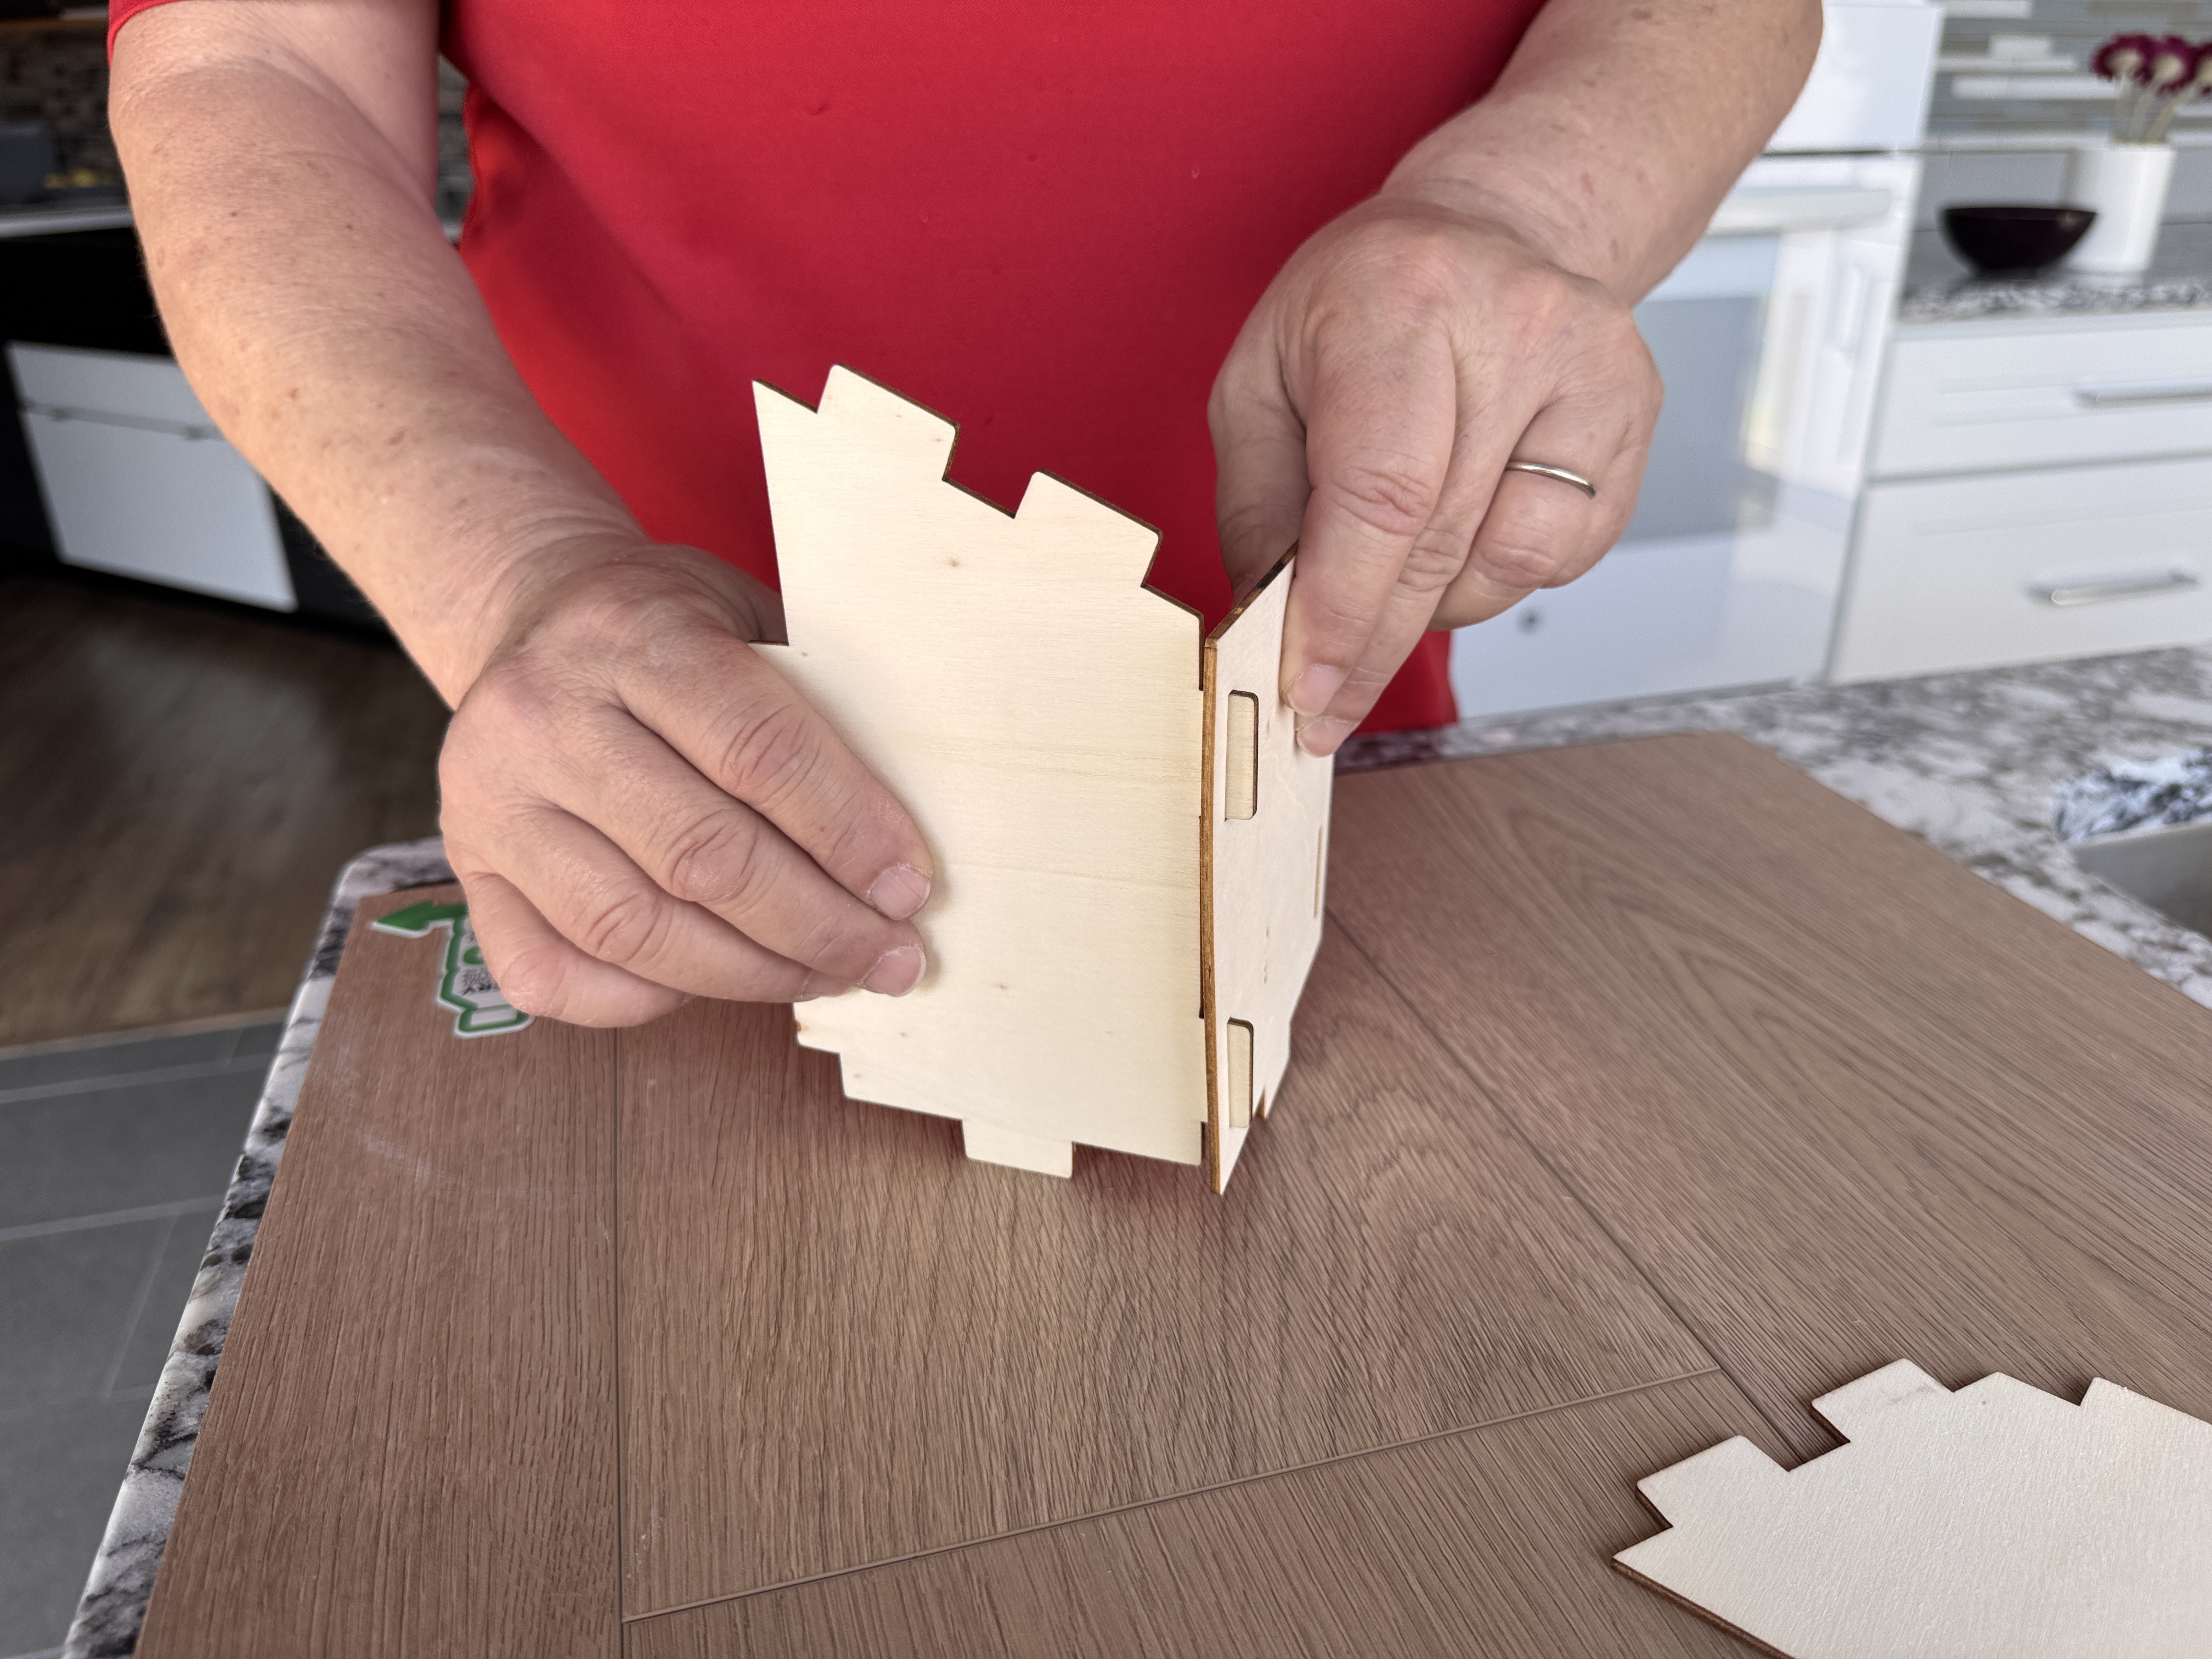
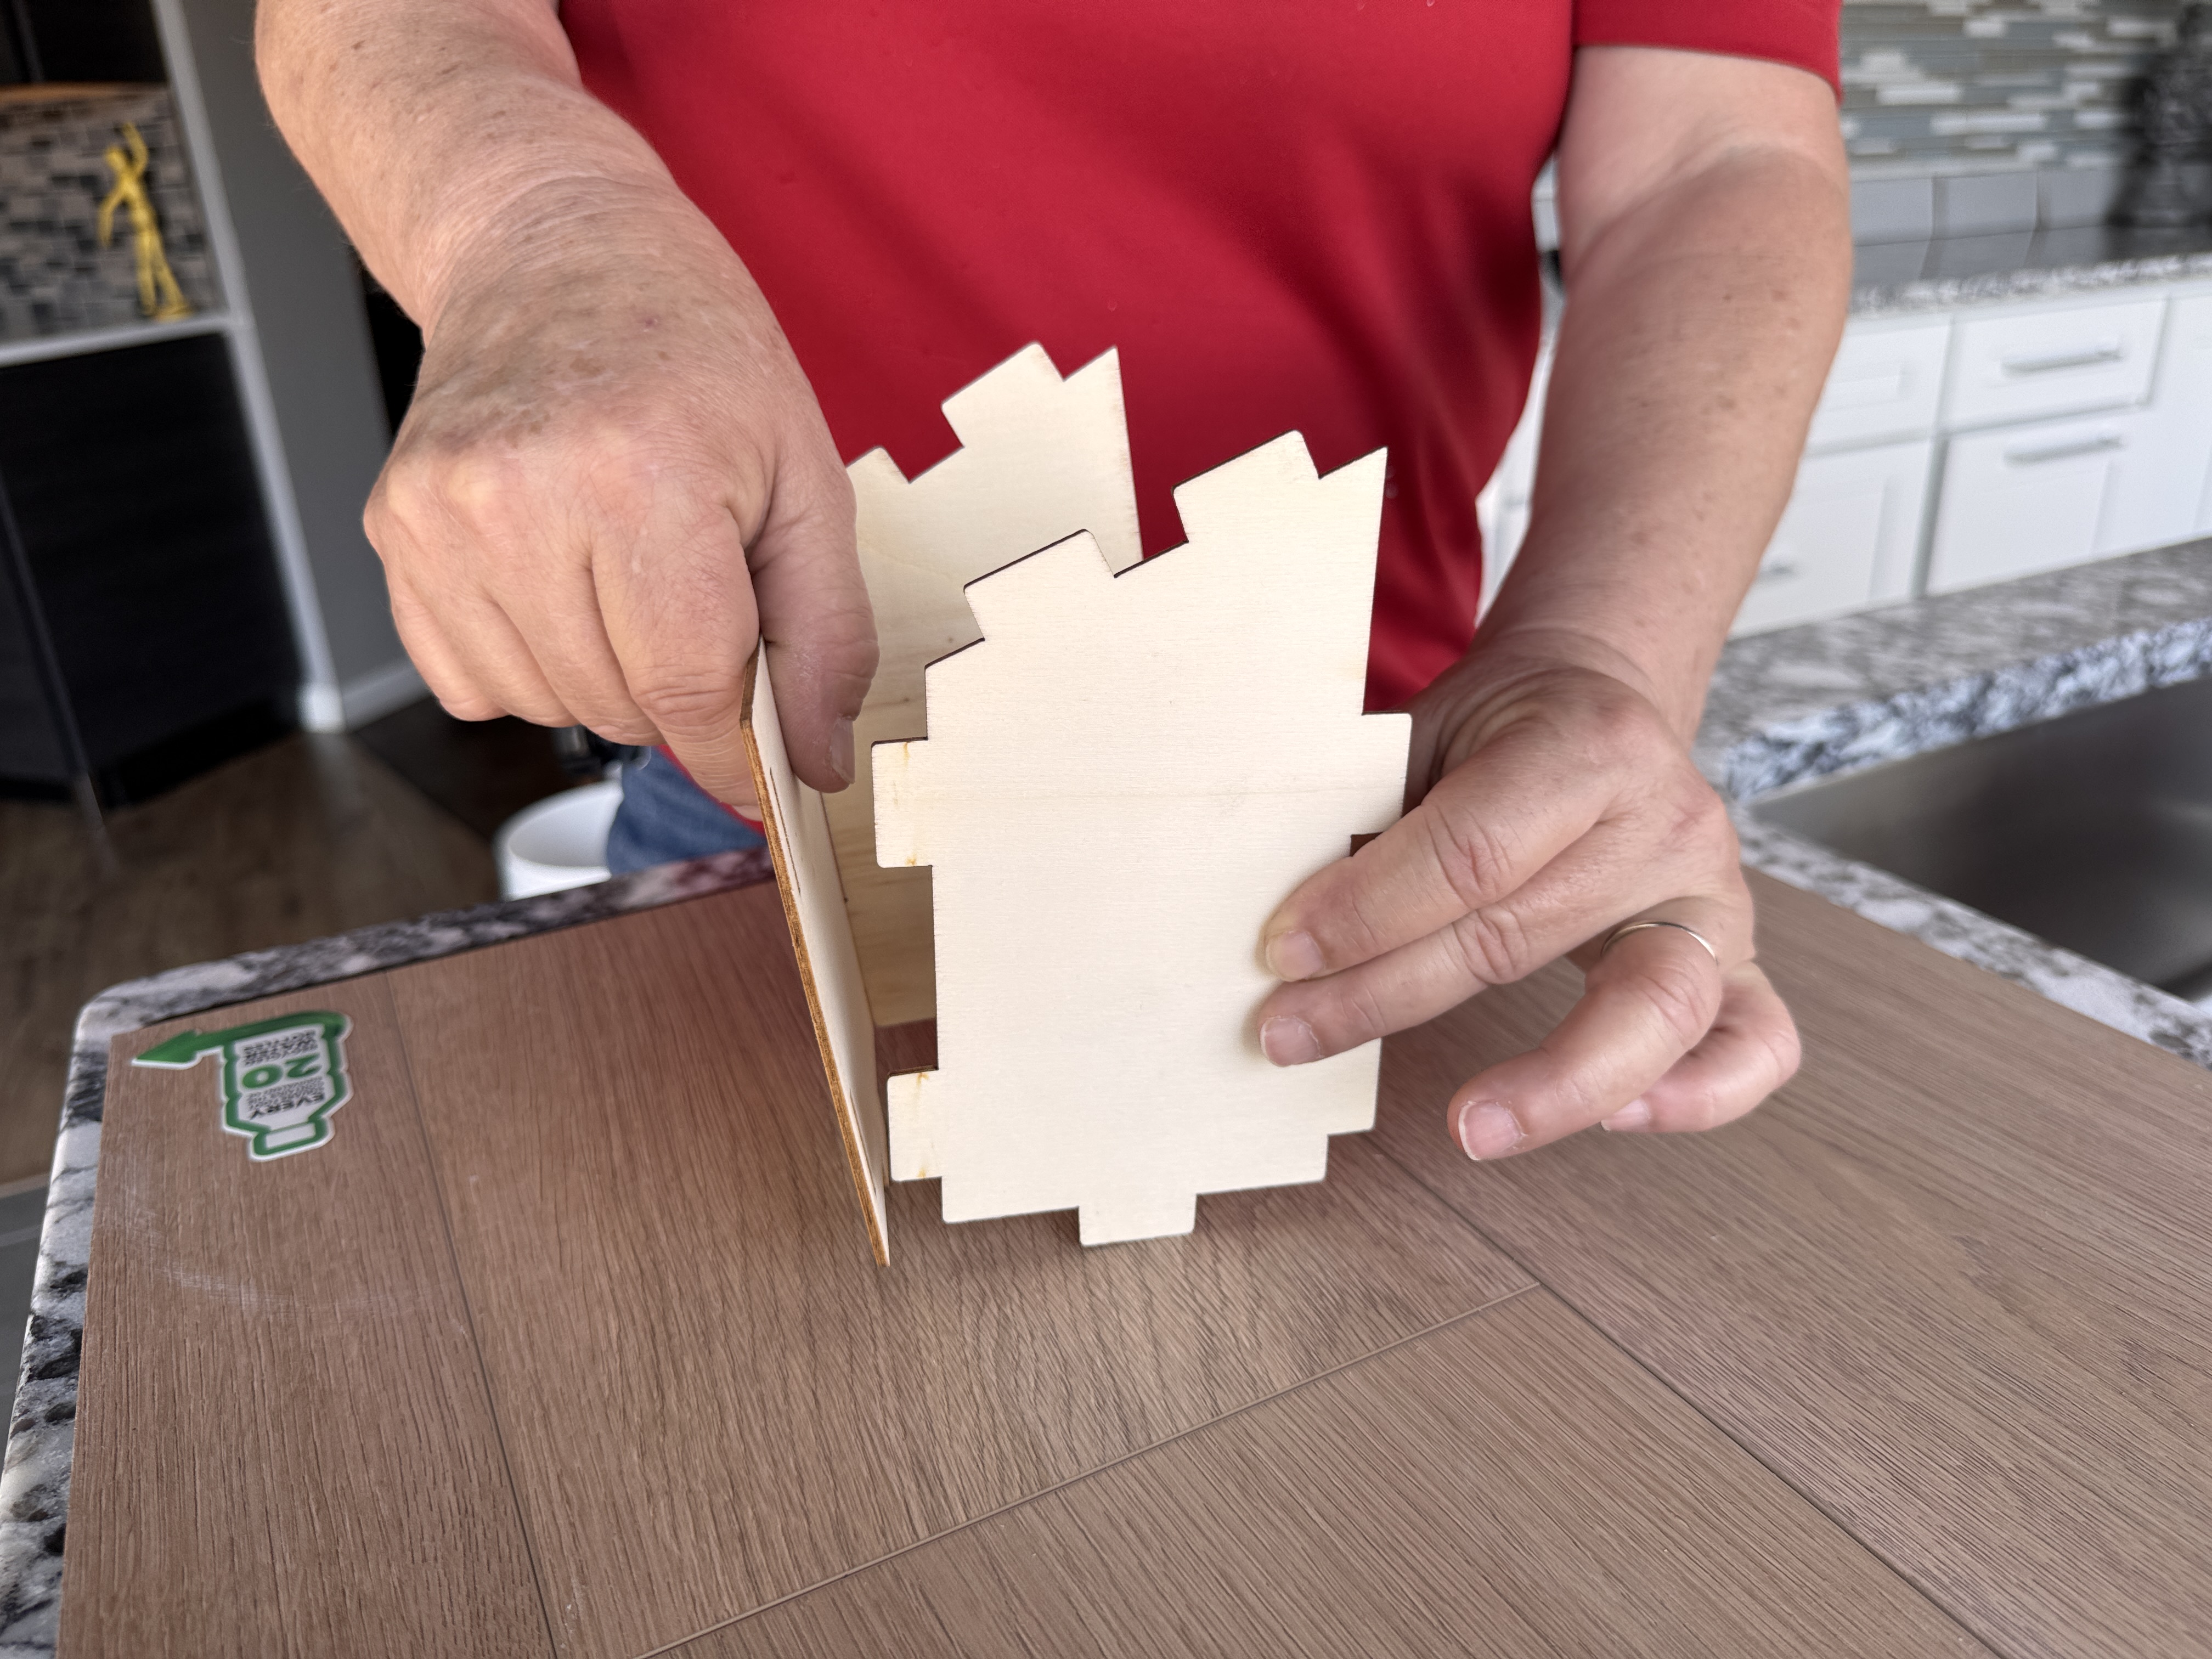
Begin by attaching Side Piece A to Back Piece C. Ensure that Piece C fits into the smaller edge of Piece A and the joint is tight. Repeat with Side Piece B on the opposite side. If desired, apply glue to the entrance holes for added stability.
Step 2: Add the Front and Bottom Pieces
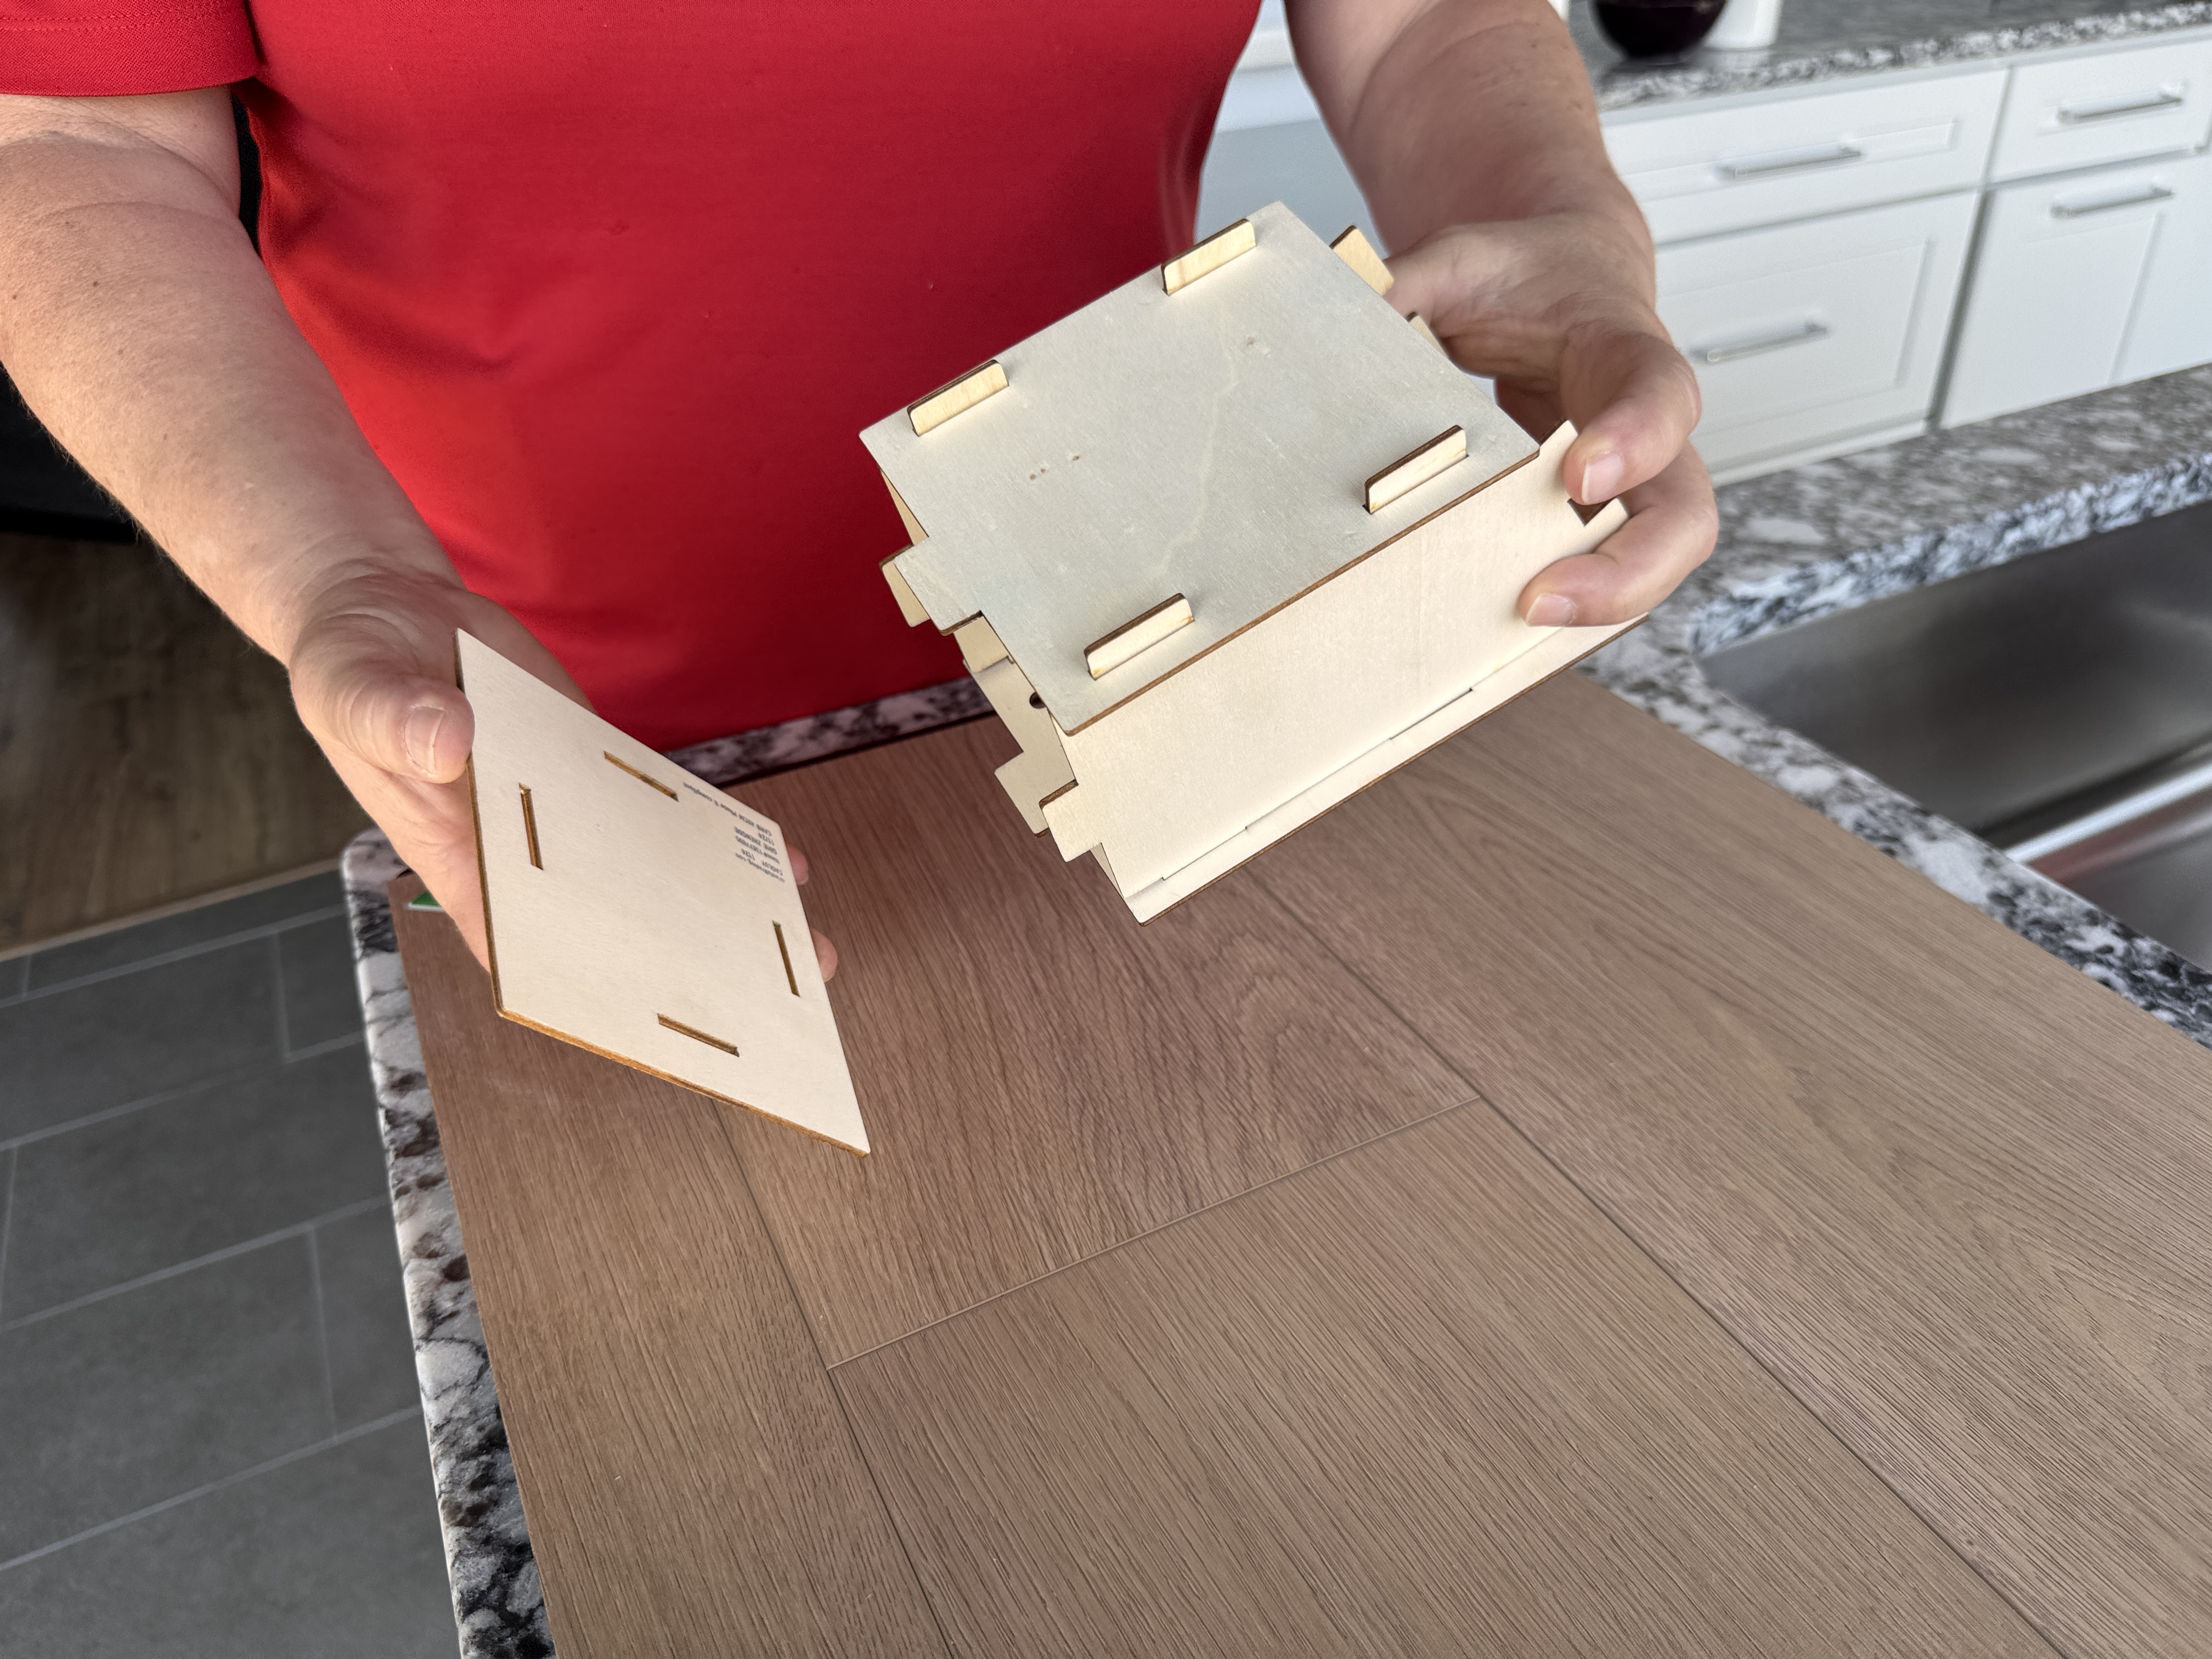
With the sides and back securely in place, attach Front Piece D. This panel includes narrow entrance slots that are sized for butterflies but help keep out larger predators. Once the front panel is attached, insert Bottom Piece E into the entrance slots. Use glue at the joints if preferred.
Step 3: Tie the Hanging Cord
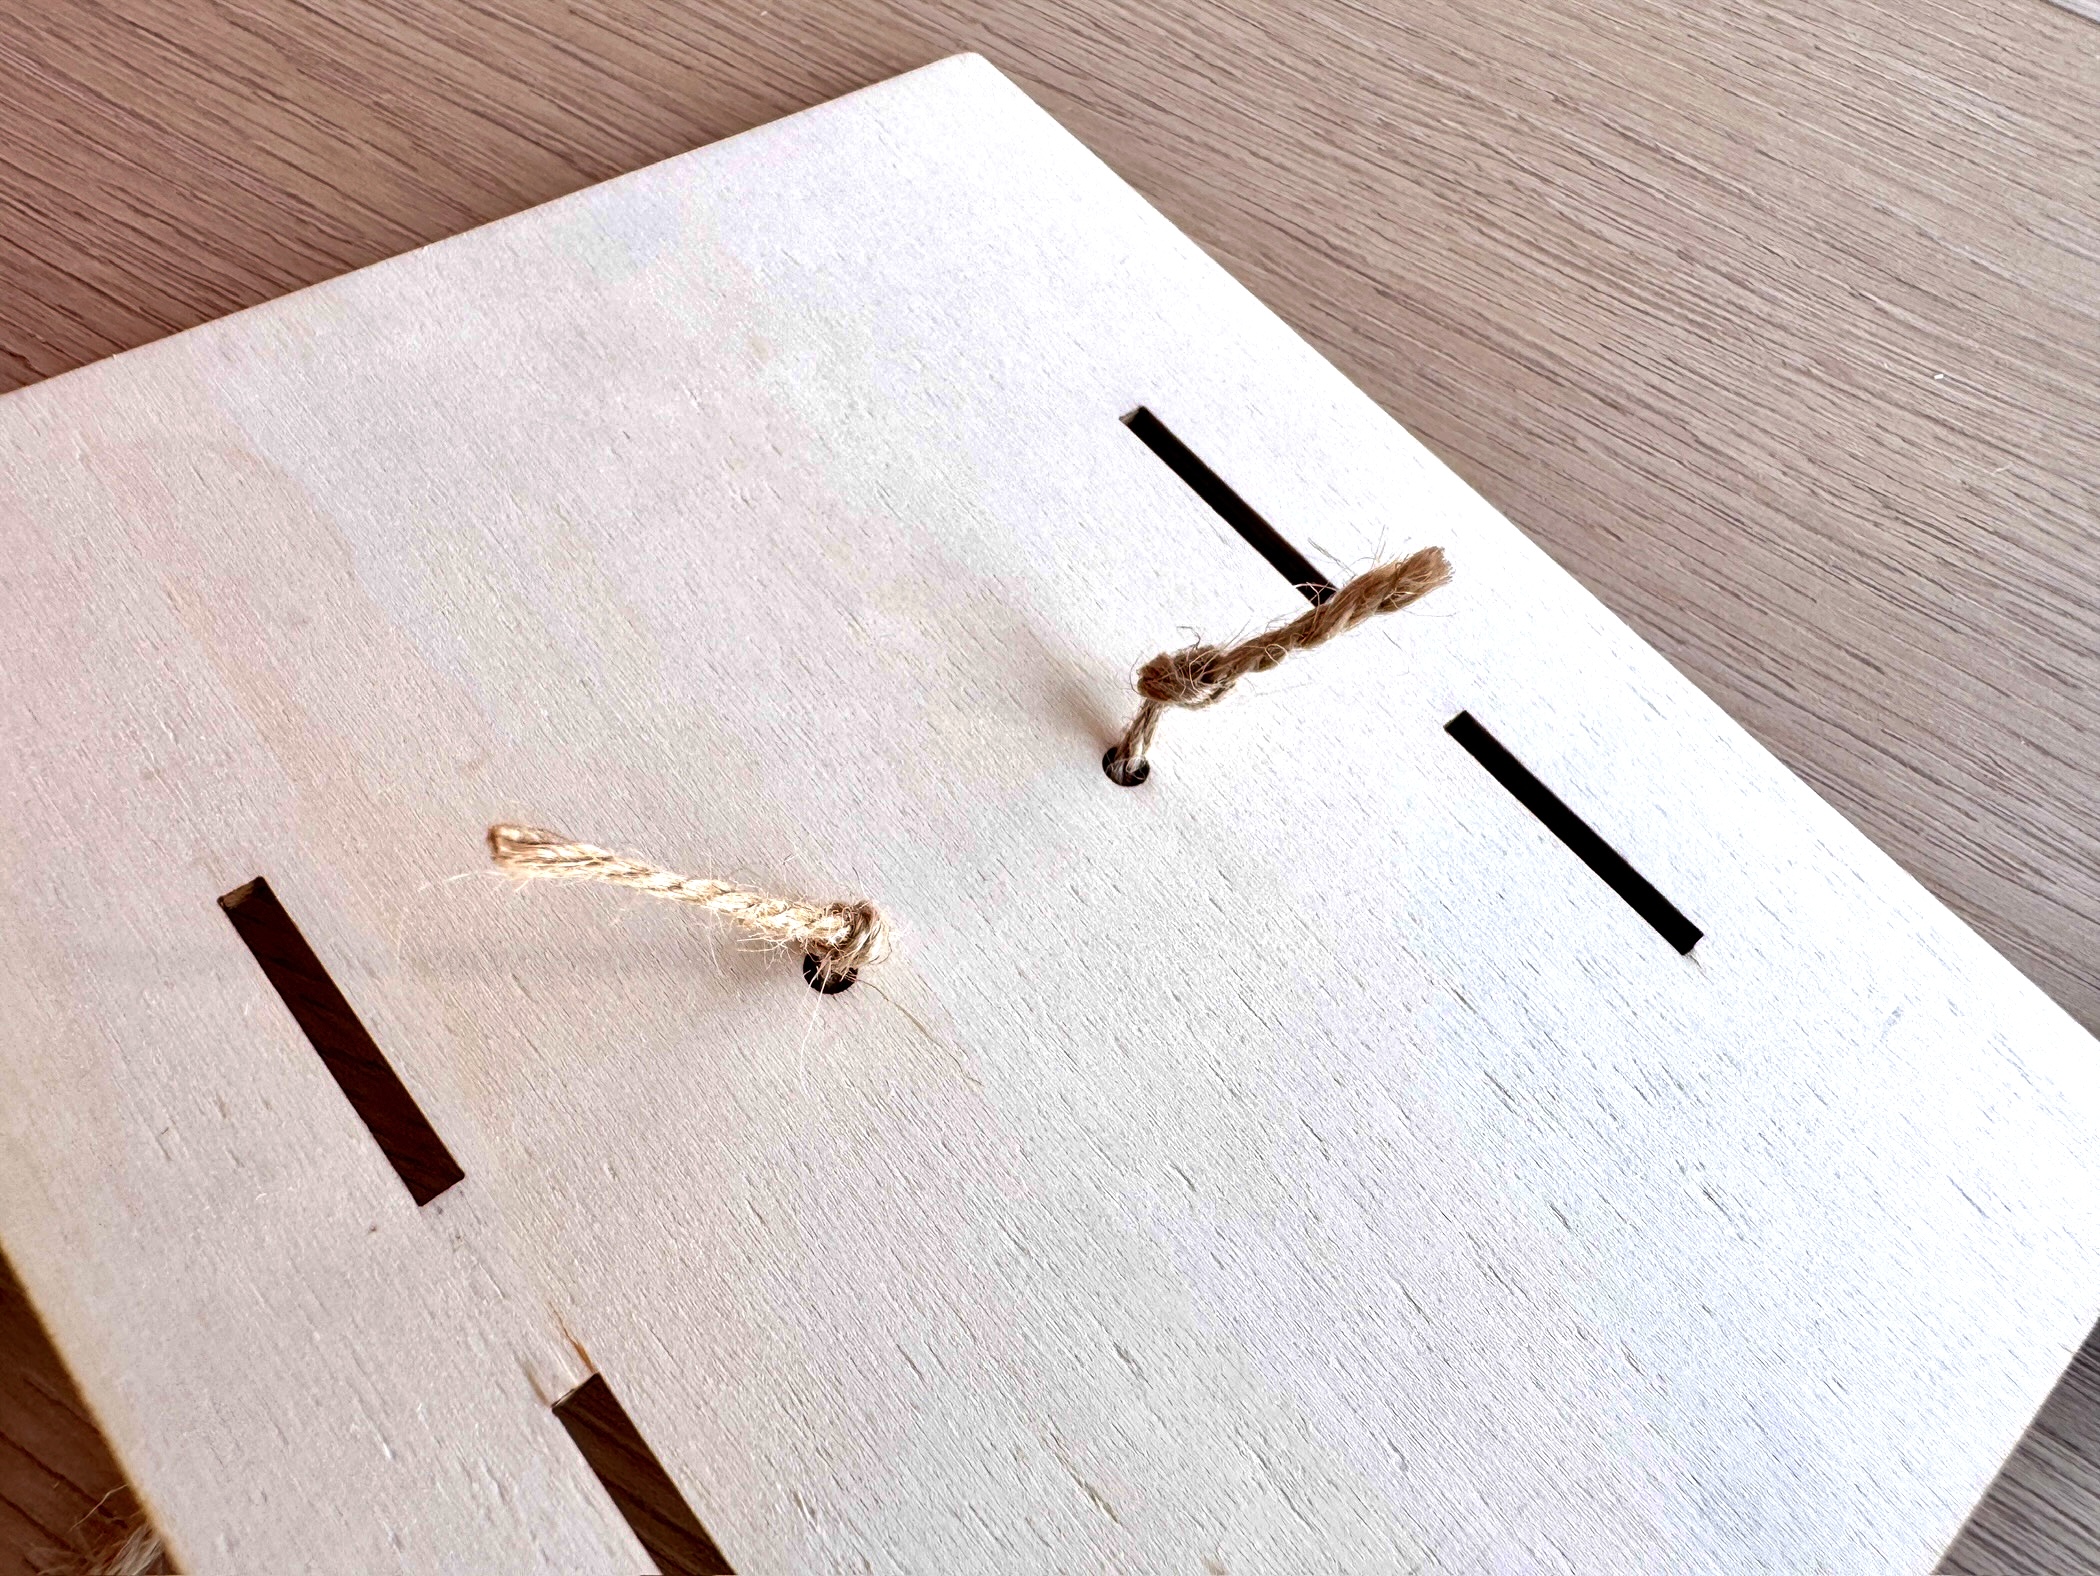
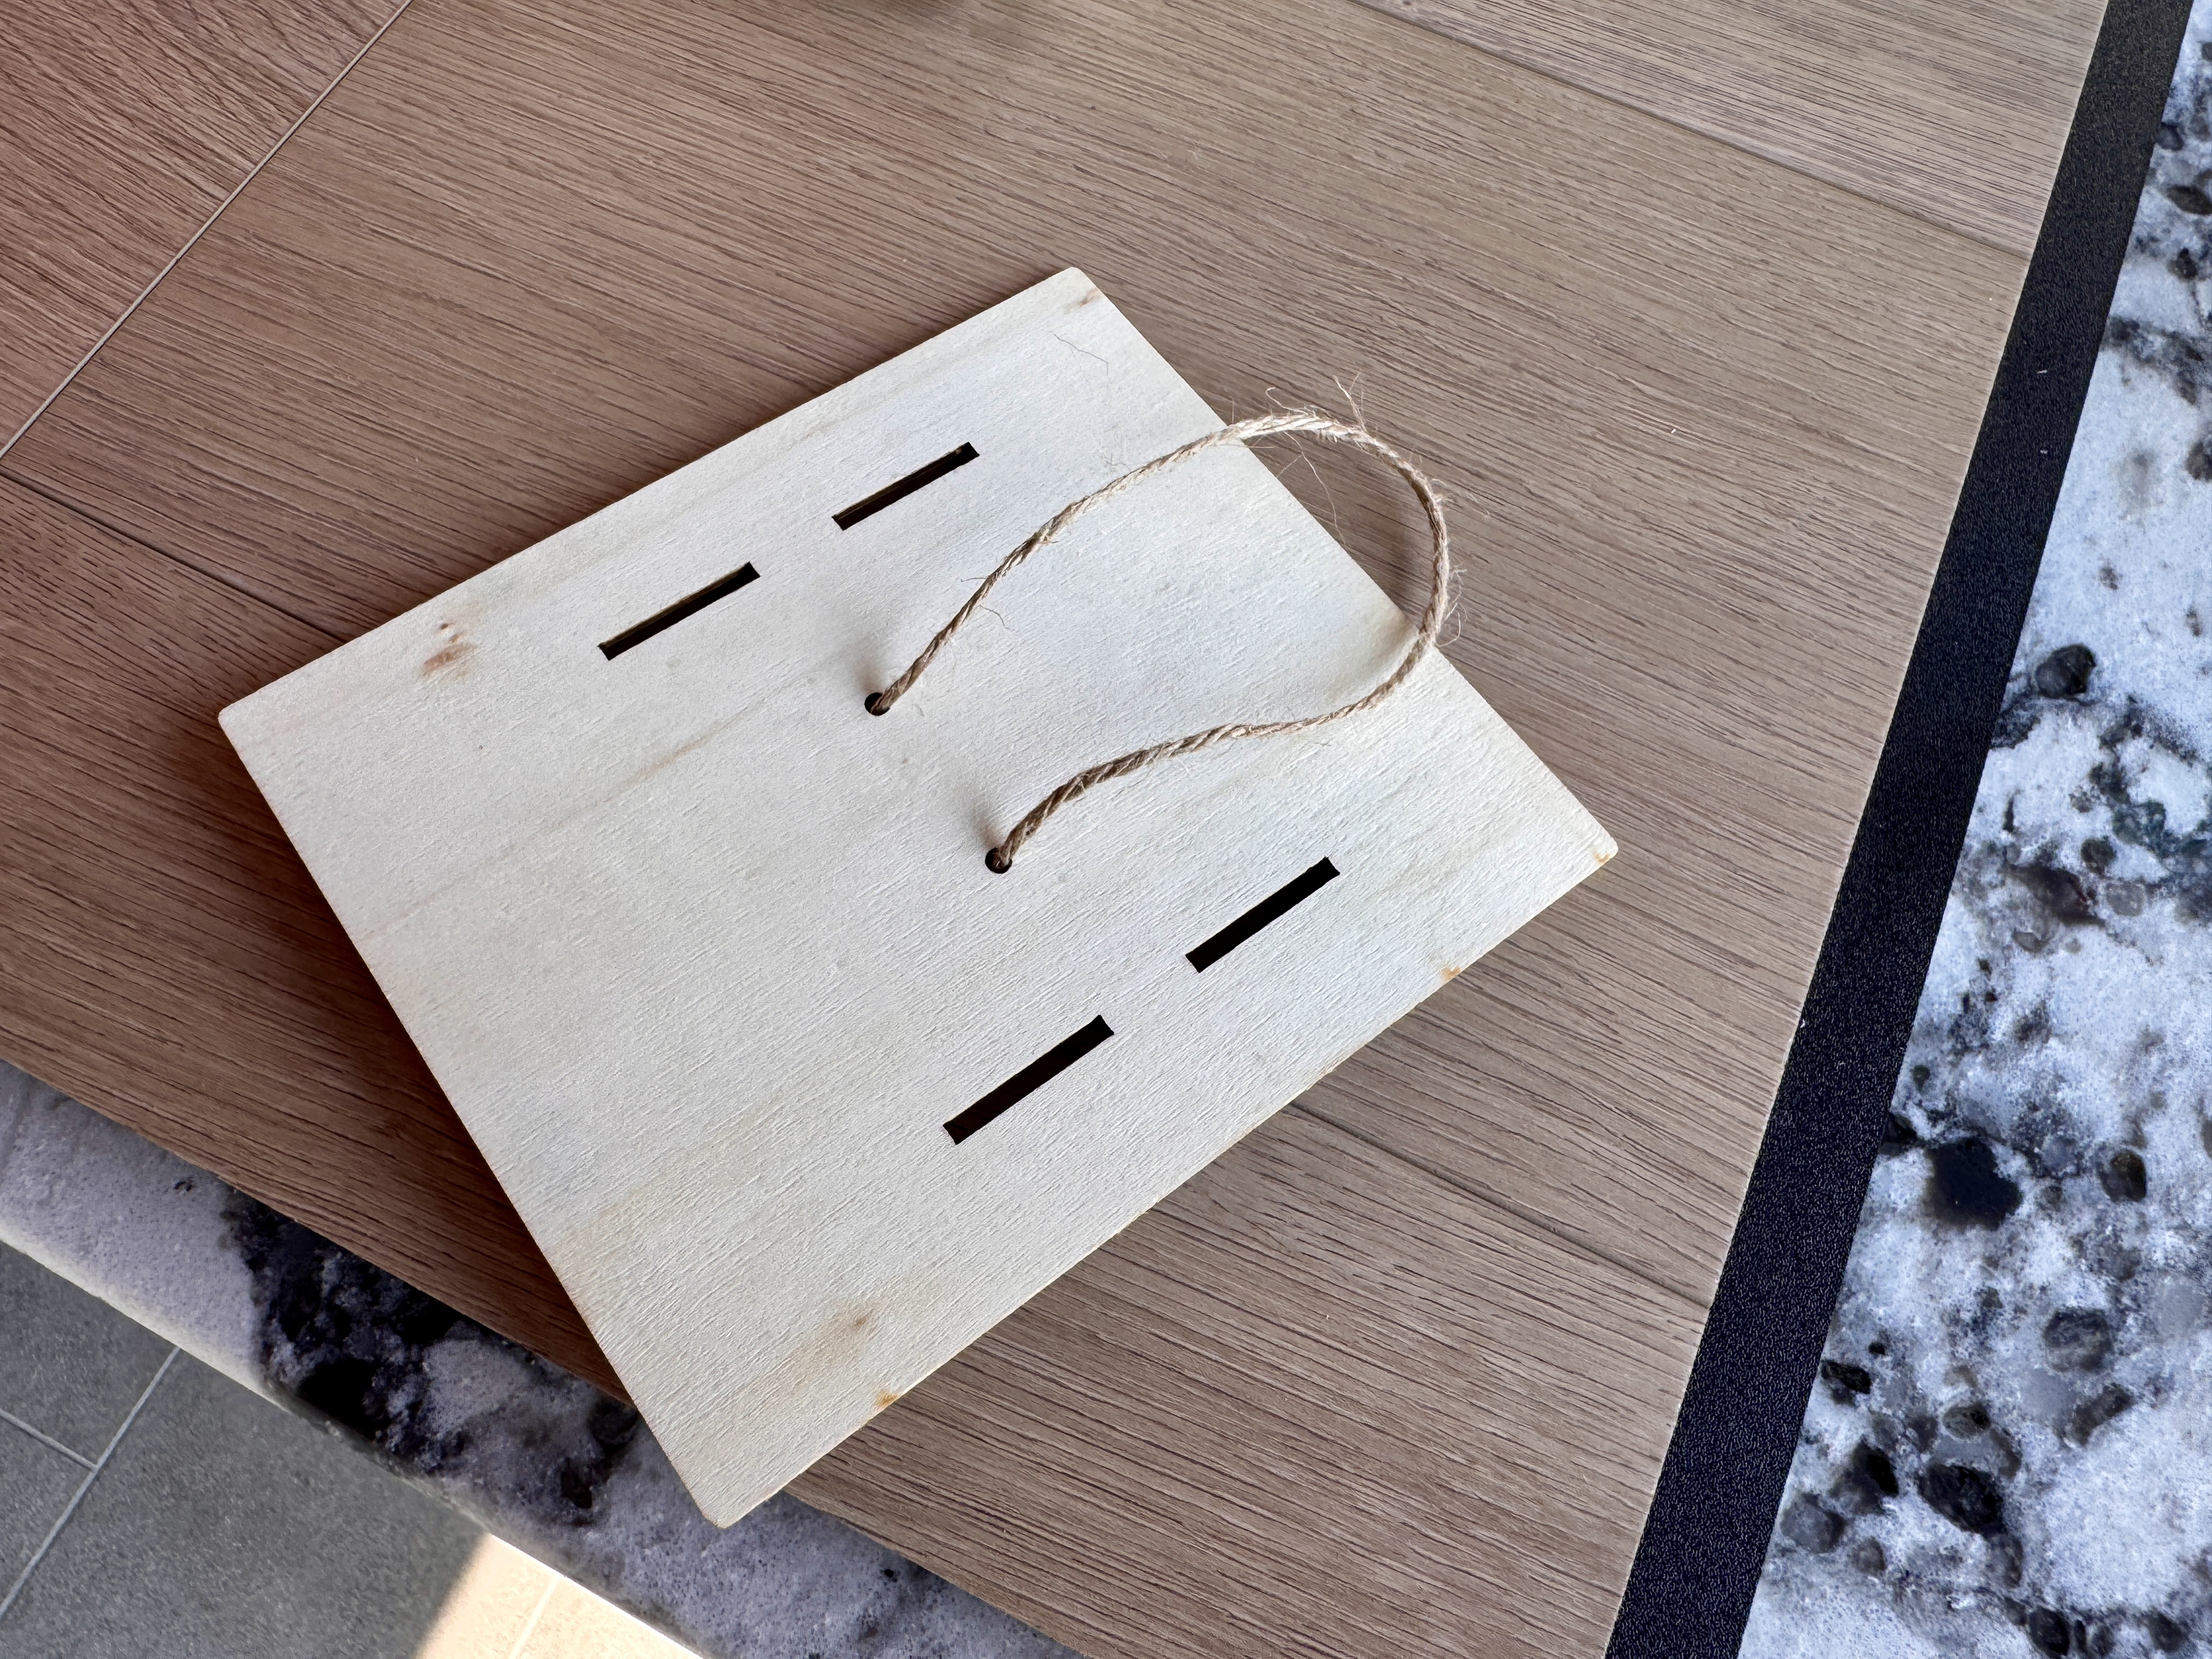
Thread each end of the provided cord through the holes in the Roof Piece. Tie knots on each end to secure it in place for hanging.
Step 4: Attach the Roof
Finish by attaching Top Piece F (the roof) to the assembled structure. Ensure all edges are aligned and tight. Again, glue may be used at the entrance holes for added security.
Step 5: Decorate Your Butterfly House!
Now that your butterfly house is assembled, it’s time to make it your own!
Paint it in bright colors, add glitter, stickers, or any decorations you like. Get creative and give your butterfly friends a stylish new home!
Tips for Success
For Both Projects:
- Take your time with each step—rushing leads to mistakes
- Allow adequate drying time between steps
- Work in a dust-free environment when painting
- Keep young children supervised around tools and materials
Sailboat Specific:
- Test your boat in shallow water first
- Consider waterproofing the hull for extended water play
- Adjust sail position for optimal wind catching
Butterfly House Specific:
- Position near butterfly-attracting plants like lantana, zinnia, or butterfly bush
- Clean out old materials annually in late fall
- Avoid using pesticides in the surrounding area
Conclusion
These two projects offer wonderful opportunities to create functional items while developing crafting skills. The sailboat provides hours of outdoor play and teaches basic principles of wind and water dynamics. The butterfly house contributes to local ecosystem health while offering a chance to observe these beautiful creatures up close.
Both projects can be completed over a weekend and make excellent gifts or additions to your own home and garden. The satisfaction of building something with your own hands, combined with the joy these items will bring, makes these projects truly worthwhile investments of your time and creativity.
Remember, the key to a great DIY project is patience, preparation, and enjoying every step along the way.
Happy building! At the Niehaus Lumber Little Builders Workshop, we love creating amazing things with your little builders—one fun project at a time!
Summer is the perfect time to engage in hands-on crafting projects that combine creativity with learning. Today, we'll walk you through two exciting DIY projects that are perfect for families, educators, or anyone looking to create something beautiful and functional. We'll cover how to build a classic wooden sailboat and construct an inviting butterfly house that will attract these magnificent pollinators to your garden.
Project 1: Building Your Wooden Sailboat
Materials You'll Need
- Pre-cut wooden sailboat kit pieces
- Sailboat base
- Mast Support
- Rudder Support
- Craft Stick
- Dowel Mast
- Squared Bead
- Fabric Sail
- Round Bead
- Wood glue
- Acrylic paints or wood stain
- Paintbrushes
Step-by-Step Instructions
Step 1: Attach the Base and Supports
Lay down the wooden sailboat base. Glue the mast support and rudder support into place, making sure the holes and pegs align correctly.
Step 2: Insert the Mast and Bead
Glue the wooden dowel mast into the mast support. Then slide the square wooden bead down the mast to your desired height.
Step 3: Add the Sail and Top Bead
Apply glue to the square bead to keep it in place. Slide the fabric sail onto the mast through the round hole. Then place the round bead on top of the mast to finish the top.
Step 4: Secure the Bottom of the Sail
Thread the wood craft stick through the holes at the bottom of the sail. Glue the stick into the square bead, then glue the sail to the stick. Let everything dry completely.
Step 5: Time to Decorate!
Once your sailboat is dry, it’s time to decorate! Use paint, stickers, or any fun materials to make it uniquely yours.
Project 2: Constructing Your Butterfly House
Materials You'll Need
- Pre-cut butterfly house kit pieces
- Two Side Pieces (A & B)
- Back Piece (C)
- Front Piece with long holes (D)
- Botton Square Piece (E)
- Top Piece (F)
- String
- Wood glue
- Paint
Step-by-Step Instructions
Step 1: Assemble the Sides and Back
Begin by attaching Side Piece A to Back Piece C. Ensure that Piece C fits into the smaller edge of Piece A and the joint is tight. Repeat with Side Piece B on the opposite side. If desired, apply glue to the entrance holes for added stability.
Step 2: Add the Front and Bottom Pieces
With the sides and back securely in place, attach Front Piece D. This panel includes narrow entrance slots that are sized for butterflies but help keep out larger predators. Once the front panel is attached, insert Bottom Piece E into the entrance slots. Use glue at the joints if preferred.
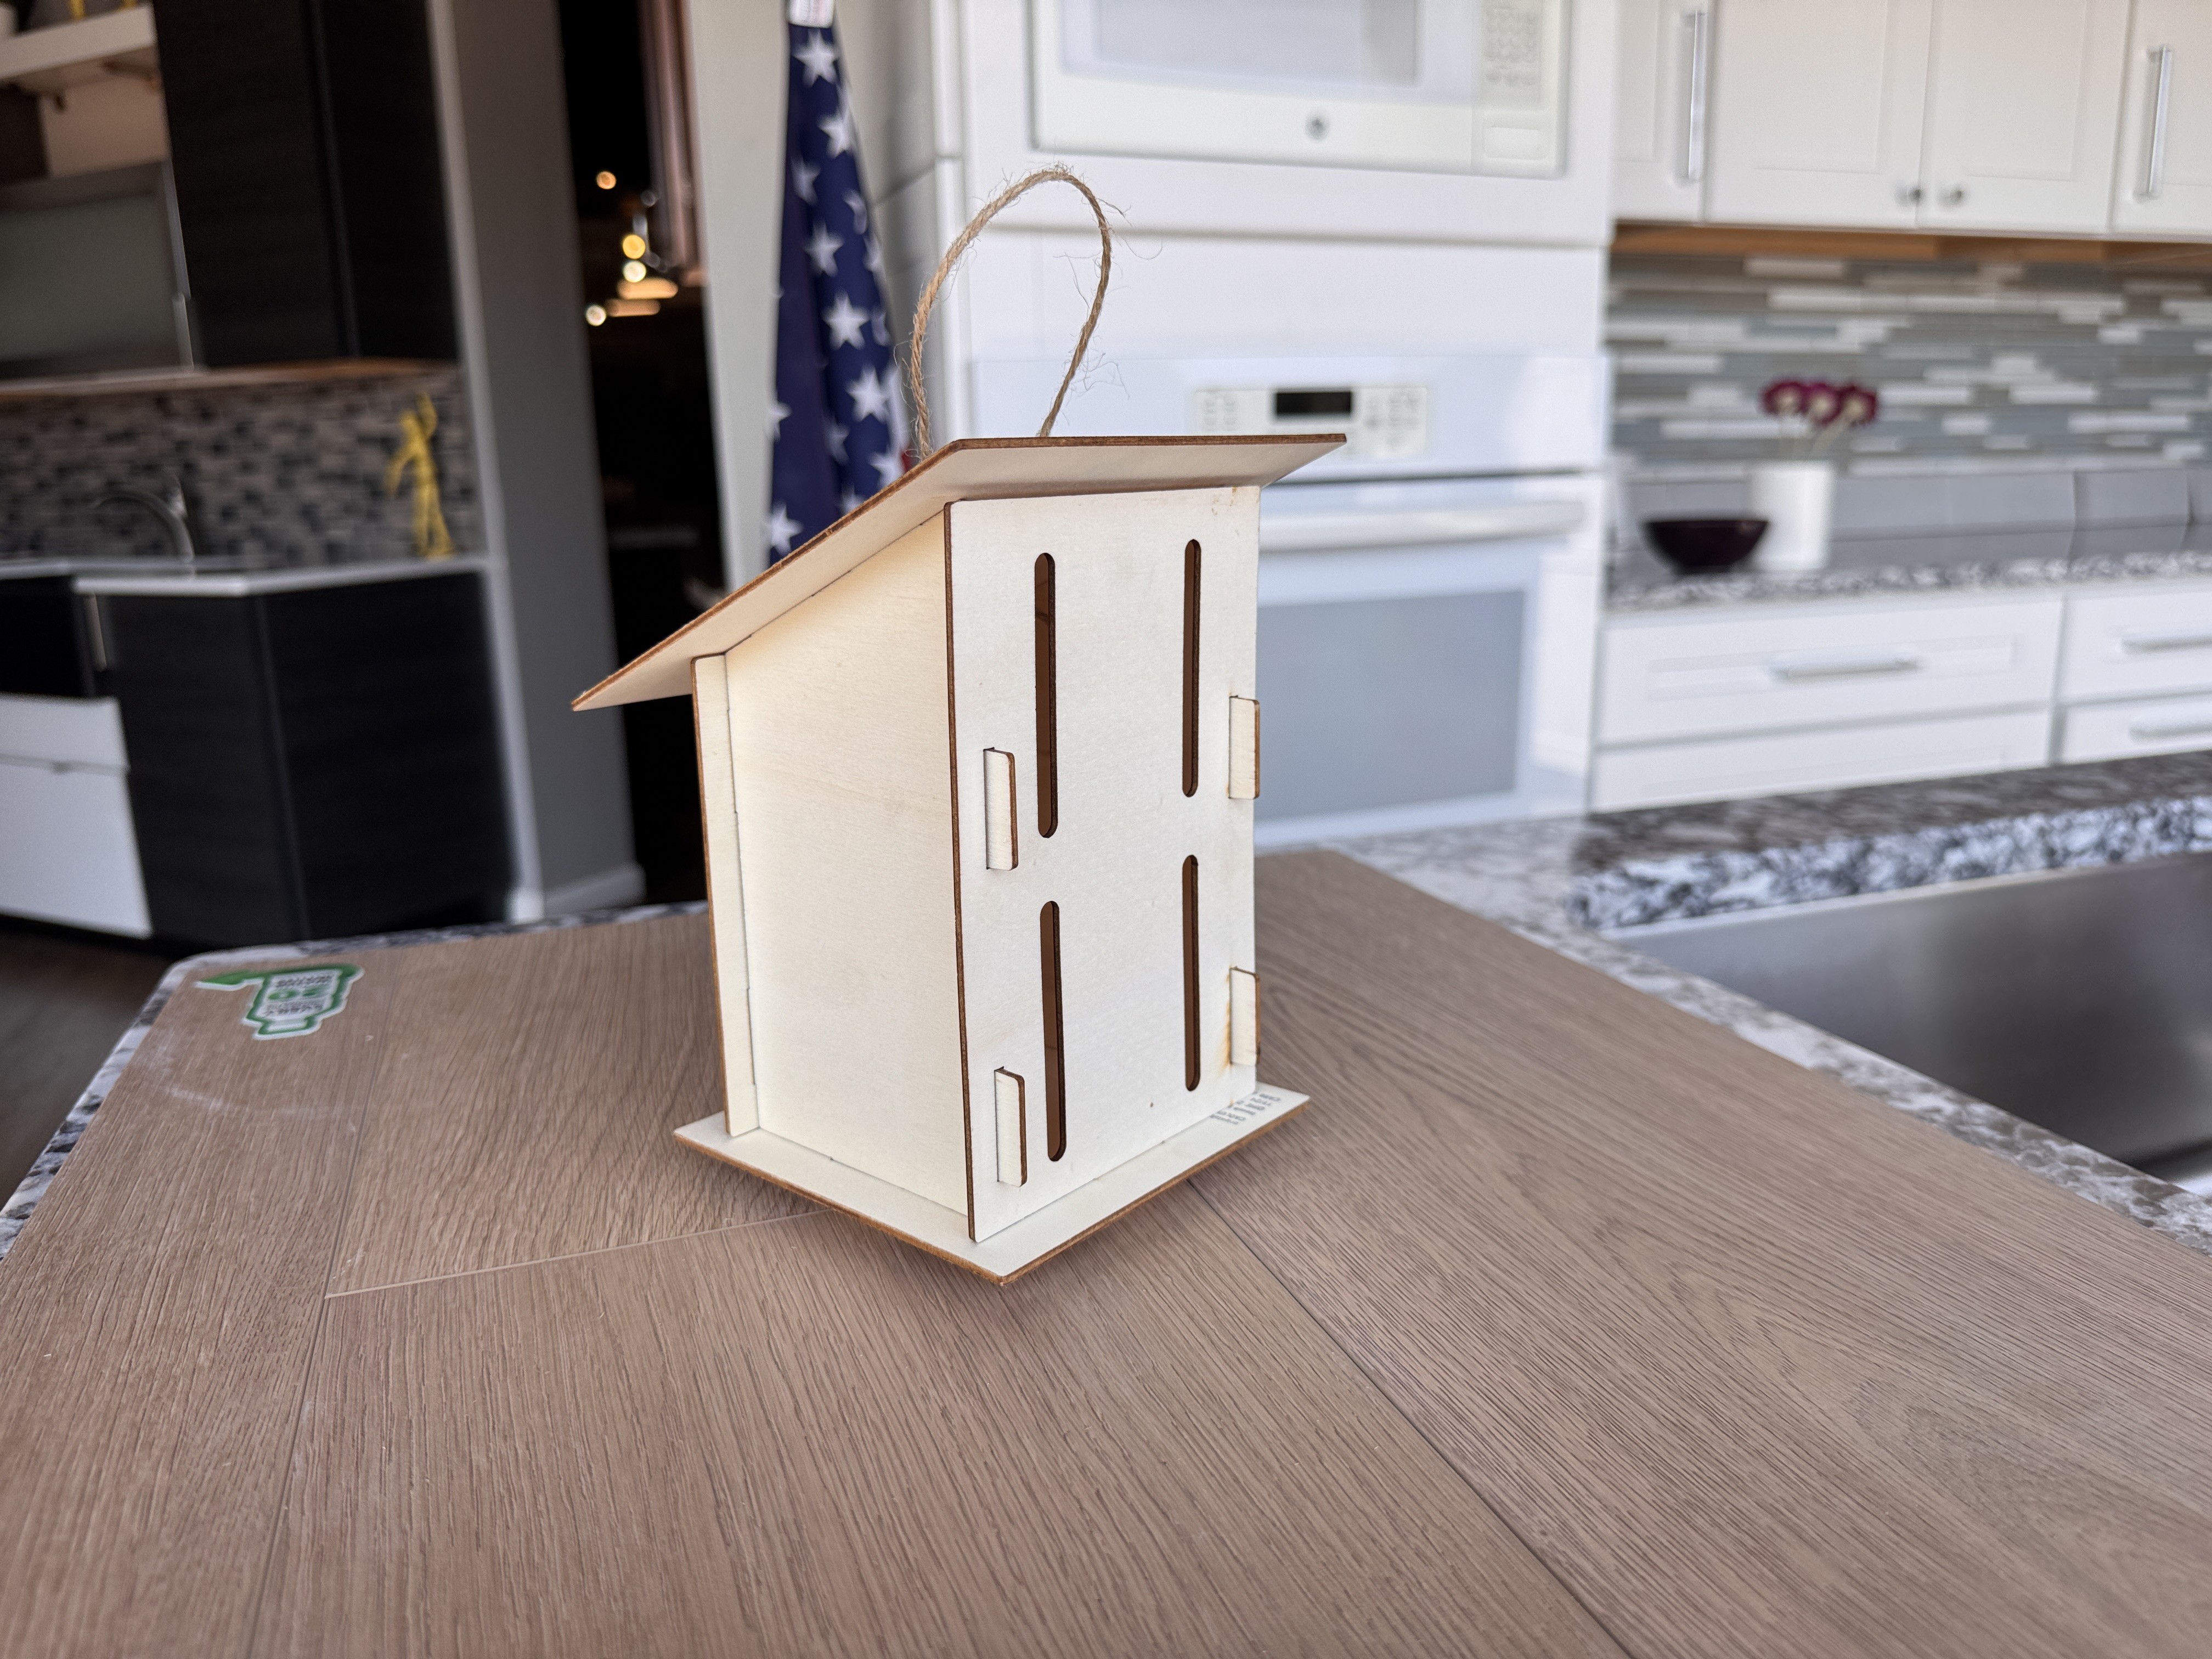
Step 3: Tie the Hanging Cord
Thread each end of the provided cord through the holes in the Roof Piece. Tie knots on each end to secure it in place for hanging.
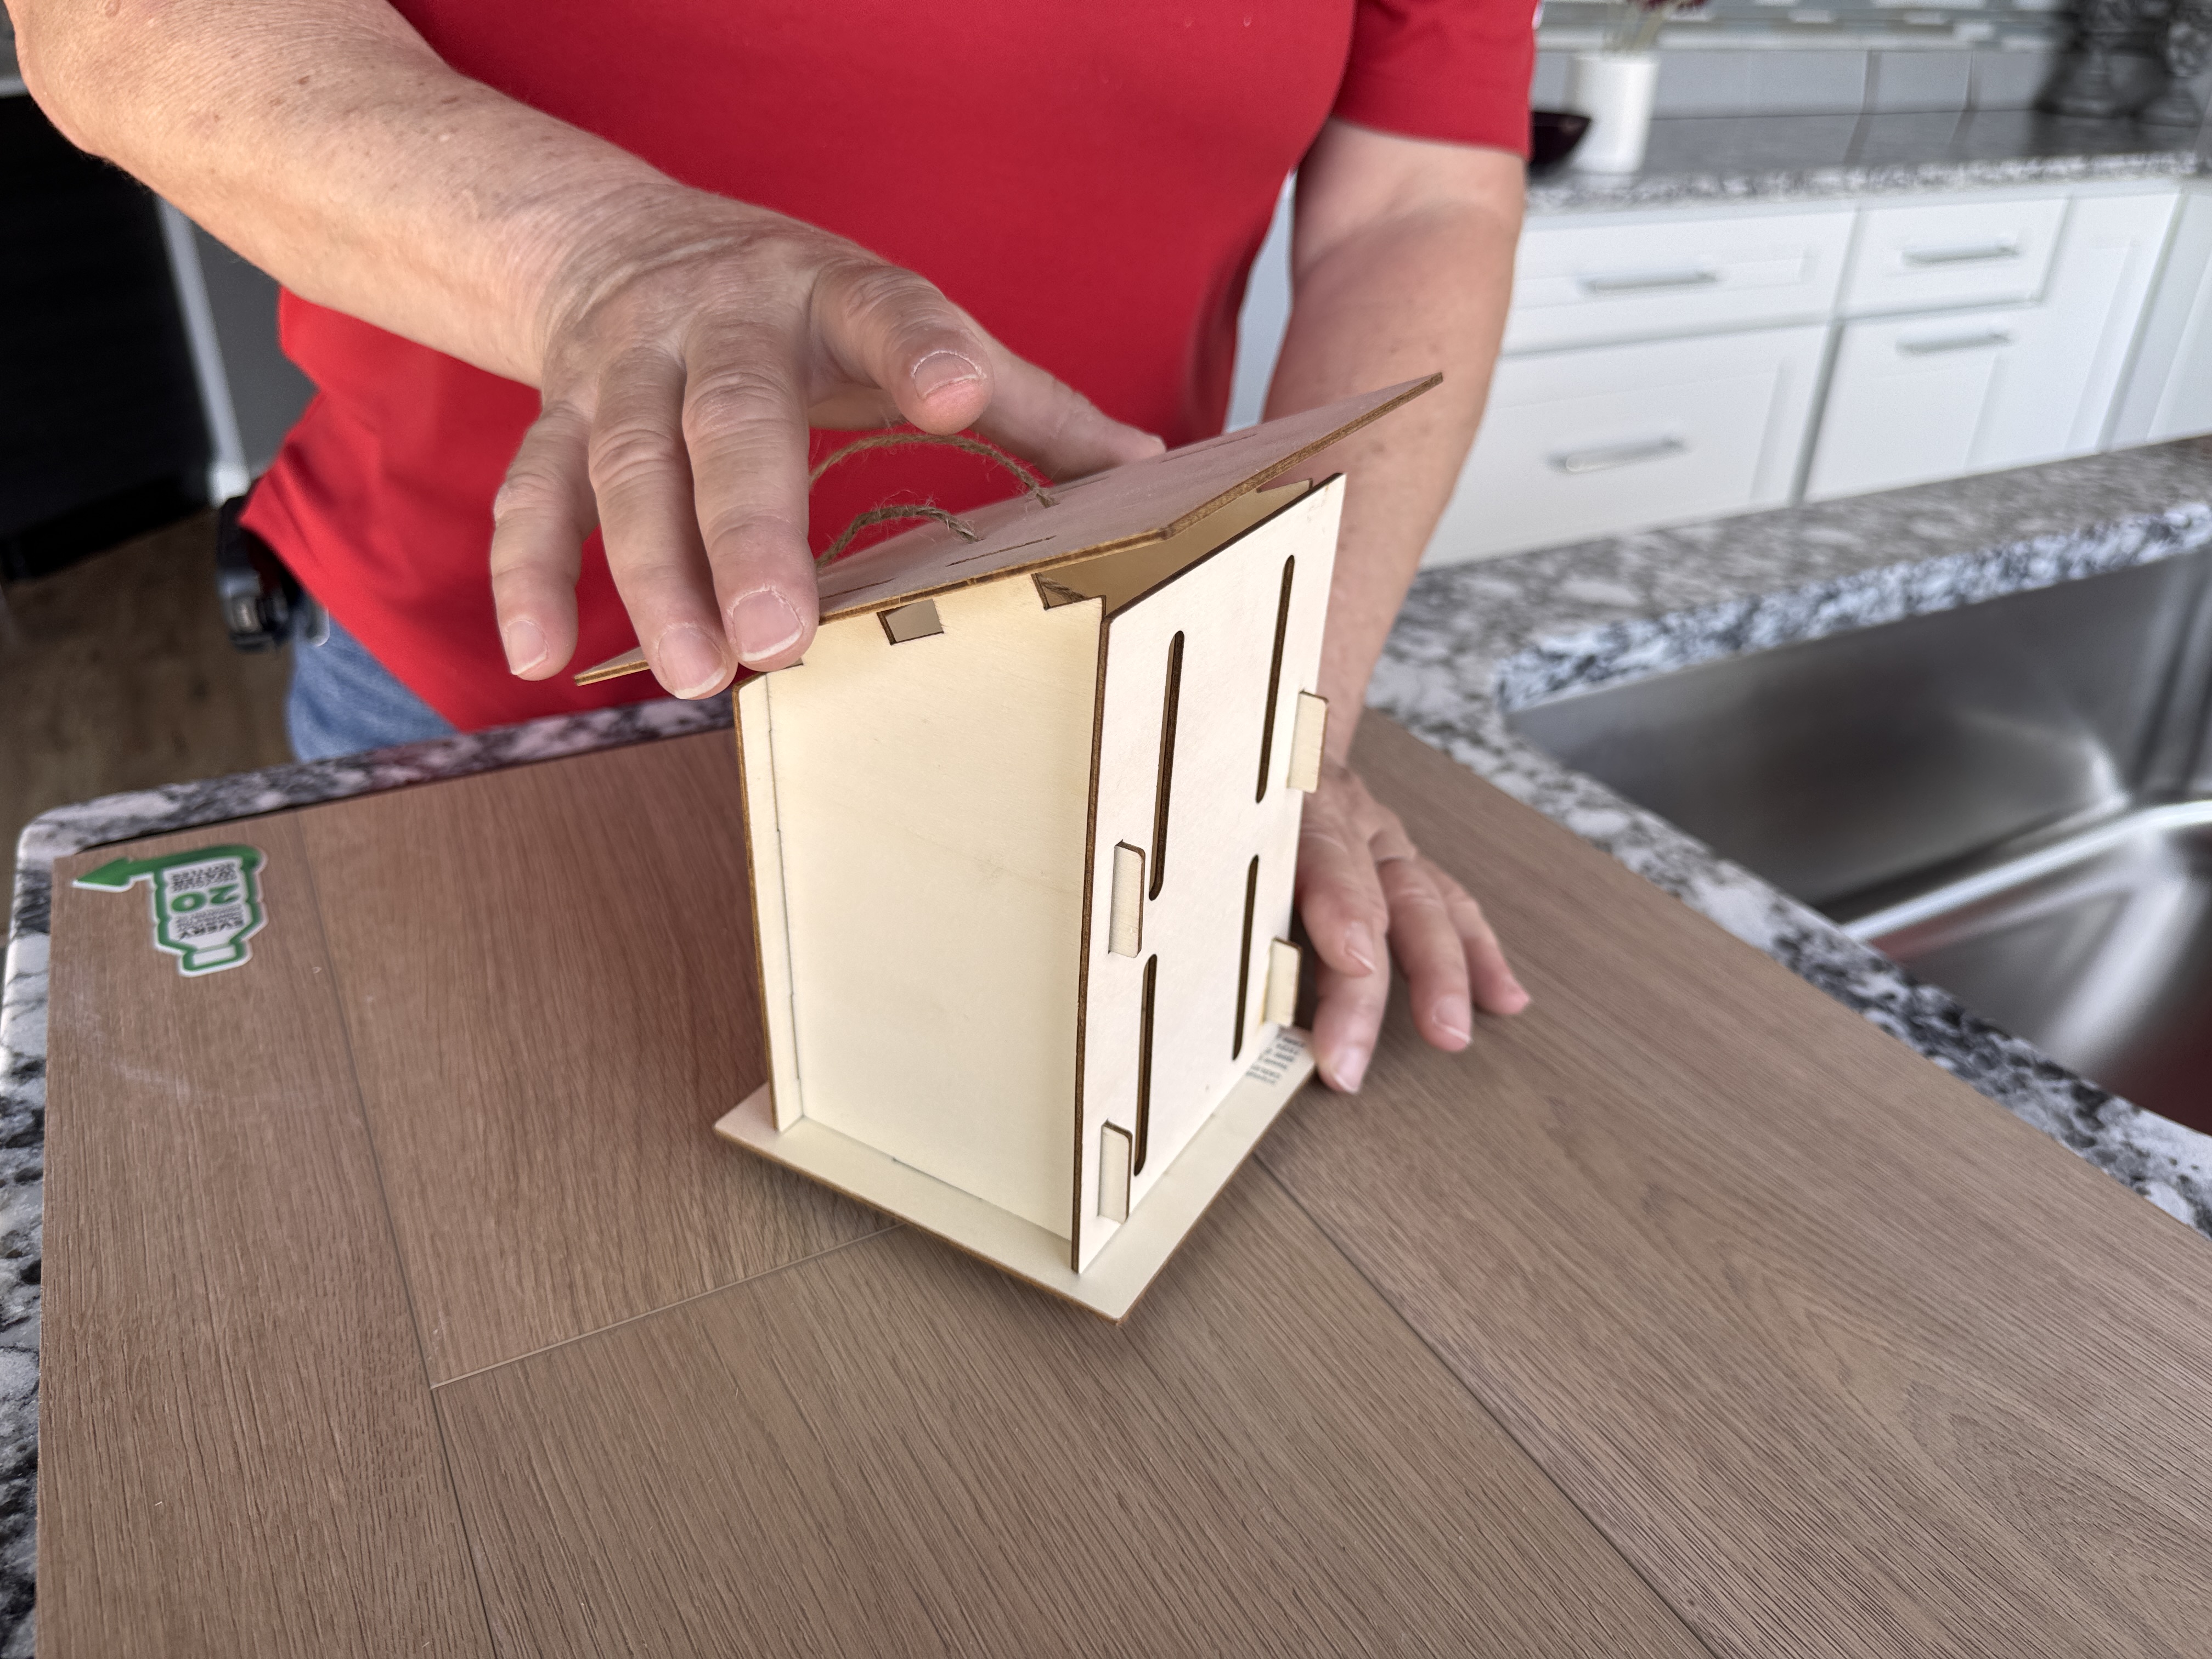
Step 4: Attach the Roof
Finish by attaching Top Piece F (the roof) to the assembled structure. Ensure all edges are aligned and tight. Again, glue may be used at the entrance holes for added security.
Step 5: Decorate Your Butterfly House!
Now that your butterfly house is assembled, it’s time to make it your own!
Paint it in bright colors, add glitter, stickers, or any decorations you like. Get creative and give your butterfly friends a stylish new home!
Tips for Success
For Both Projects:
- Take your time with each step—rushing leads to mistakes
- Allow adequate drying time between steps
- Work in a dust-free environment when painting
- Keep young children supervised around tools and materials
Sailboat Specific:
- Test your boat in shallow water first
- Consider waterproofing the hull for extended water play
- Adjust sail position for optimal wind catching
Butterfly House Specific:
- Position near butterfly-attracting plants like lantana, zinnia, or butterfly bush
- Clean out old materials annually in late fall
- Avoid using pesticides in the surrounding area
Conclusion
These two projects offer wonderful opportunities to create functional items while developing crafting skills. The sailboat provides hours of outdoor play and teaches basic principles of wind and water dynamics. The butterfly house contributes to local ecosystem health while offering a chance to observe these beautiful creatures up close.
Both projects can be completed over a weekend and make excellent gifts or additions to your own home and garden. The satisfaction of building something with your own hands, combined with the joy these items will bring, makes these projects truly worthwhile investments of your time and creativity.
Remember, the key to a great DIY project is patience, preparation, and enjoying every step along the way.
Happy building! At the Niehaus Lumber Little Builders Workshop, we love creating amazing things with your little builders—one fun project at a time!