

.png "Build a Wooden Love Sign for Valentine's Day")
Build a Wooden Love Sign for Valentine's Day
Valentine's Day presents an excellent opportunity to create meaningful, handcrafted decorations for your home. A wooden love sign combines rustic charm with heartfelt sentiment, making it an ideal project for both seasoned woodworkers and beginners alike.
Materials Needed
- (1) Wood board (approximately 8" x 18")
- Small wood pieces for letters
- "L": (1) 5-1/2 in. & (1) 2 in. pieces
- "V": (2) angled 5-1/2 in. & (1) angled 3 in. pieces
- "E": (1) 5-1/2 in., (2) 2 in., (1) 1 in. pieces
- Heart-shaped sticker for the "O"
- Hammer
- (11) Nails
- Safety Glasses
Step-by-Step Instructions
Step 1. Organize Materials
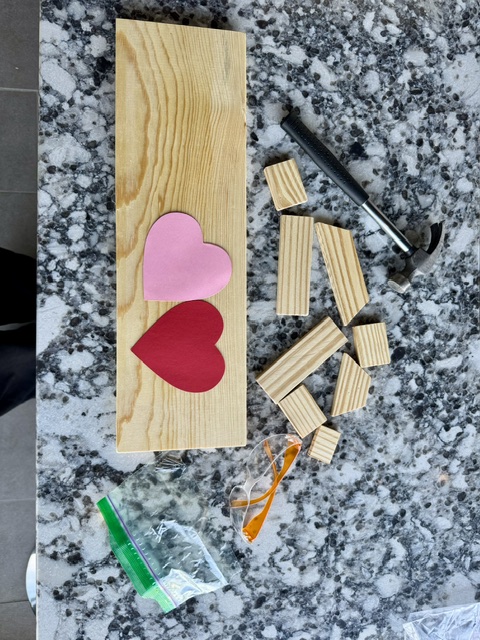
Identify all your pieces and make sure you have all of them as discribed in the materials list.
Step 2. Match the Letters to the Pieces
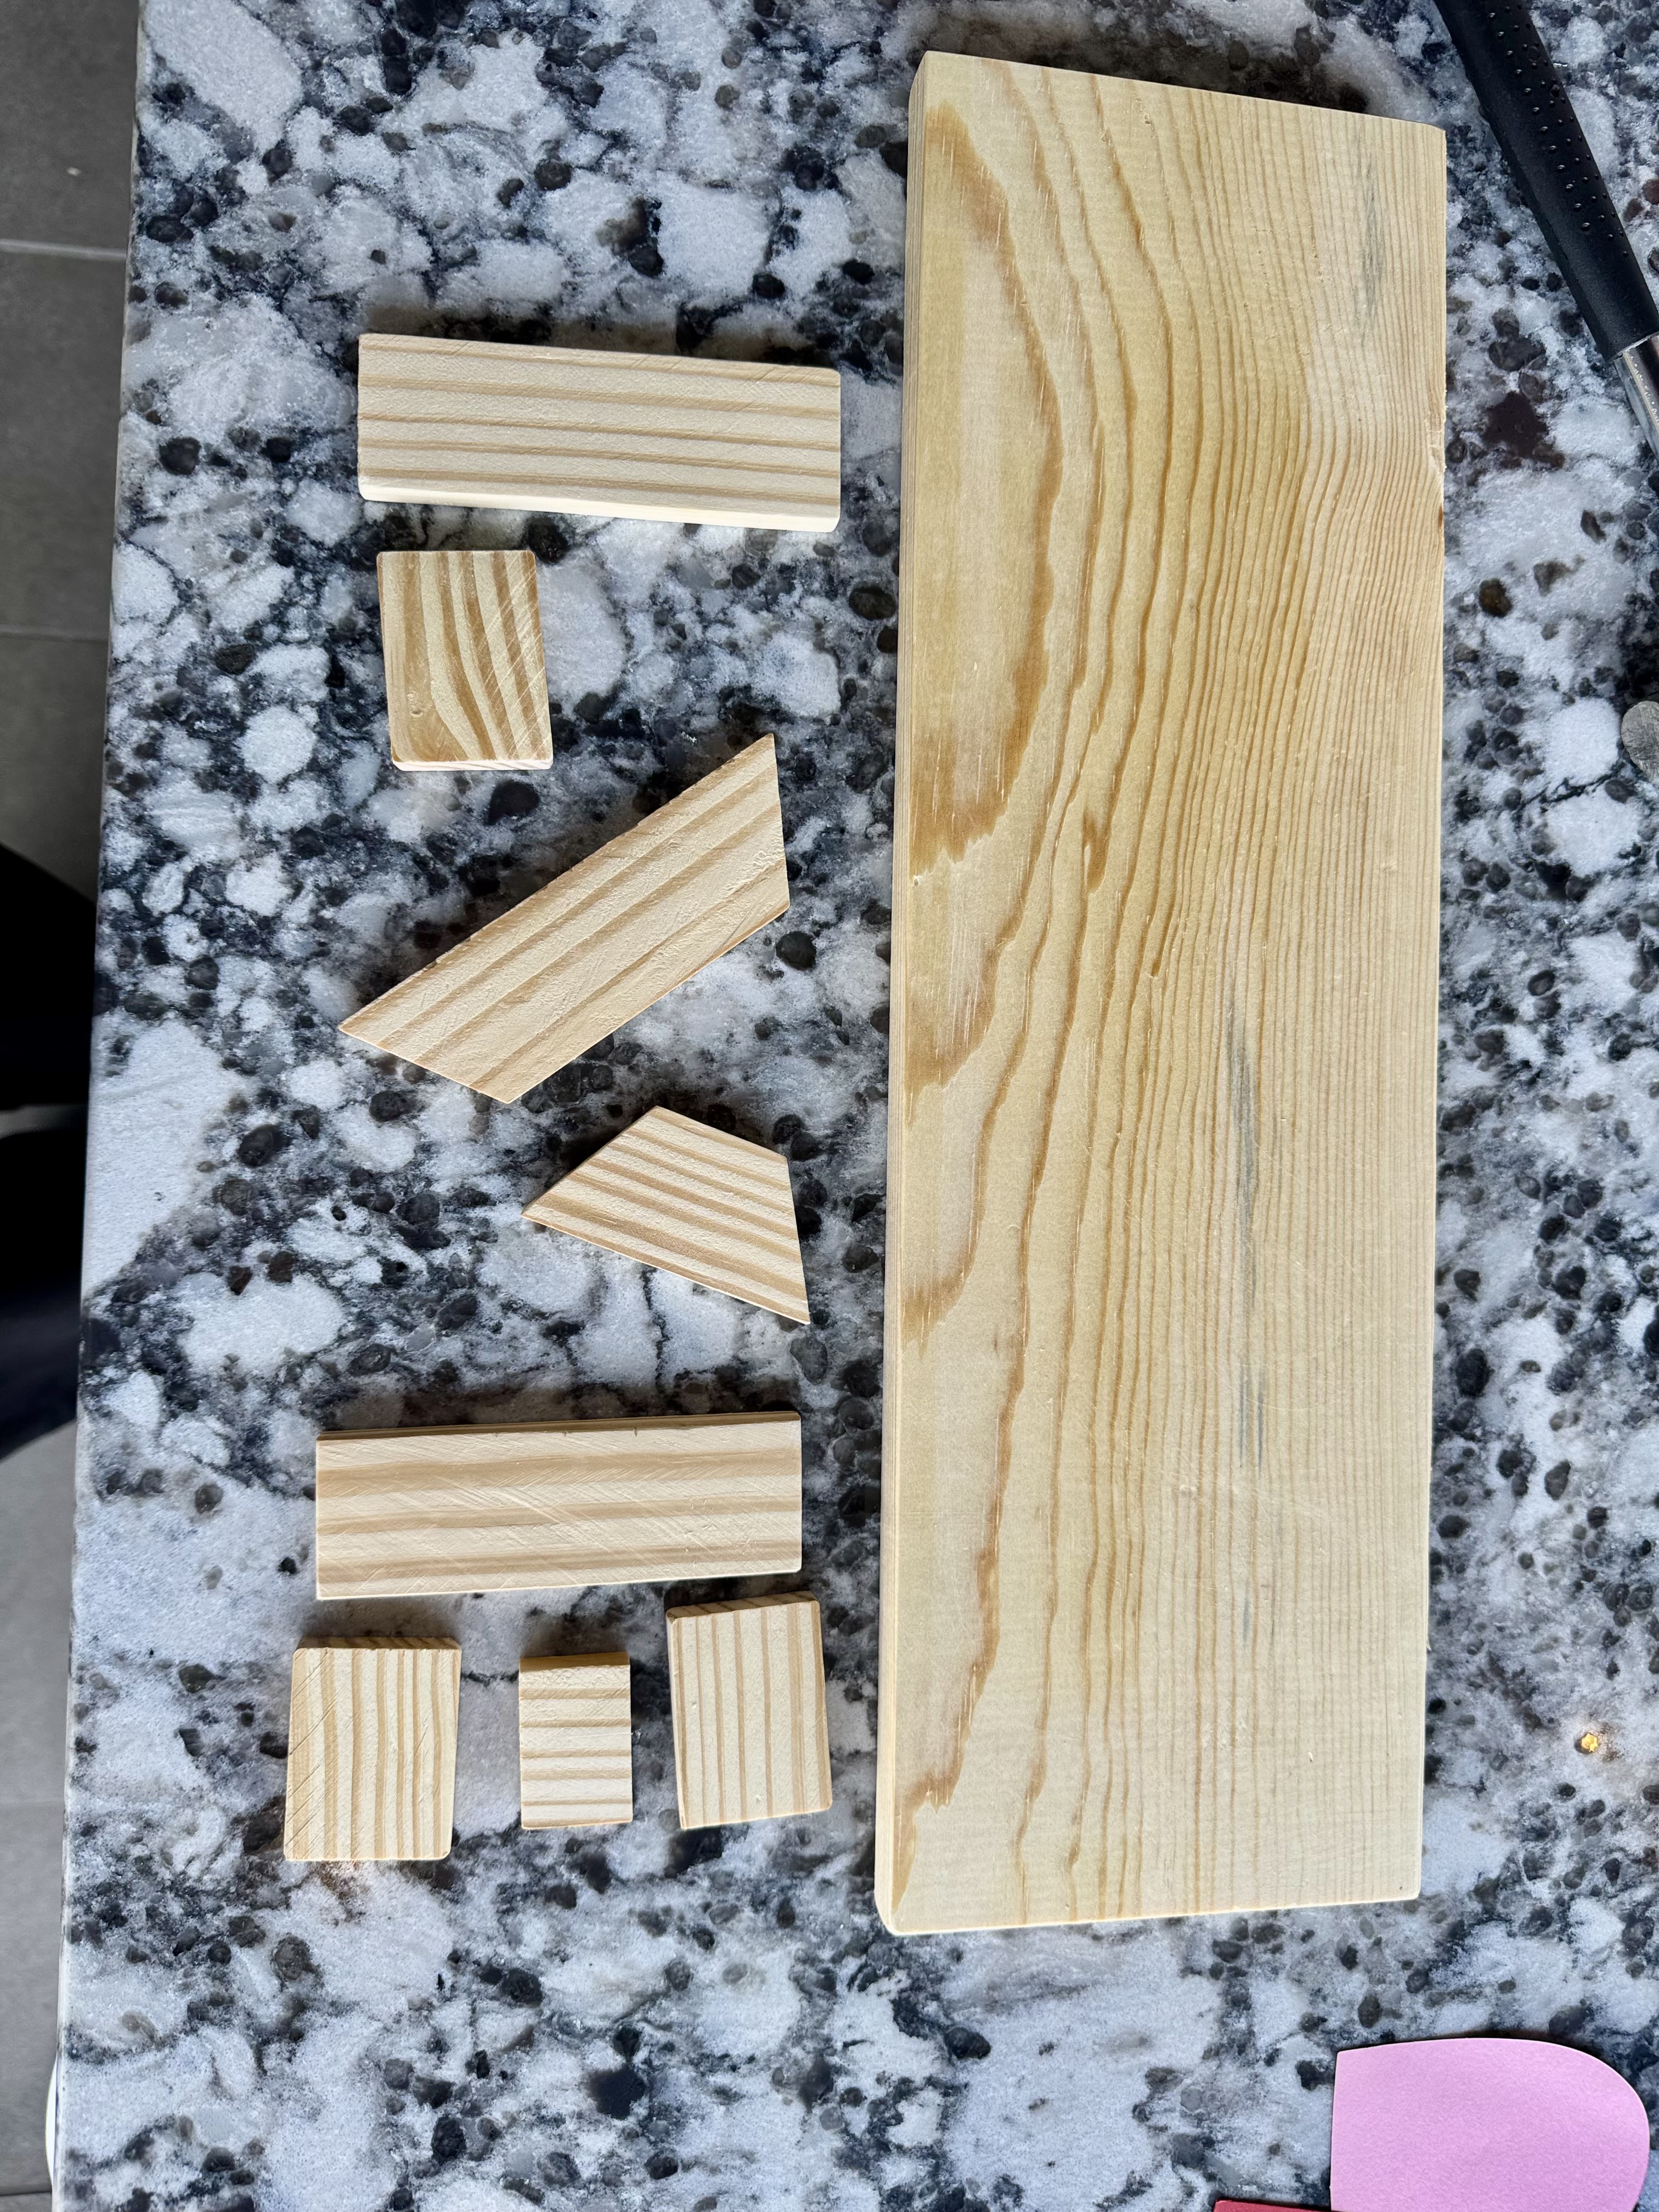
Before placing anything on the board, identify which wooden pieces belong to each letter. Use the image as a guide to match the correct pieces to L, O, V, and E so you know exactly what goes where.
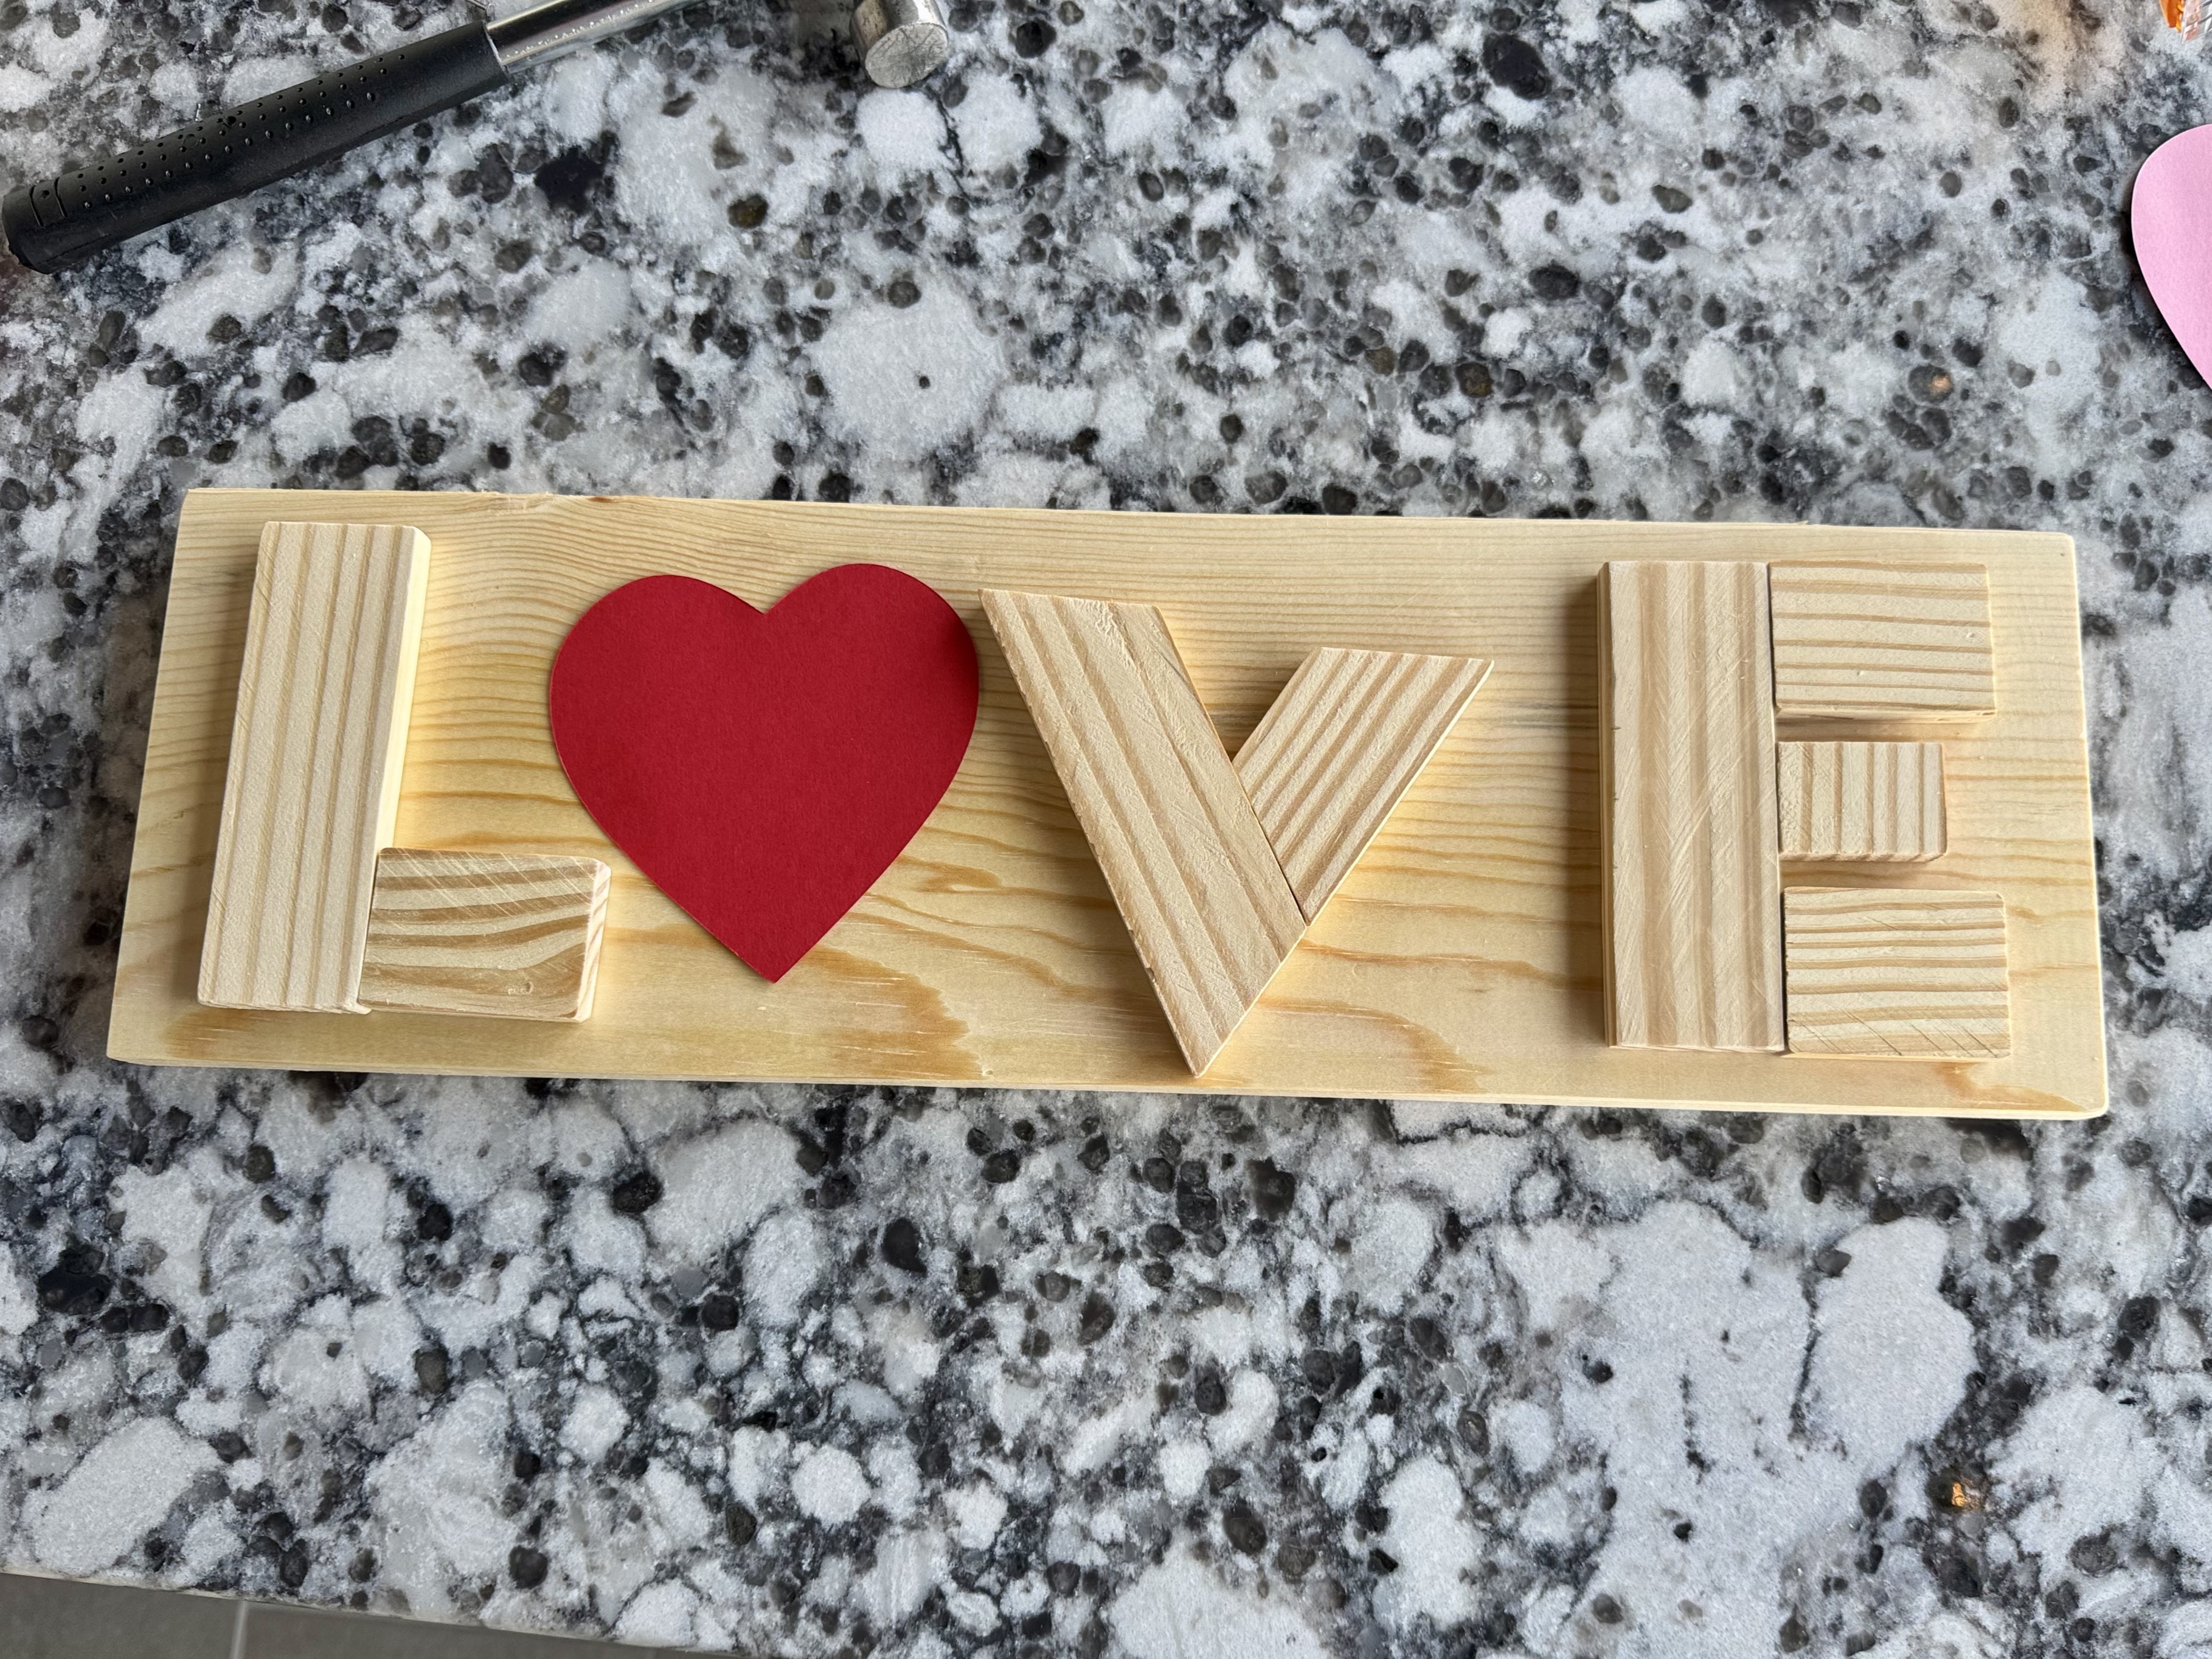
3. Arrange the Letters and Follow the Guide Dots
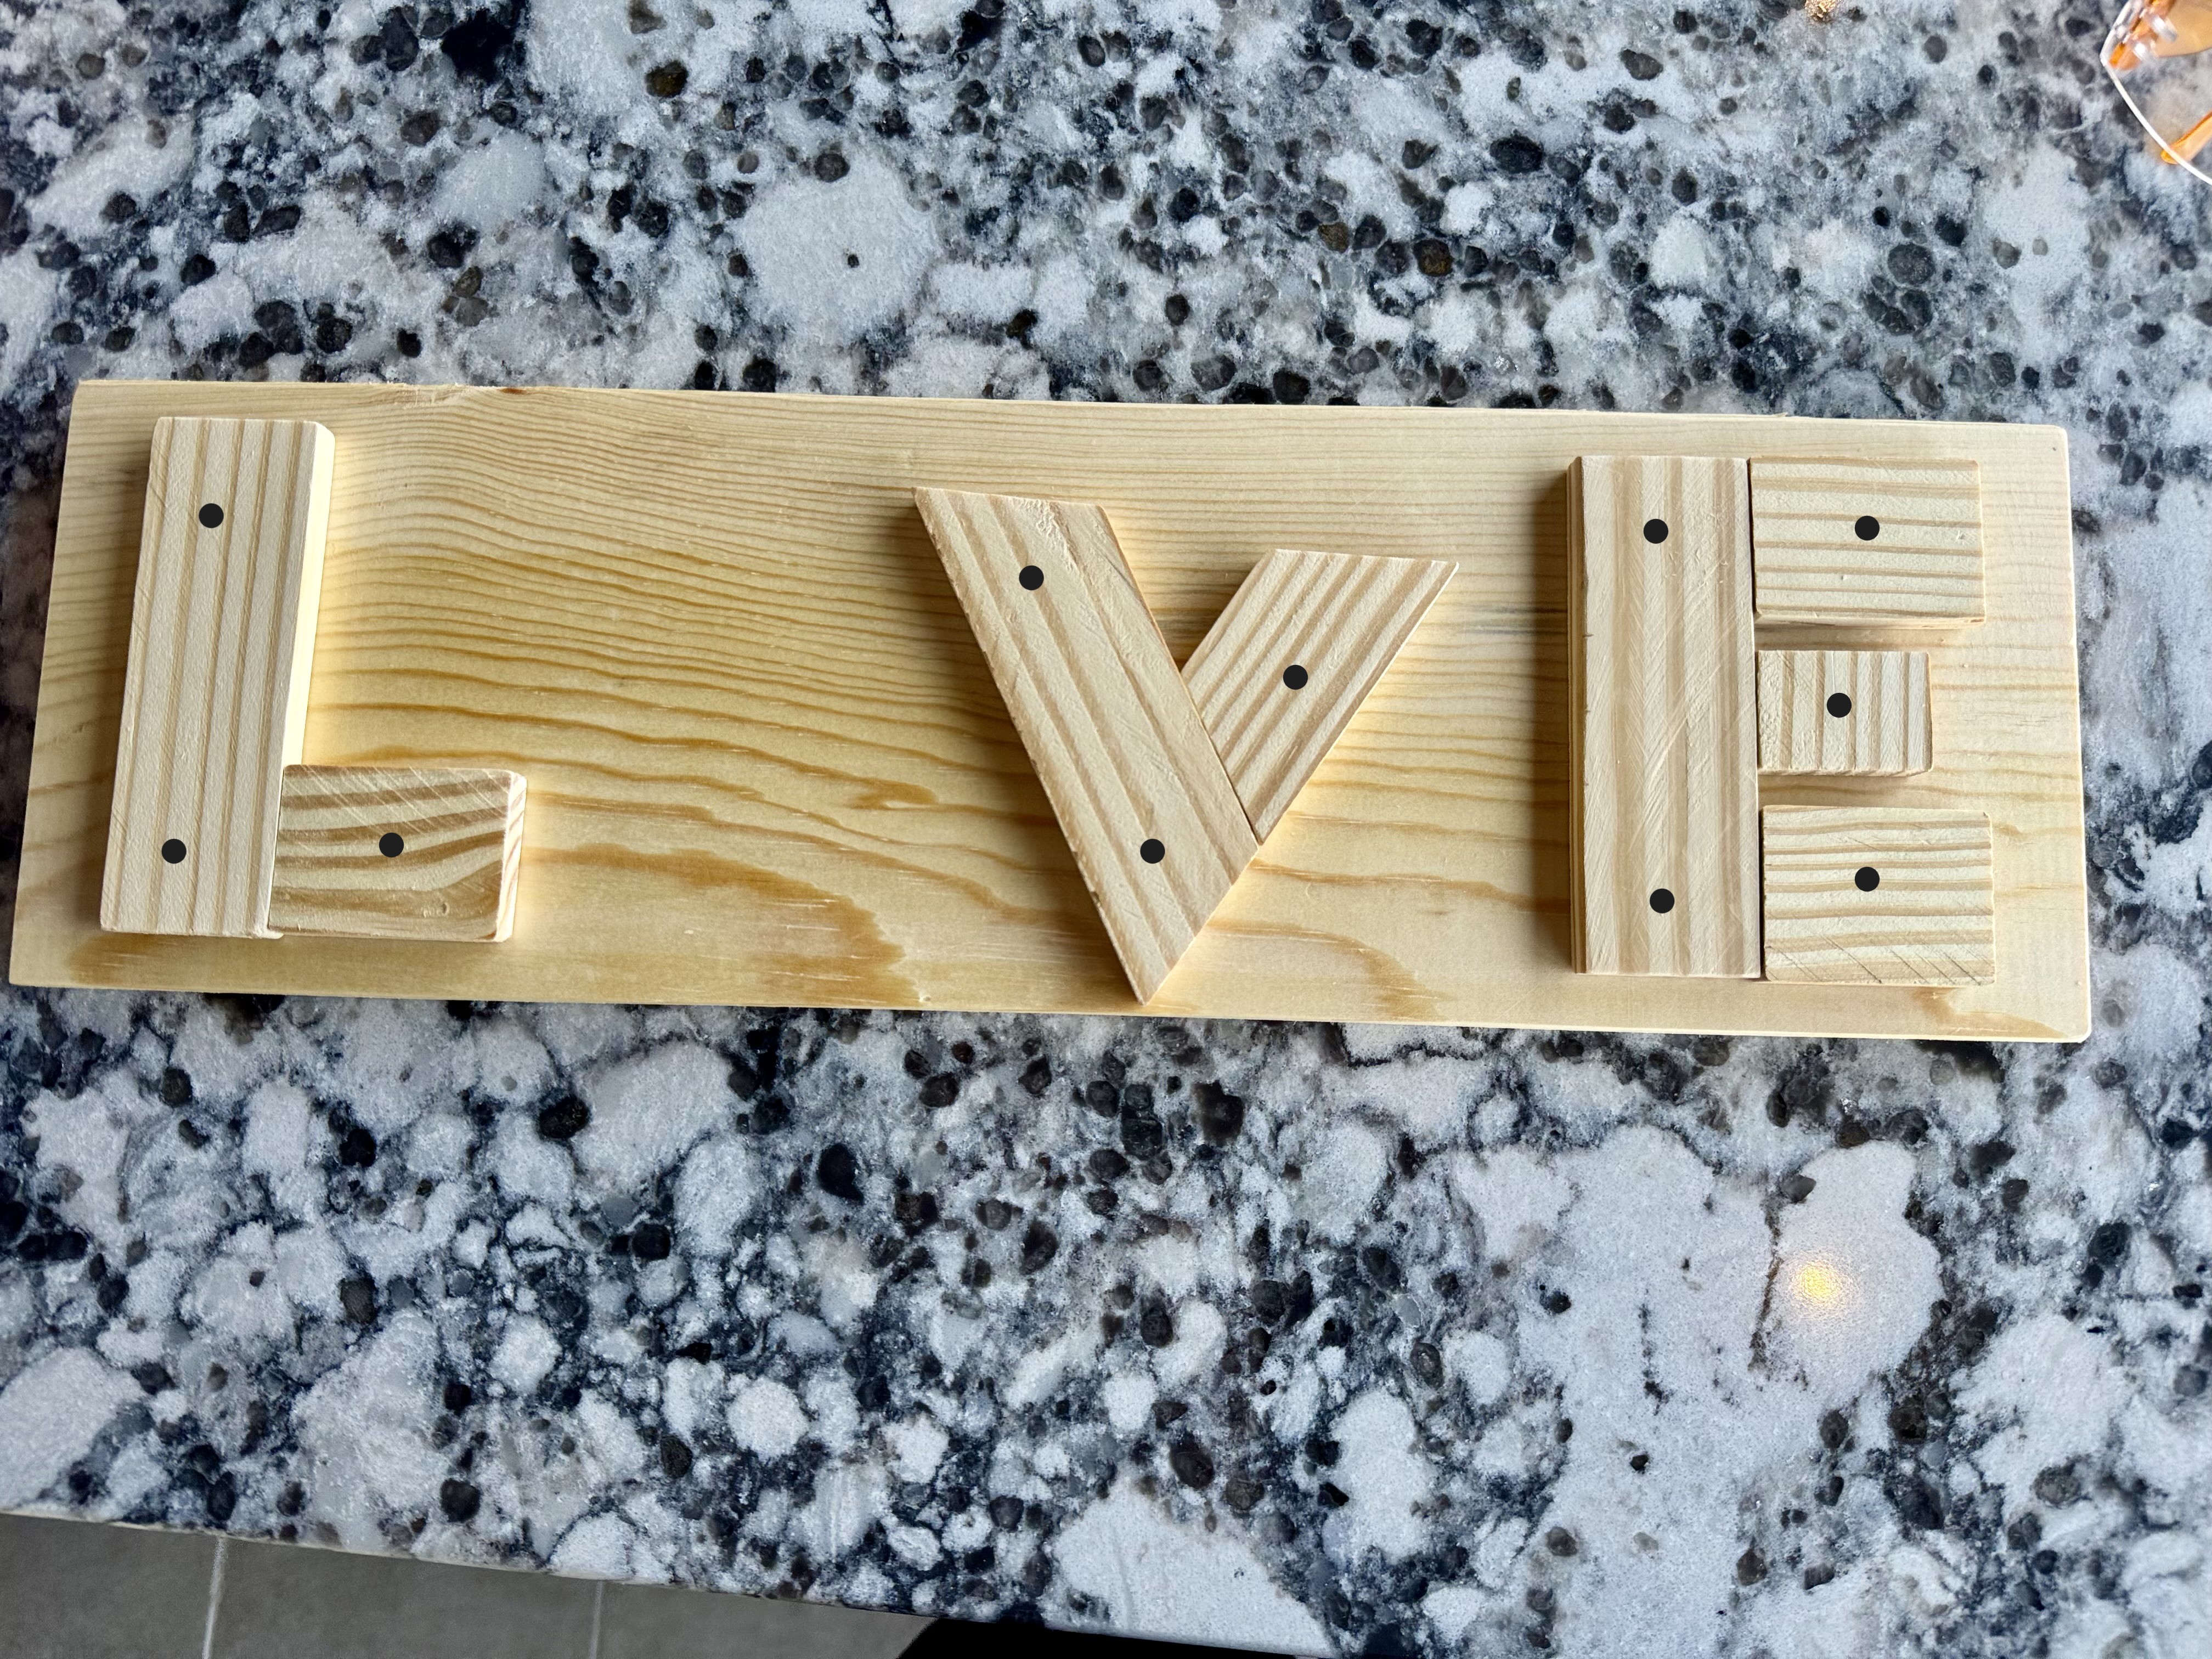
Place the wooden letter pieces on the large base to spell LOVE, leaving space in the center for the heart that will be the letter O. Adjust the letters until they look balanced and centered. Then locate the guide dots shown in the image, which mark exactly where each nail should go to keep the letters straight and evenly spaced before hammering.
4. Insert the nails
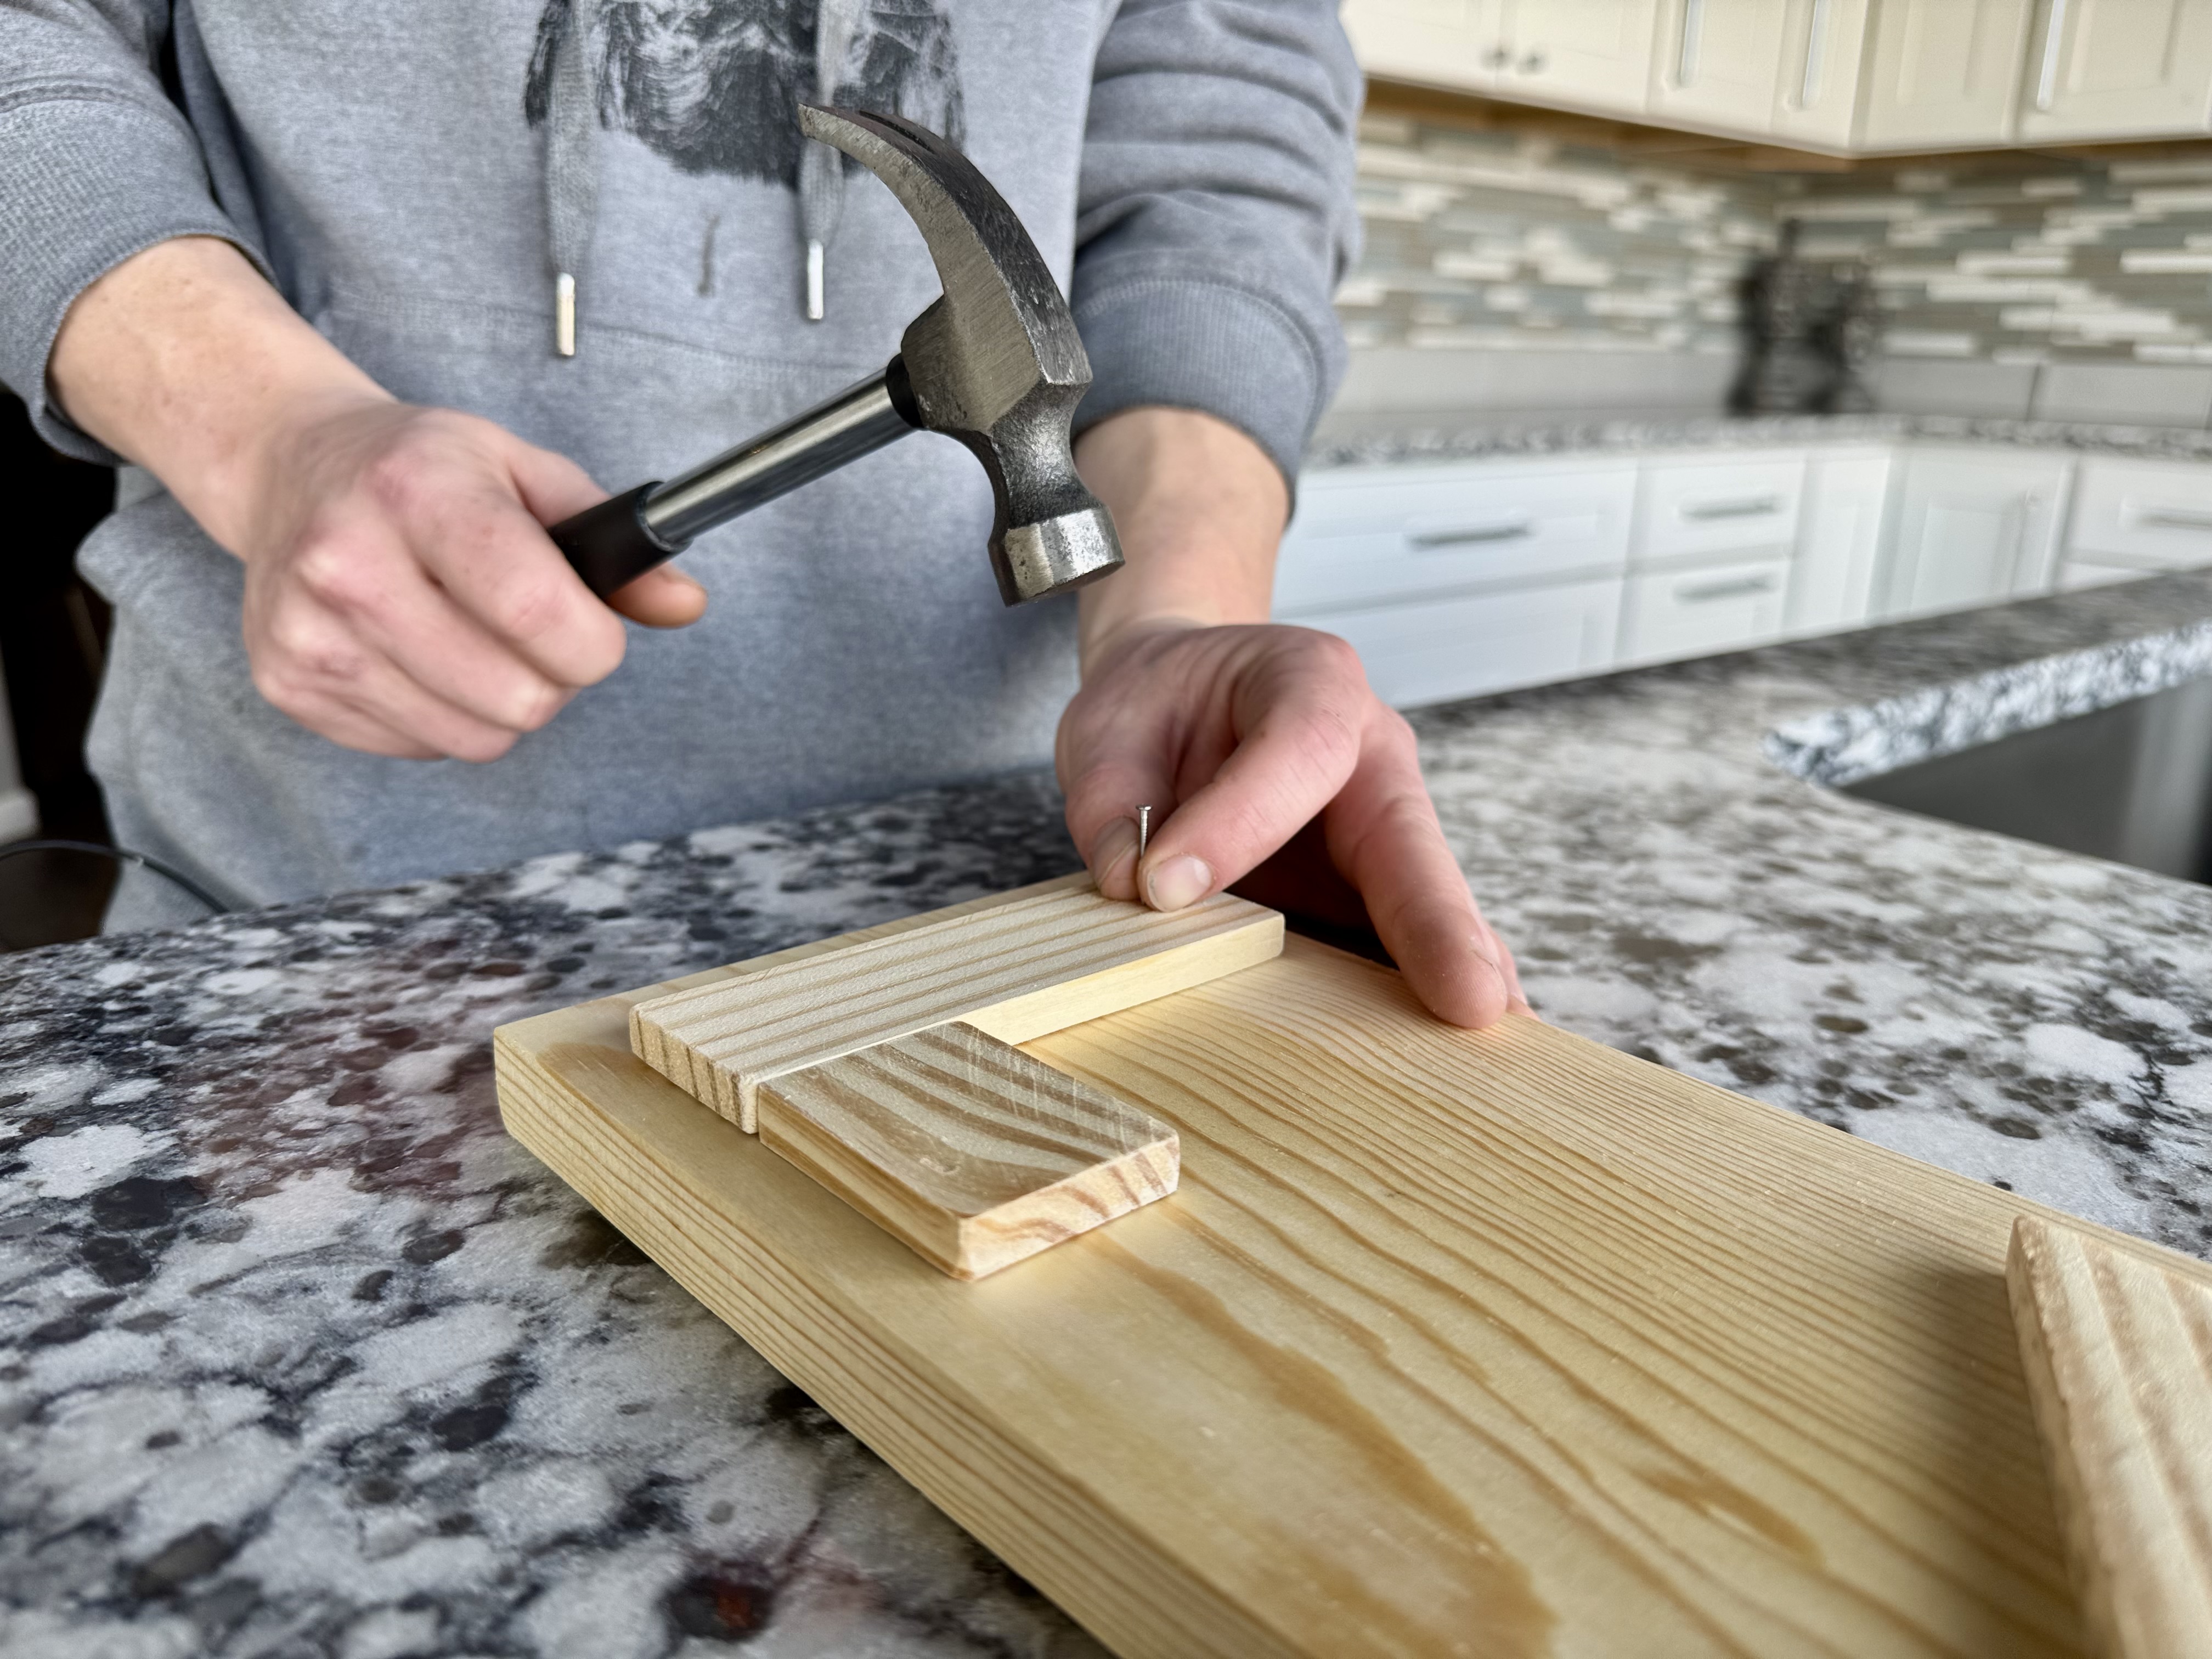
Place a nail in each marked spot from Step 3. Hold the nail steady with your fingers and begin tapping it gently with the hammer. Take your time and focus on keeping the nail straight as you hammer it into the wood. Work slowly and carefully until each letter feels secure against the base.
5. Add the Heart
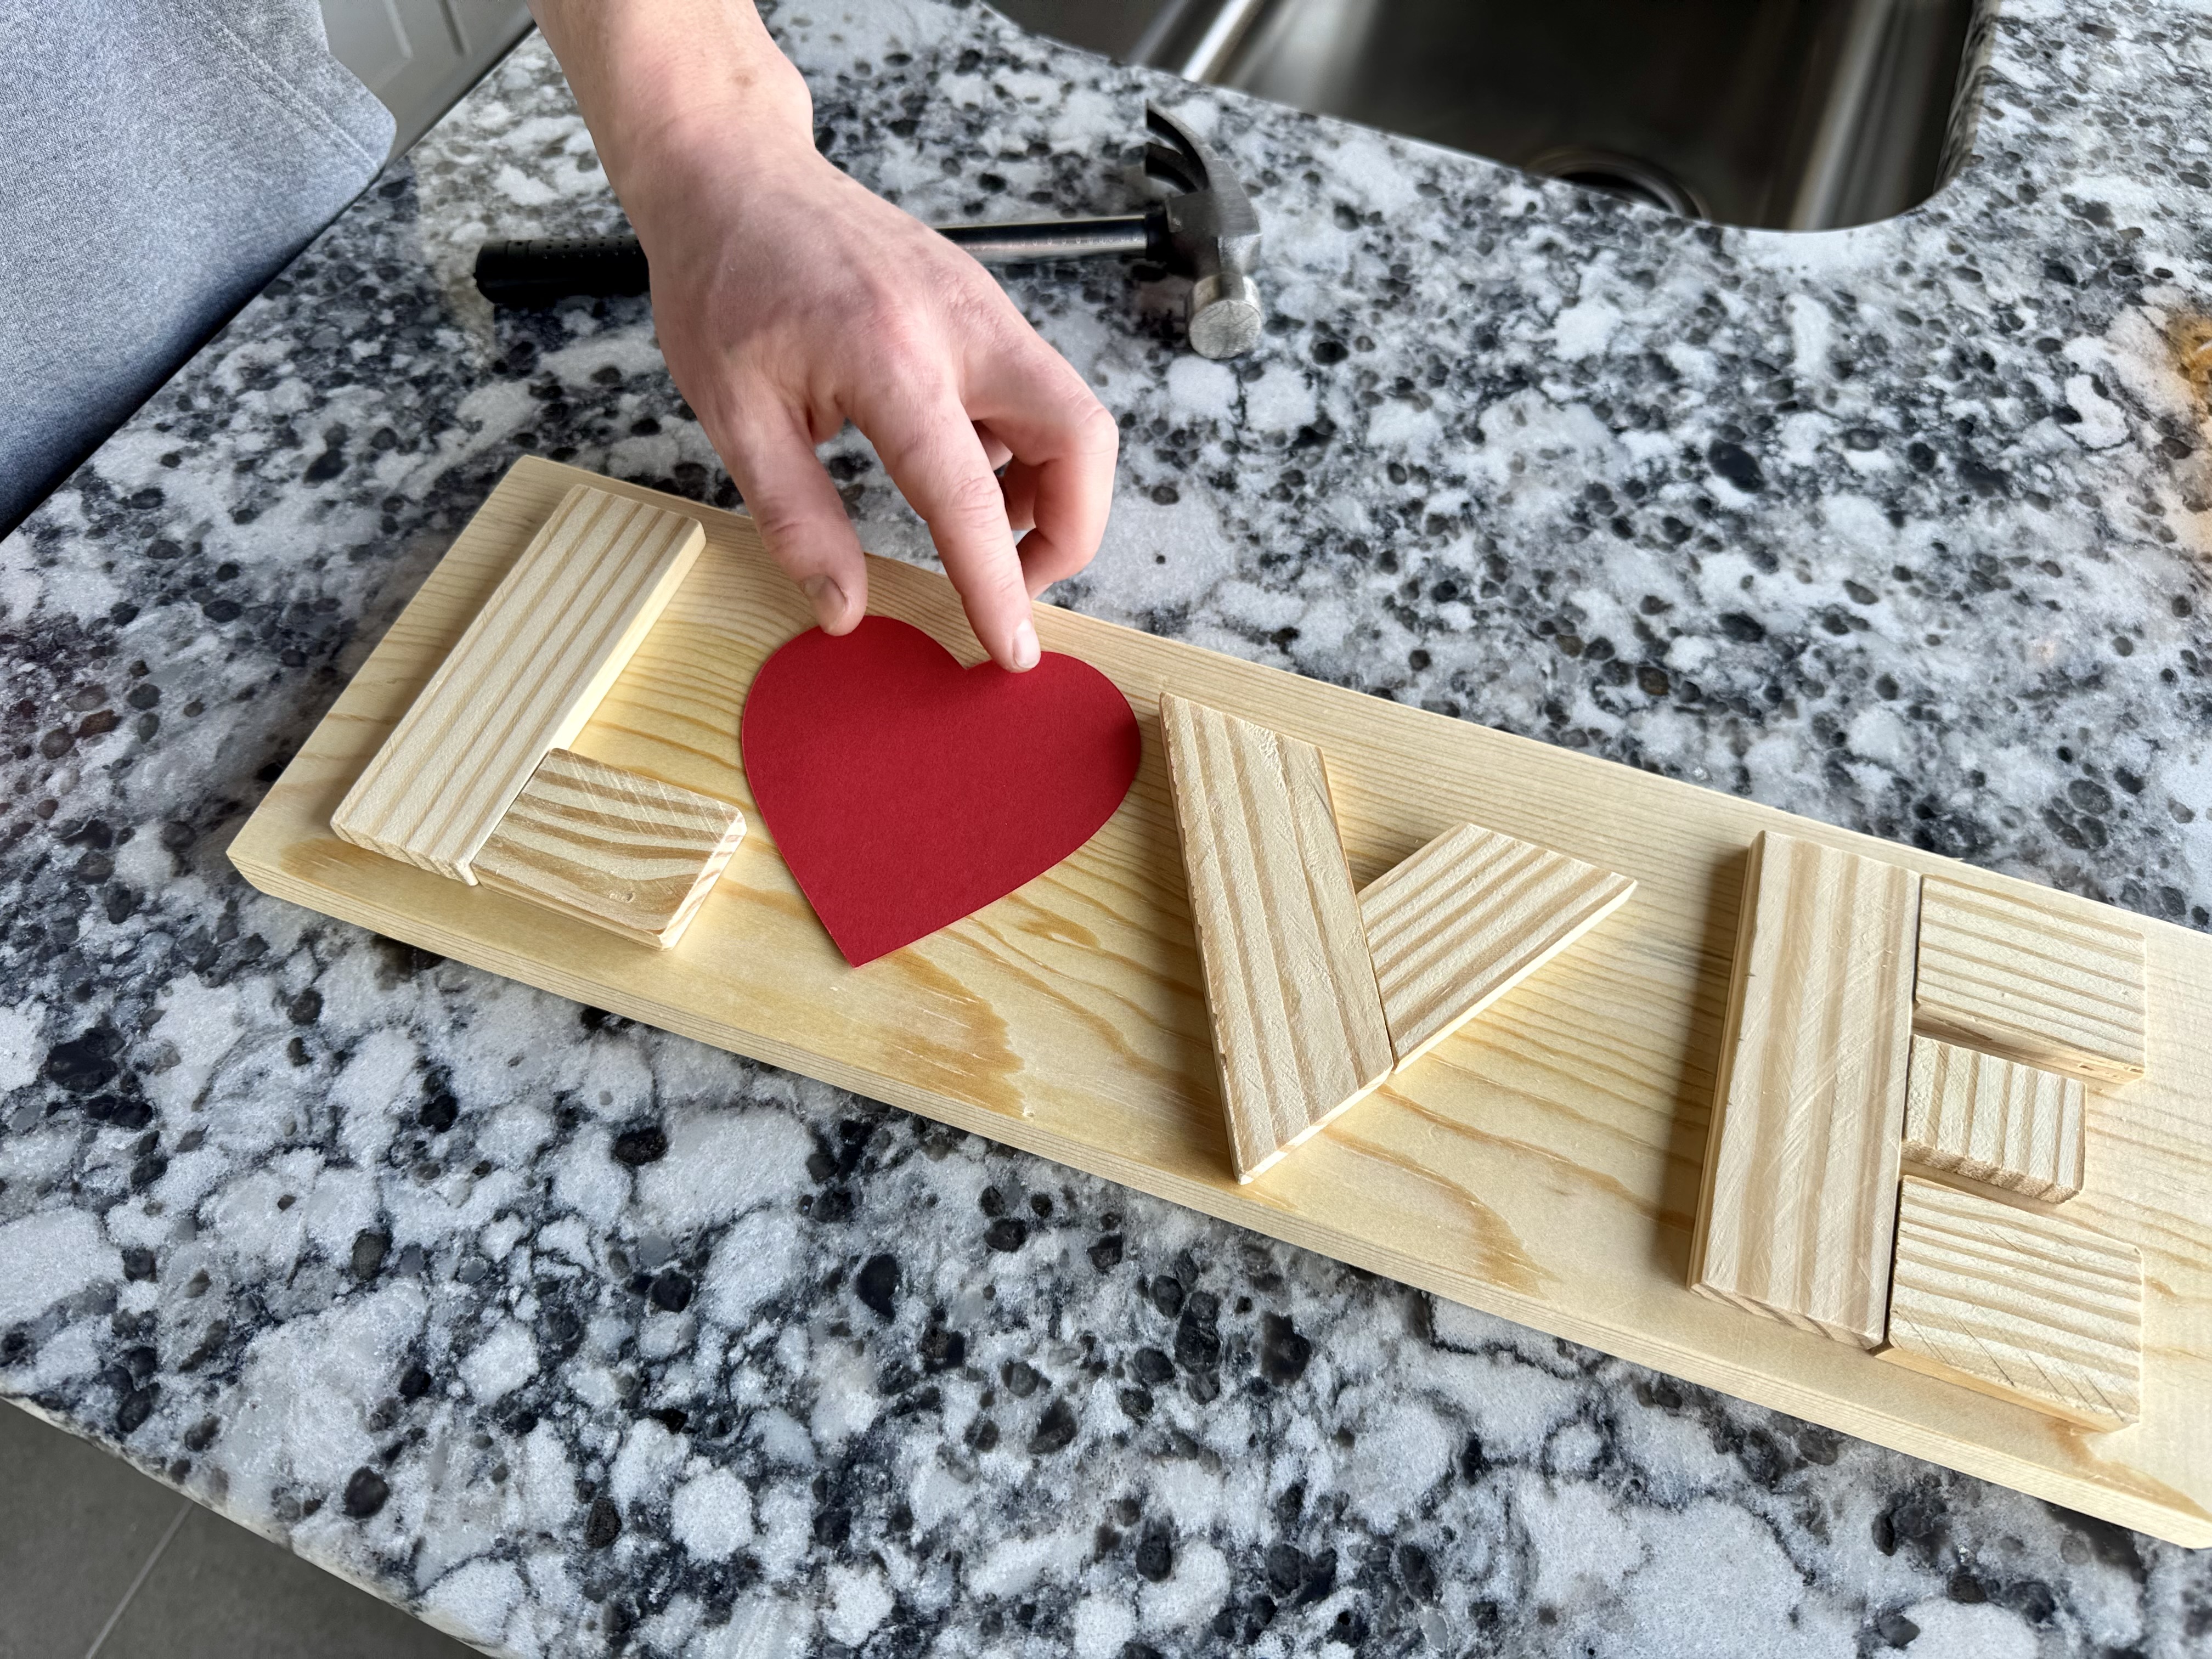
Apply a small amount of glue to the back of the cardboard or paper heart. Place it in the center to create the O in LOVE, then press down firmly so it sticks smoothly and securely.
6. Admire and Display
Check that all the letters are secure and give your sign a final look. Once finished, display your LOVE sign at home as a special Valentine keepsake you built together.
Conclusion
Building your LOVE sign is more than just a fun Valentine project. It is a chance for kids to practice basic tool skills, build confidence, and create something meaningful with their hands. With predrilled holes and guided instruction, even first time Little Builders can feel proud of what they accomplish.
At Niehaus Lumber, we love bringing families together through hands on workshops that inspire creativity and teach real world skills in a safe and welcoming environment. We hope your LOVE sign finds a special place in your home and reminds you of the fun memories you made together. Be sure to join us for our next Little Builders Workshop and keep the tradition going.
Supplies to Help You Get Started


Build a Wooden Love Sign for Valentine's Day
Valentine's Day presents an excellent opportunity to create meaningful, handcrafted decorations for your home. A wooden love sign combines rustic charm with heartfelt sentiment, making it an ideal project for both seasoned woodworkers and beginners alike.
Materials Needed
- (1) Wood board (approximately 8" x 18")
- Small wood pieces for letters
- "L": (1) 5-1/2 in. & (1) 2 in. pieces
- "V": (2) angled 5-1/2 in. & (1) angled 3 in. pieces
- "E": (1) 5-1/2 in., (2) 2 in., (1) 1 in. pieces
- Heart-shaped sticker for the "O"
- Hammer
- (11) Nails
- Safety Glasses
Step-by-Step Instructions
Step 1. Organize Materials
Identify all your pieces and make sure you have all of them as discribed in the materials list.
Step 2. Match the Letters to the Pieces
Before placing anything on the board, identify which wooden pieces belong to each letter. Use the image as a guide to match the correct pieces to L, O, V, and E so you know exactly what goes where.
3. Arrange the Letters and Follow the Guide Dots
Place the wooden letter pieces on the large base to spell LOVE, leaving space in the center for the heart that will be the letter O. Adjust the letters until they look balanced and centered. Then locate the guide dots shown in the image, which mark exactly where each nail should go to keep the letters straight and evenly spaced before hammering.
4. Insert the nails
Place a nail in each marked spot from Step 3. Hold the nail steady with your fingers and begin tapping it gently with the hammer. Take your time and focus on keeping the nail straight as you hammer it into the wood. Work slowly and carefully until each letter feels secure against the base.
5. Add the Heart
Apply a small amount of glue to the back of the cardboard or paper heart. Place it in the center to create the O in LOVE, then press down firmly so it sticks smoothly and securely.
6. Admire and Display
Check that all the letters are secure and give your sign a final look. Once finished, display your LOVE sign at home as a special Valentine keepsake you built together.
Conclusion
Building your LOVE sign is more than just a fun Valentine project. It is a chance for kids to practice basic tool skills, build confidence, and create something meaningful with their hands. With predrilled holes and guided instruction, even first time Little Builders can feel proud of what they accomplish.
At Niehaus Lumber, we love bringing families together through hands on workshops that inspire creativity and teach real world skills in a safe and welcoming environment. We hope your LOVE sign finds a special place in your home and reminds you of the fun memories you made together. Be sure to join us for our next Little Builders Workshop and keep the tradition going.
Supplies to Help You Get Started