
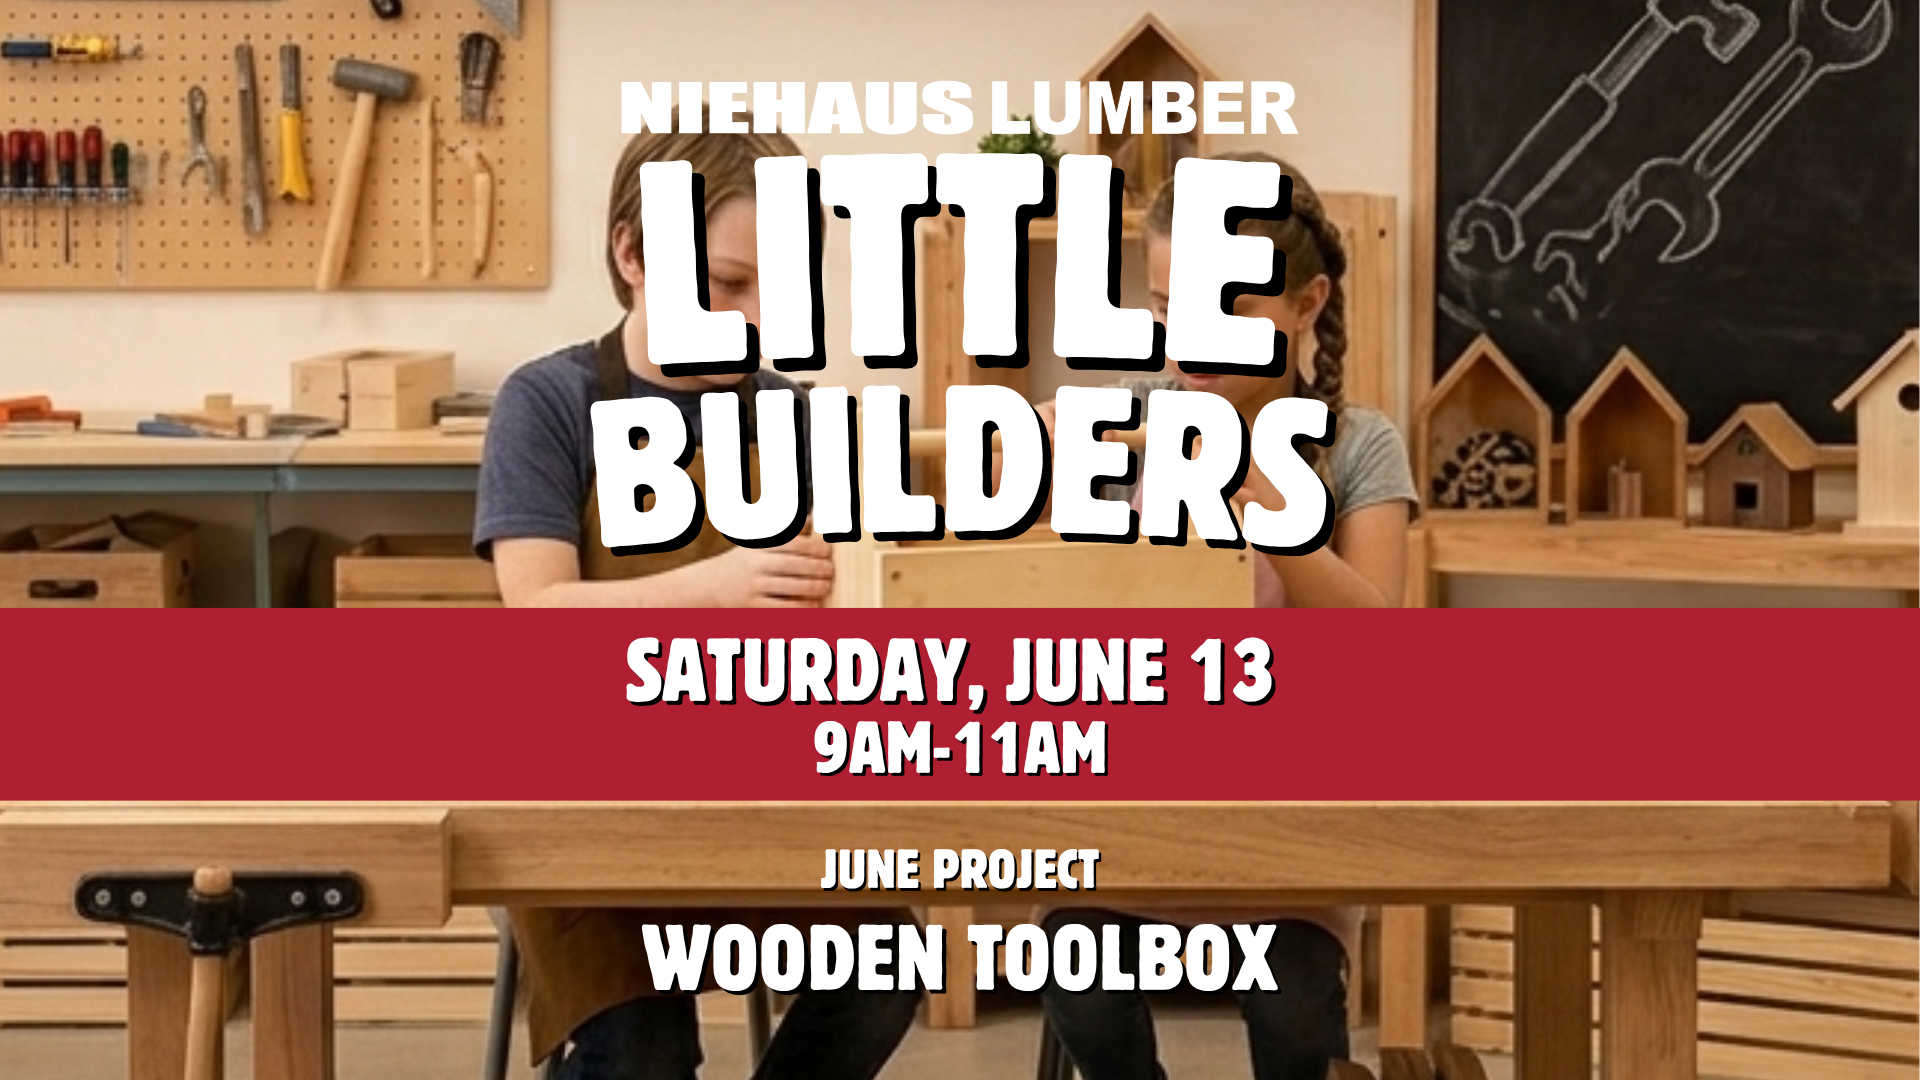
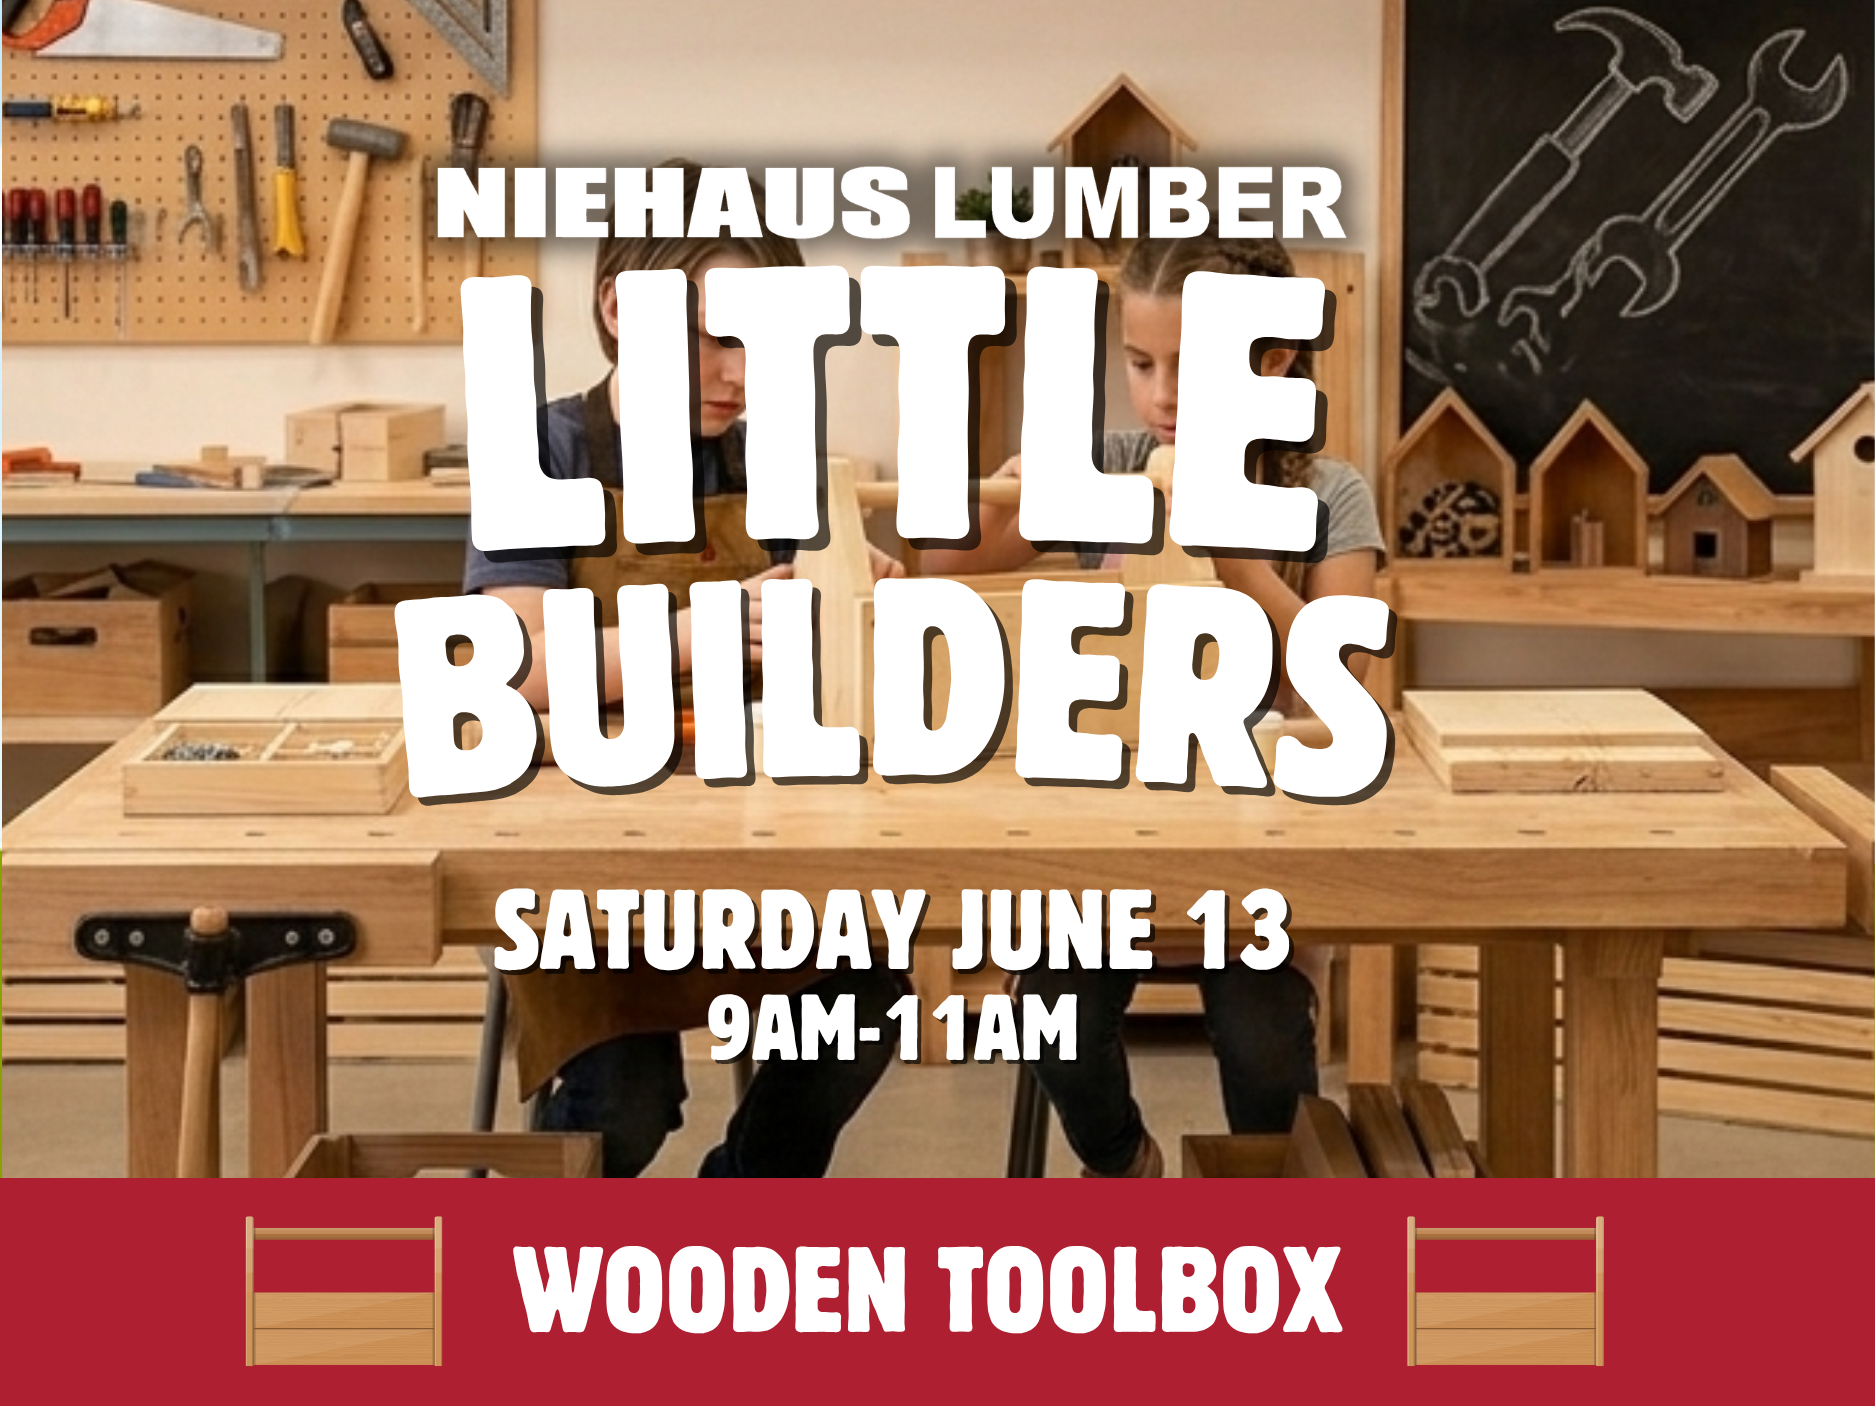
Gift Dad A Handmade Wooden Toolbox for Father's Day: A Step-by-Step Guide
Father's Day is just around the corner, and if you're looking for a meaningful gift that goes beyond the typical store-bought options, a handmade wooden toolbox is the perfect choice. It's practical, personal, and crafted with love, something Dad will treasure for years to come.
What You'll Need
Before you begin, gather your supplies. You can find all the high-quality wood and hardware you need at Niehaus Lumber. Their friendly associates are always ready to help you find exactly what you need to make your project stand out.
- (2) 1 in. x 5-1/3 in. x 9 in. Pine Wood Pieces cut and with predrilled hole (Pieces A)
- (3) 1/4 in. x 5-1/2 in. x 12 in. Luan plywood pieces (Pieces B)
- (1) 3/4 in. x 12 in. wood dowel
- (16) 1 in. #17 Nails
- (1) Hammer
Step-by-Step Instructions
Step 1: Check Your Material

Lay out all your pieces, match the letters to the parts list, and ensure nothing is missing. Have an adult helper join you for the build.
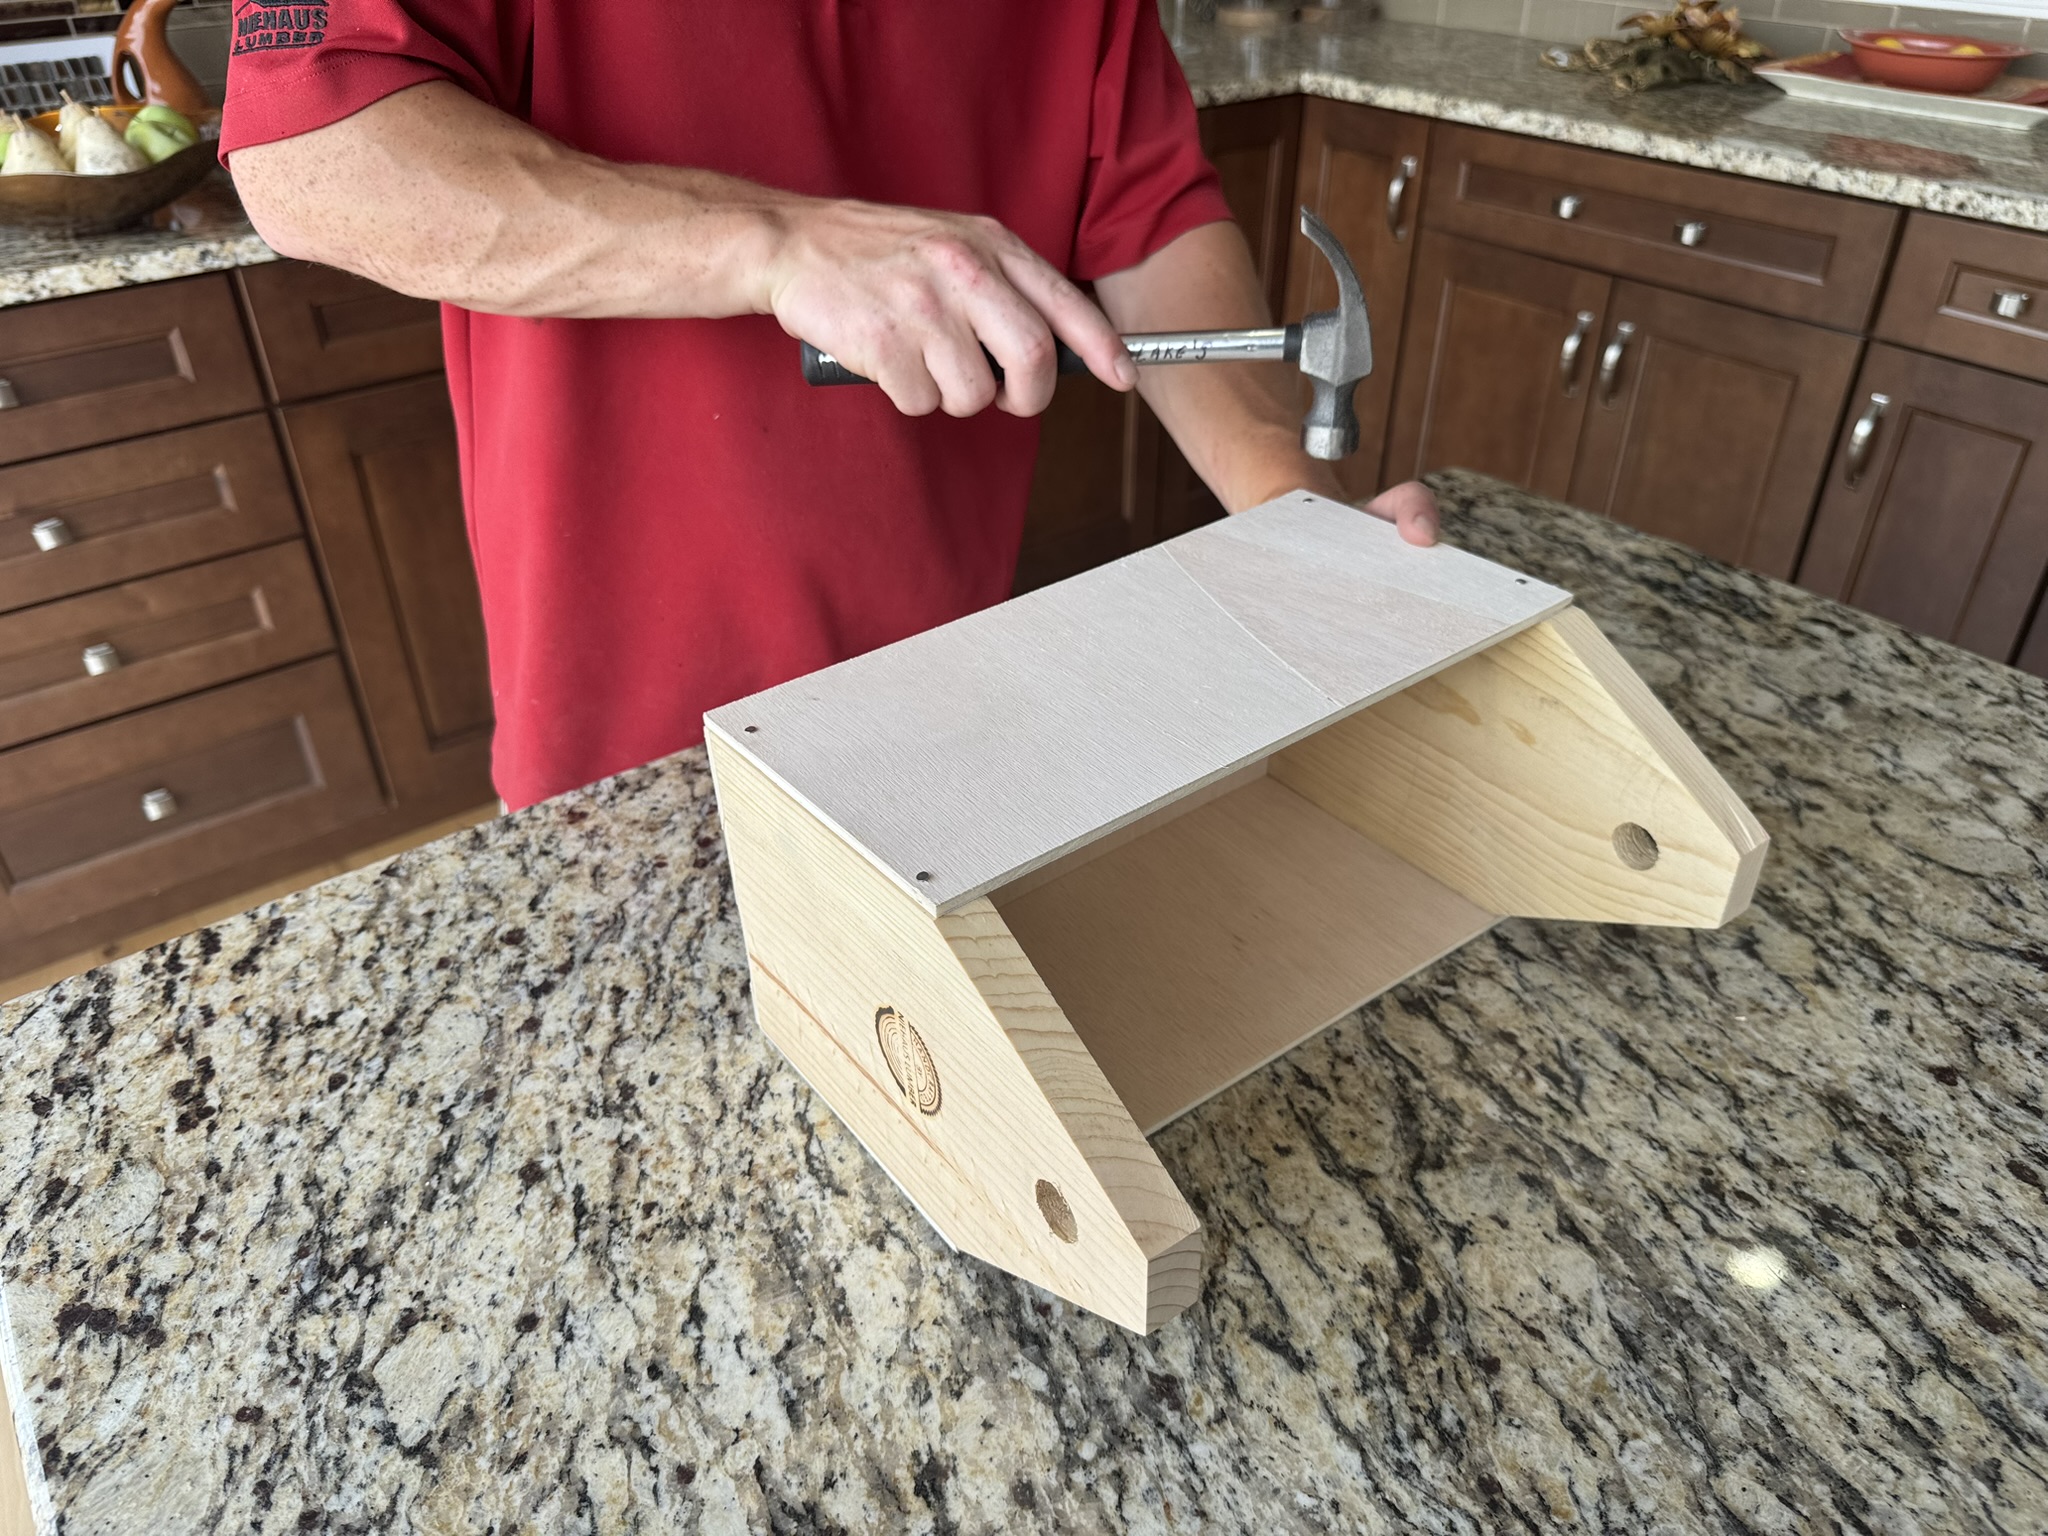
Step 2: Attach Bottom Piece
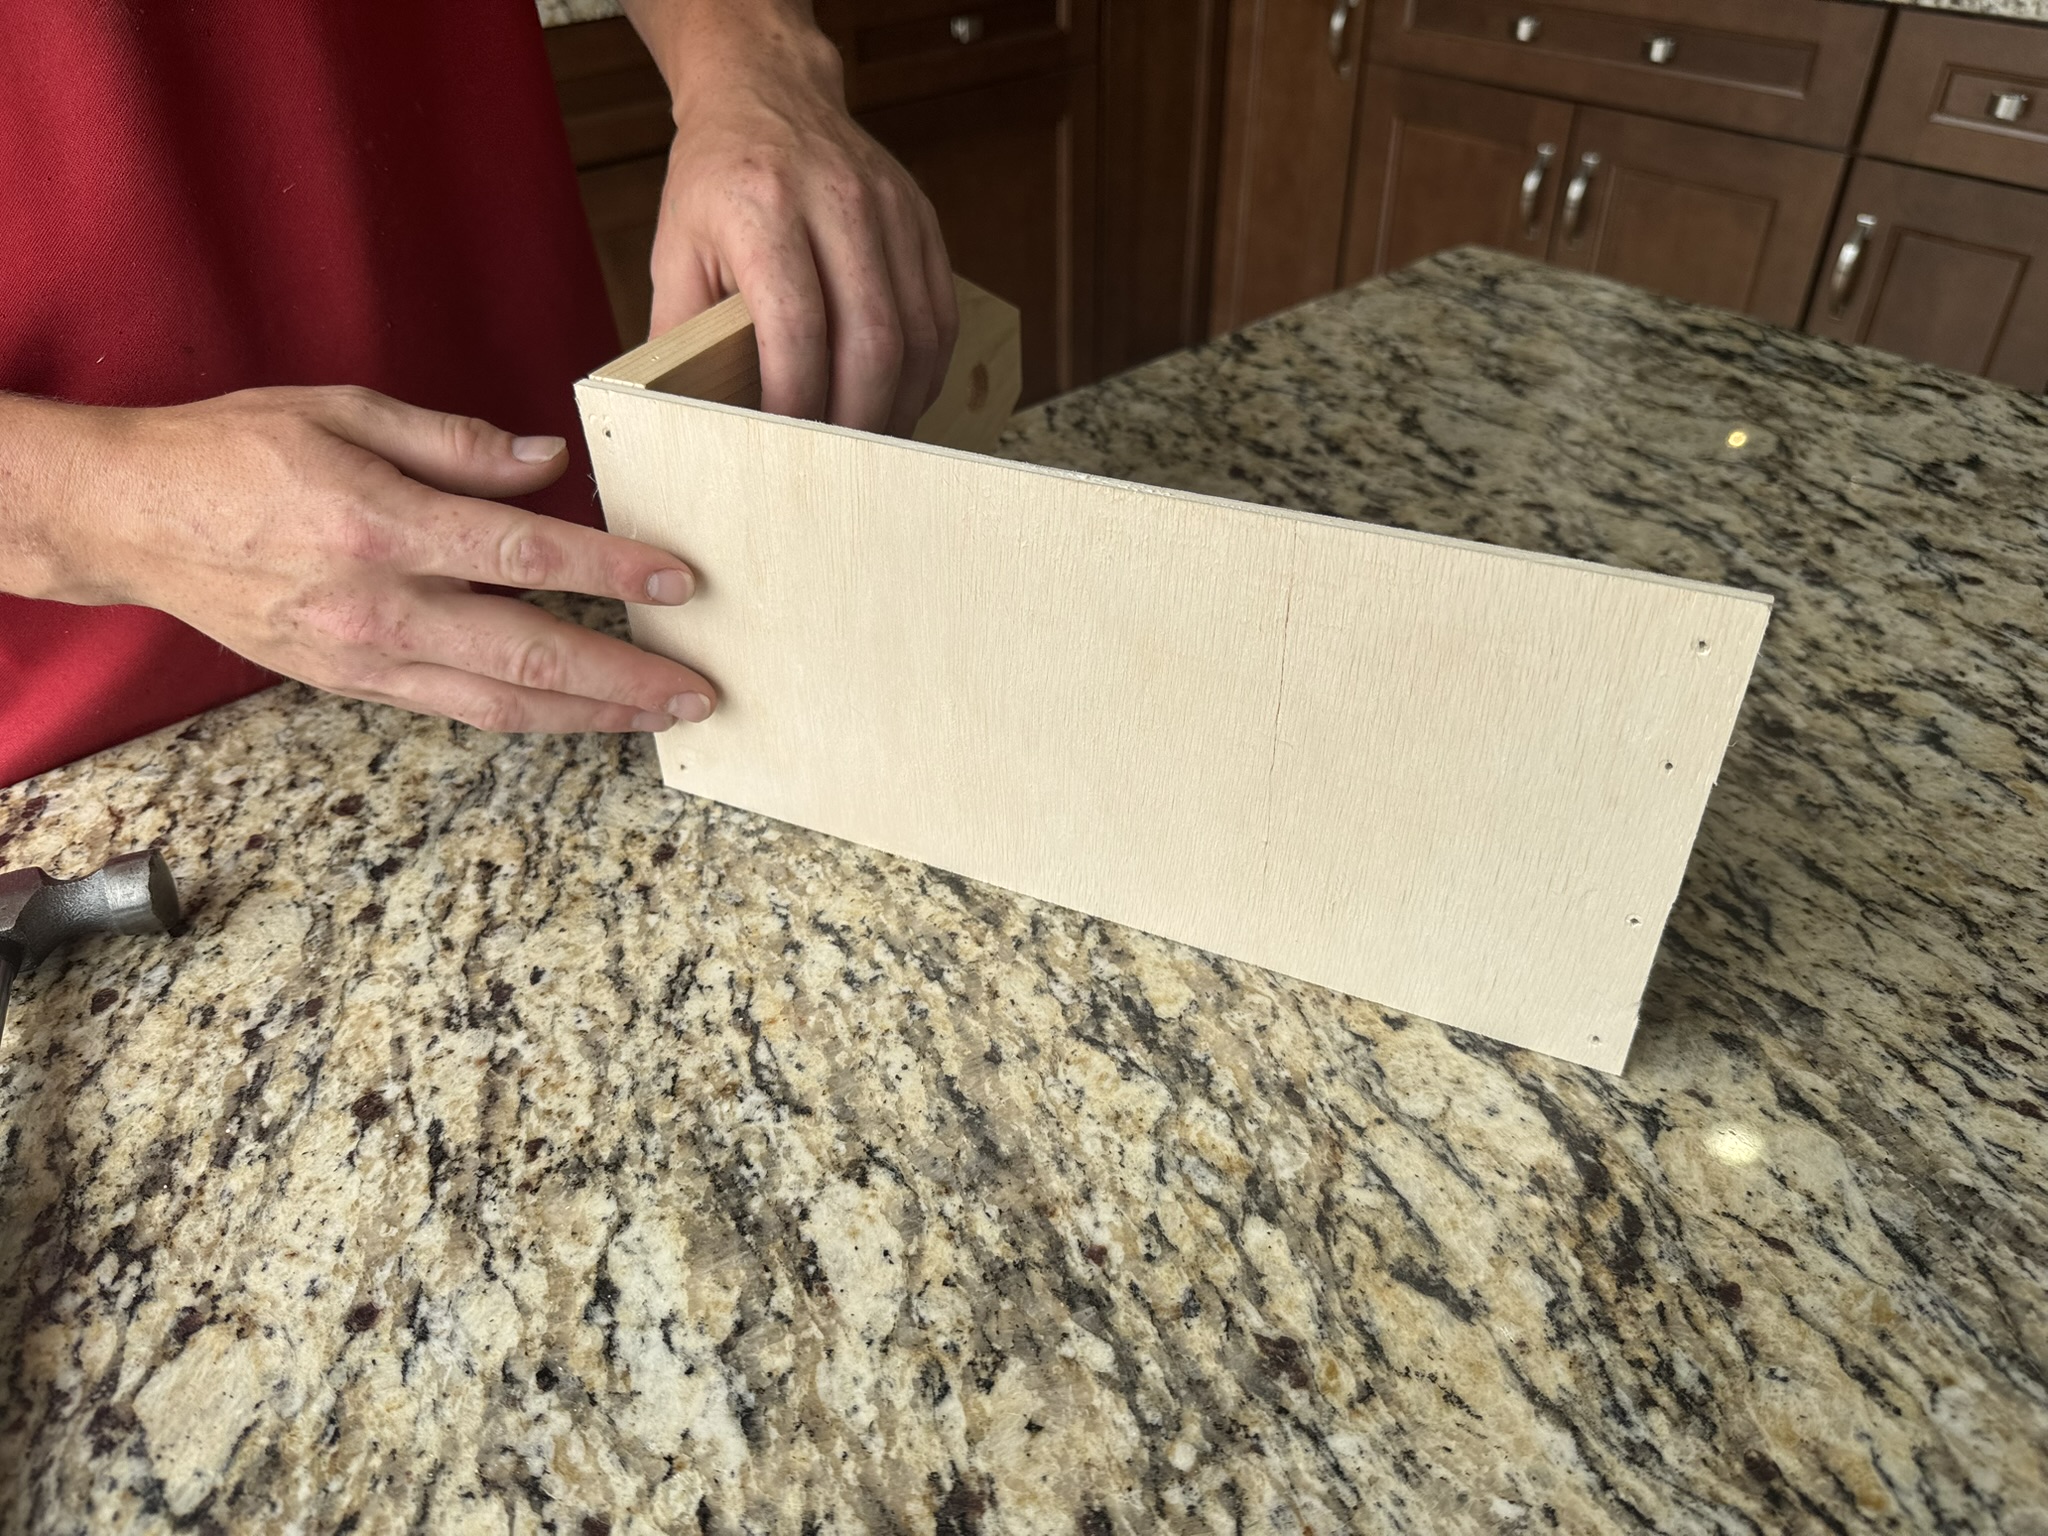

Grab one of the side pieces (A) and the bottom piece (B). Align the edges of piece B with the bottom of piece A, using the photo as a reference. Use your hammer to drive four (4) nails through piece B and into piece A to secure the connection. Repeat this for the other side piece (A).
Step 3: Attached First Side
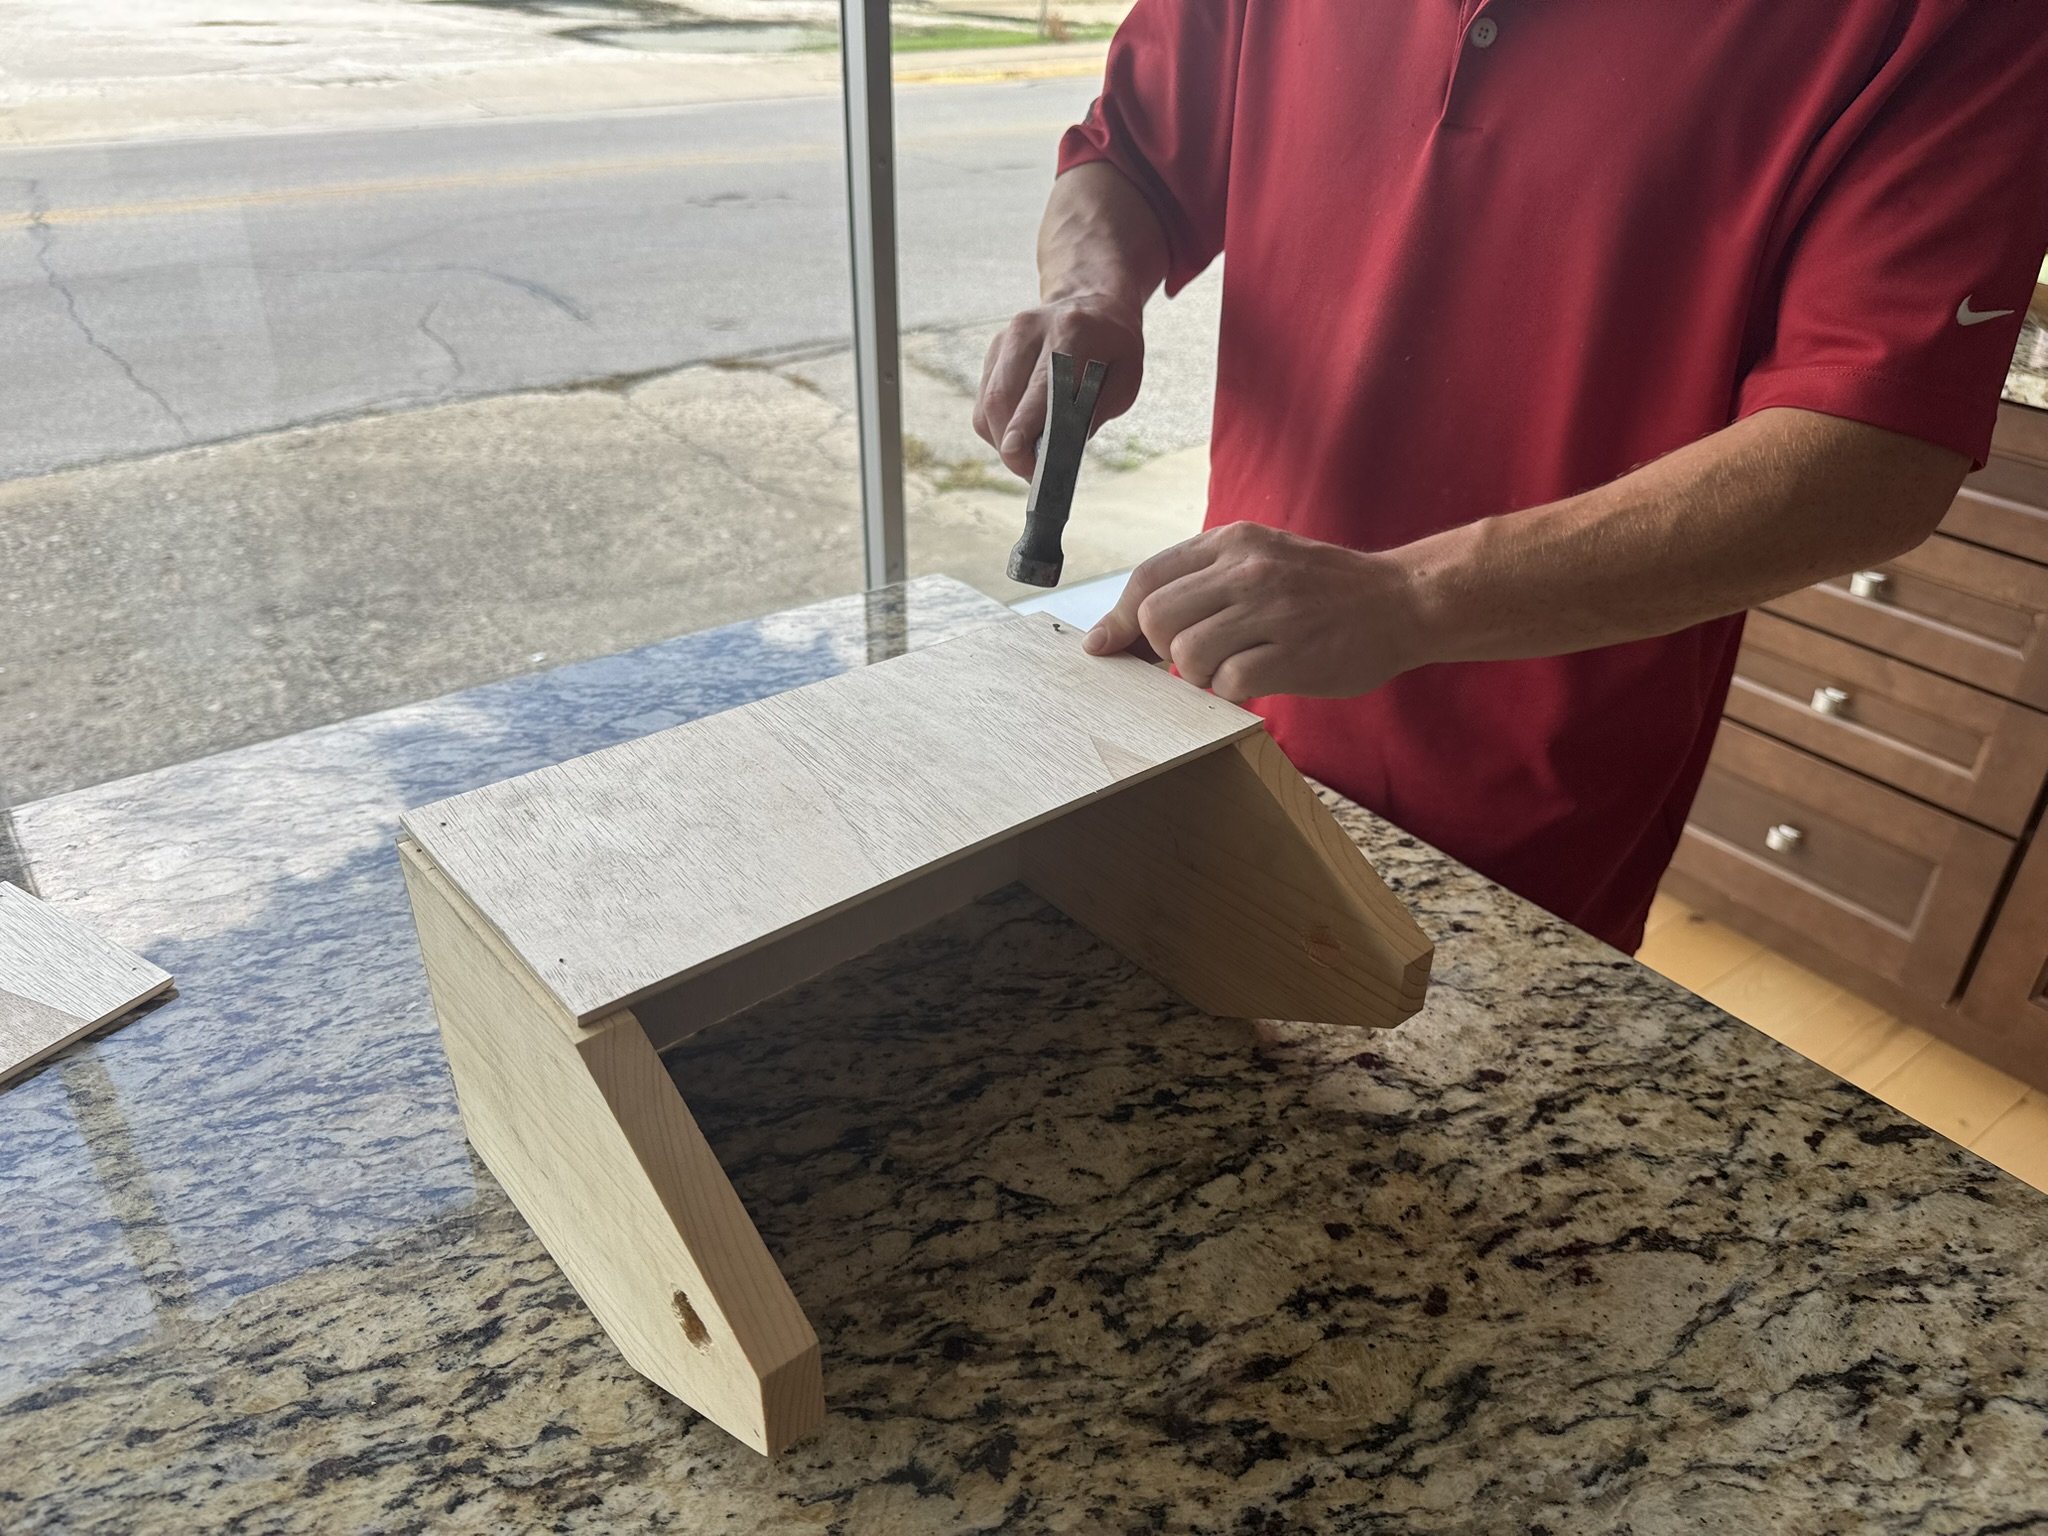
Grab a front/back piece (B) and align its edges to the bottom piece (B) and both side pieces (A) so they are flush (with no gaps). Hammer two (2) nails through piece B and into each of the side pieces (A).
Step 4: Install Second Side
Repeat Step 3 for the last remaining piece (B), making sure all edges are flush with no gaps. Your adult helper should assist in holding the pieces in place.
Step 5: Install the Handle
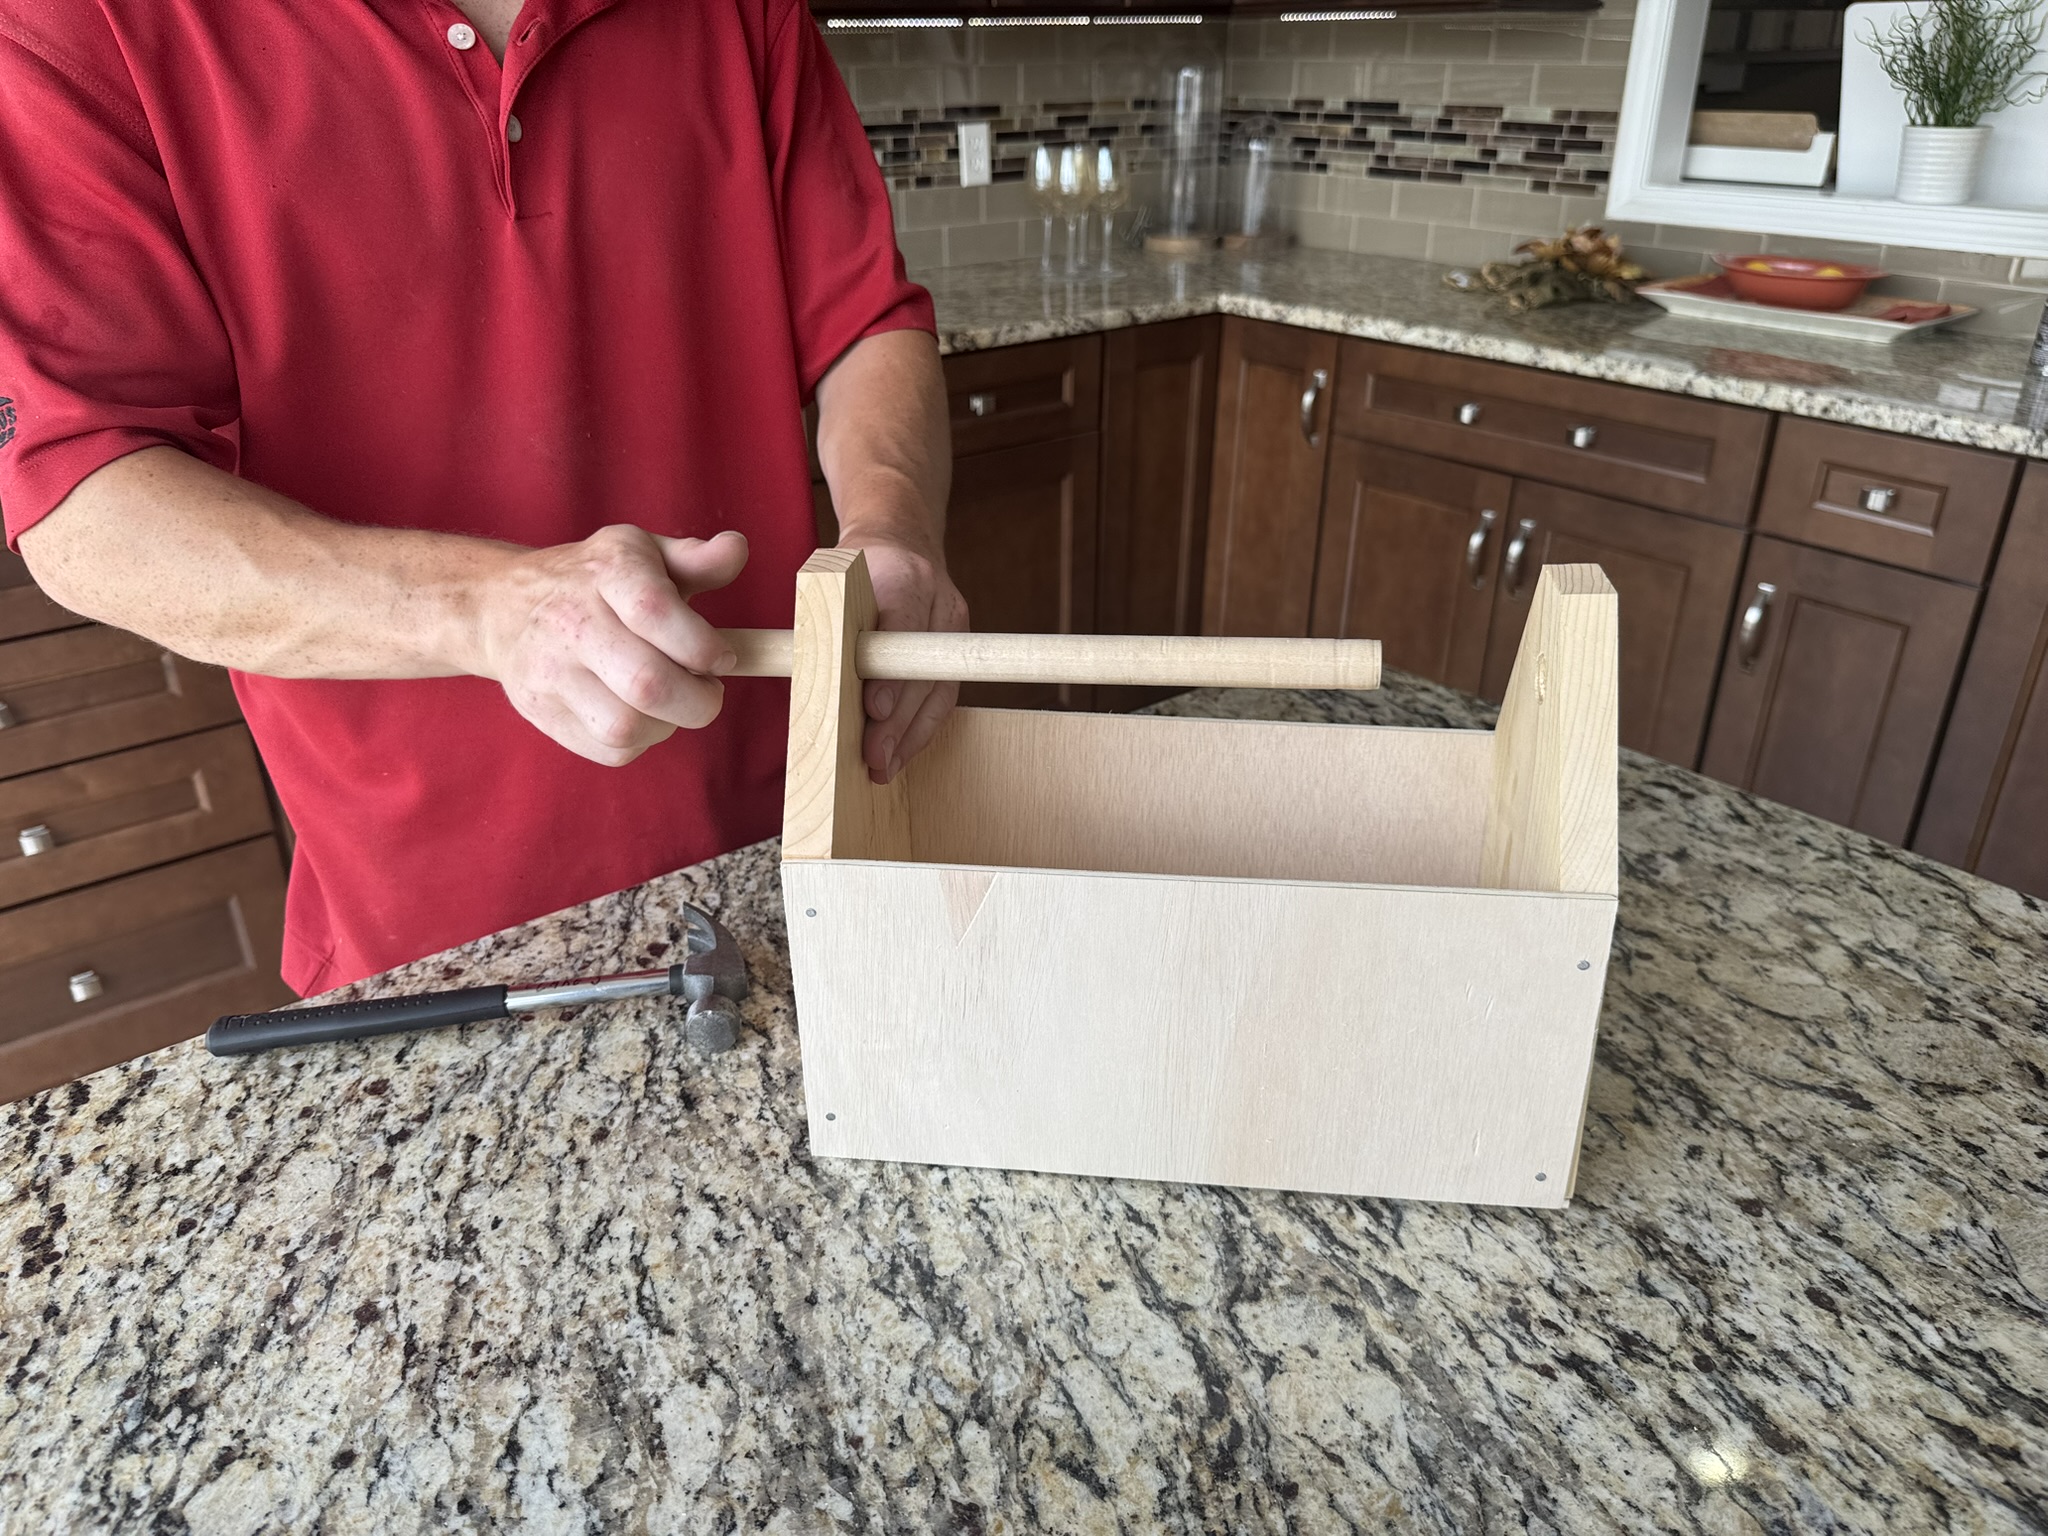
The toolbox structure is now complete! Take your dowel rod and insert it through the pre-drilled holes in both side pieces (A), as shown in the picture. Press the rod with firm, steady force until it is secure. Be careful not to use excessive force.
Step 6: Decorate
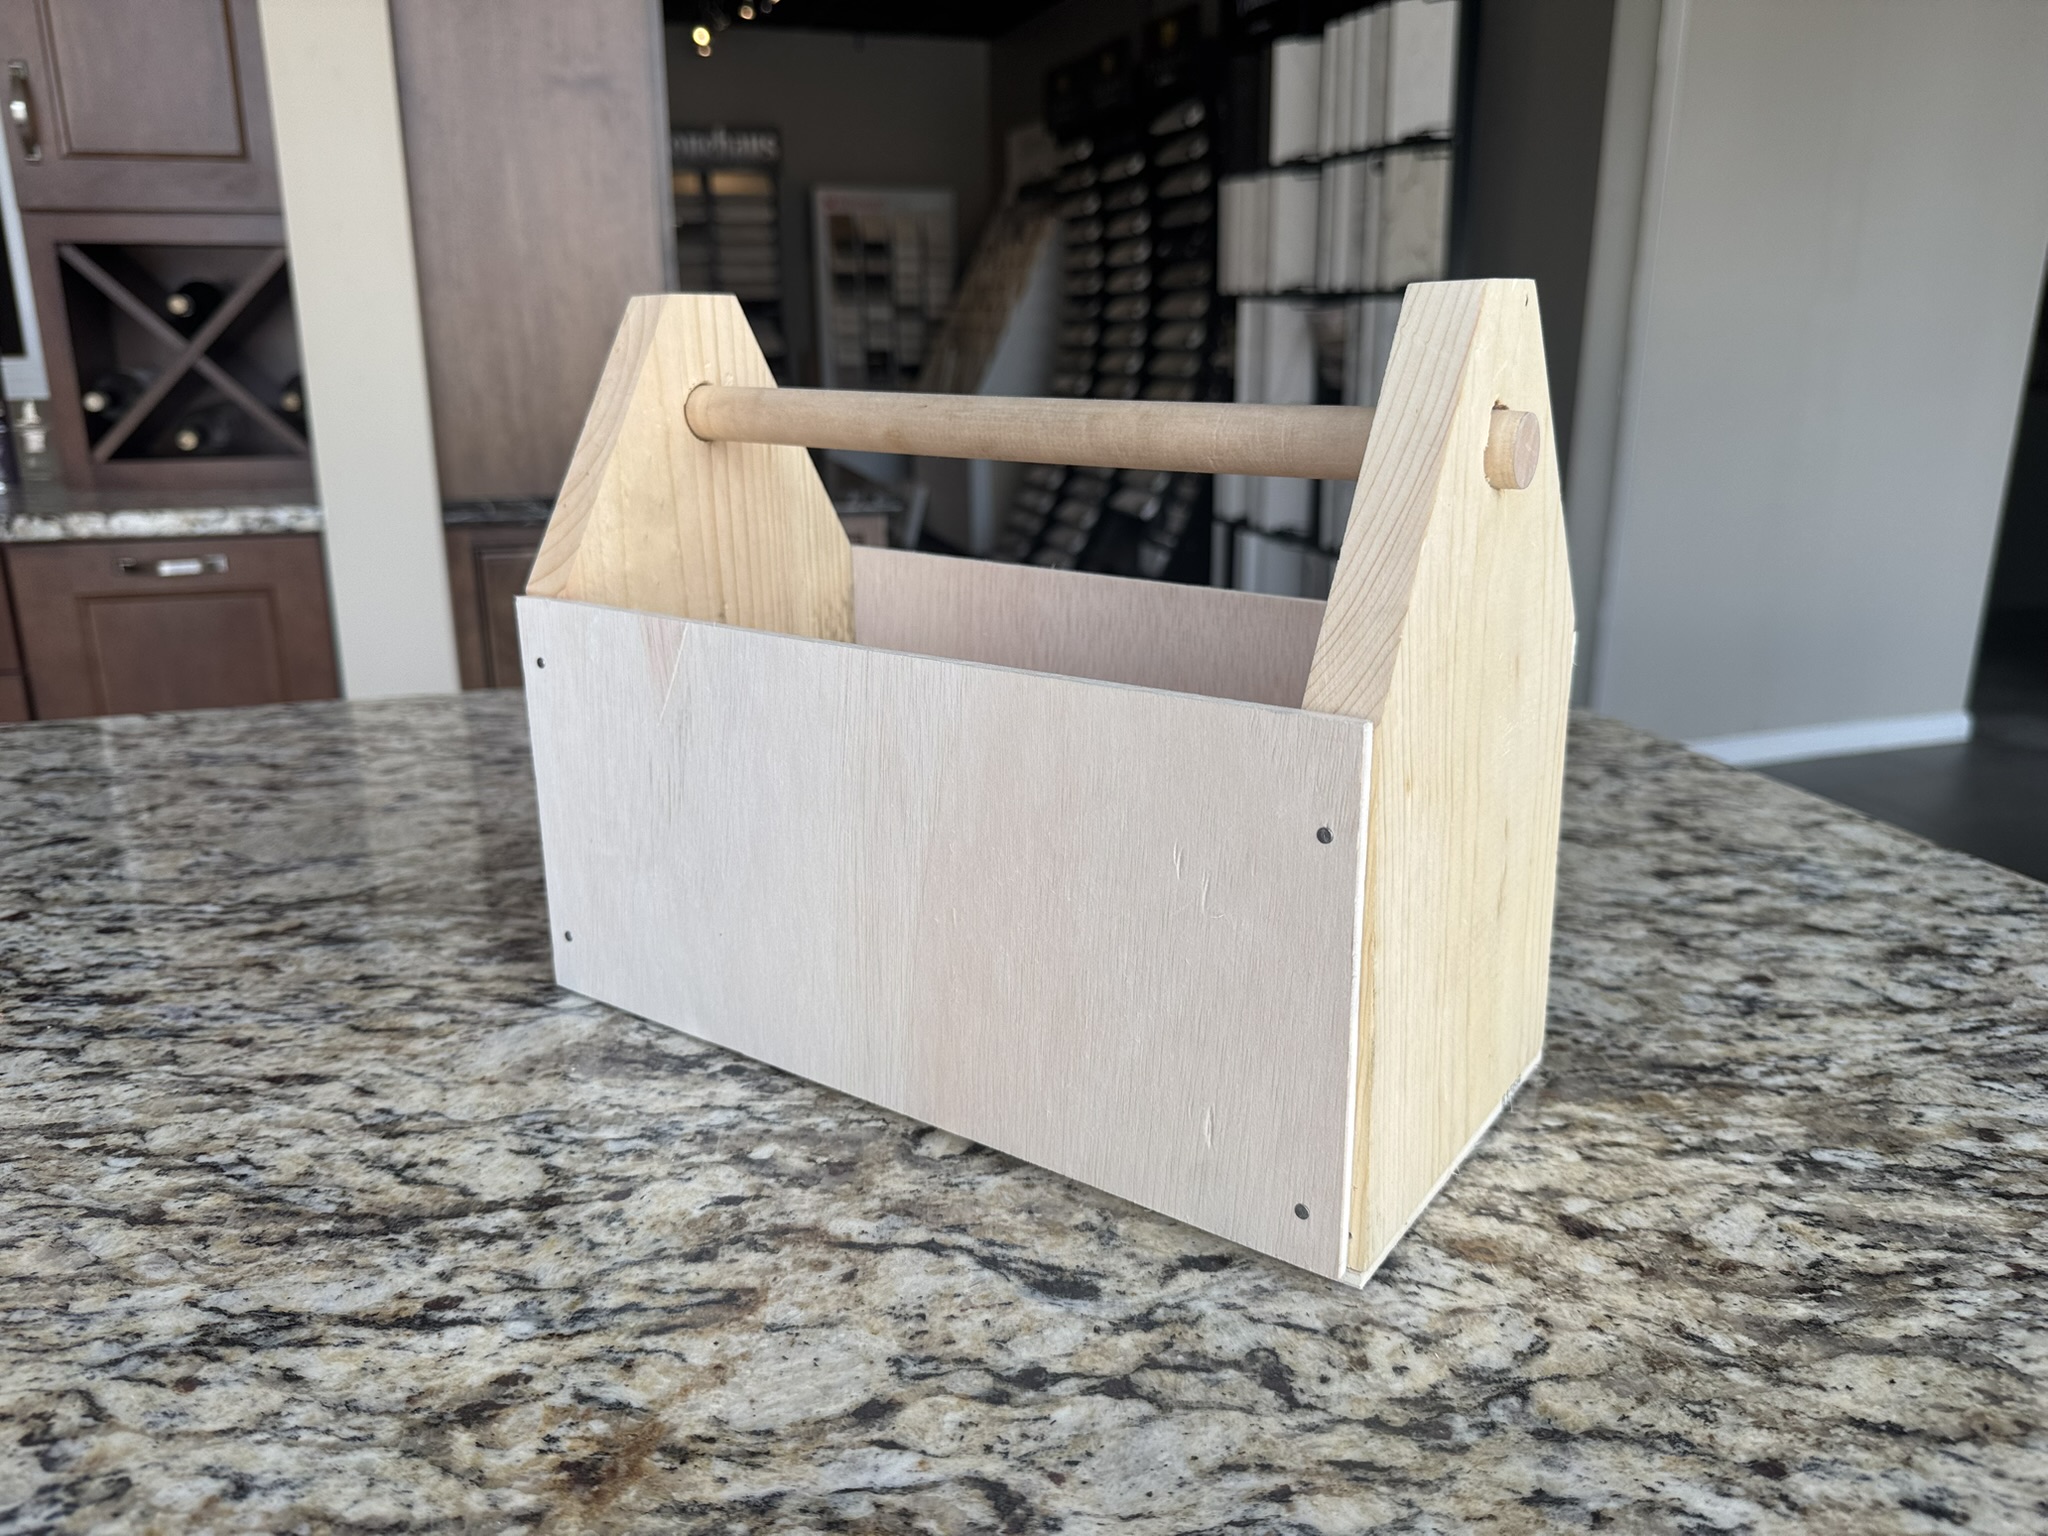
You’re done! Now it's time to use your imagination and decorate your amazing wooden toolbox.
Pro-Tips for Little Builders
- Measure Twice, Nail Once: Take your time aligning the edges before hammering to ensure the box is flush.
- Safety First: Always ensure you have an adult supervisor nearby when working with tools and nails.
- Ask the Pros: If you aren't sure which type of wood or nails are best for your specific project, just ask an associate at Niehaus Lumber for their expert recommendations.
Conclusion
Congratulations on completing your toolbox! Not only do you now have a handy place to store your tools, but you’ve also gained valuable building skills. Remember, every master builder started with a simple project just like this. Keep practicing, keep building, and don't hesitate to visit us at Niehaus Lumber for your next set of supplies!
Happy crafting — and Happy Father's Day!
Supplies to Help You Get Started


Gift Dad A Handmade Wooden Toolbox for Father's Day: A Step-by-Step Guide
Father's Day is just around the corner, and if you're looking for a meaningful gift that goes beyond the typical store-bought options, a handmade wooden toolbox is the perfect choice. It's practical, personal, and crafted with love, something Dad will treasure for years to come.
What You'll Need
Before you begin, gather your supplies. You can find all the high-quality wood and hardware you need at Niehaus Lumber. Their friendly associates are always ready to help you find exactly what you need to make your project stand out.
- (2) 1 in. x 5-1/3 in. x 9 in. Pine Wood Pieces cut and with predrilled hole (Pieces A)
- (3) 1/4 in. x 5-1/2 in. x 12 in. Luan plywood pieces (Pieces B)
- (1) 3/4 in. x 12 in. wood dowel
- (16) 1 in. #17 Nails
- (1) Hammer
Step-by-Step Instructions
Step 1: Check Your Material
Lay out all your pieces, match the letters to the parts list, and ensure nothing is missing. Have an adult helper join you for the build.
Step 2: Attach Bottom Piece
Grab one of the side pieces (A) and the bottom piece (B). Align the edges of piece B with the bottom of piece A, using the photo as a reference. Use your hammer to drive four (4) nails through piece B and into piece A to secure the connection. Repeat this for the other side piece (A).
Step 3: Attached First Side
Grab a front/back piece (B) and align its edges to the bottom piece (B) and both side pieces (A) so they are flush (with no gaps). Hammer two (2) nails through piece B and into each of the side pieces (A).
Step 4: Install Second Side
Repeat Step 3 for the last remaining piece (B), making sure all edges are flush with no gaps. Your adult helper should assist in holding the pieces in place.
Step 5: Install the Handle
The toolbox structure is now complete! Take your dowel rod and insert it through the pre-drilled holes in both side pieces (A), as shown in the picture. Press the rod with firm, steady force until it is secure. Be careful not to use excessive force.
Step 6: Decorate
You’re done! Now it's time to use your imagination and decorate your amazing wooden toolbox.
Pro-Tips for Little Builders
- Measure Twice, Nail Once: Take your time aligning the edges before hammering to ensure the box is flush.
- Safety First: Always ensure you have an adult supervisor nearby when working with tools and nails.
- Ask the Pros: If you aren't sure which type of wood or nails are best for your specific project, just ask an associate at Niehaus Lumber for their expert recommendations.
Conclusion
Congratulations on completing your toolbox! Not only do you now have a handy place to store your tools, but you’ve also gained valuable building skills. Remember, every master builder started with a simple project just like this. Keep practicing, keep building, and don't hesitate to visit us at Niehaus Lumber for your next set of supplies!
Happy crafting — and Happy Father's Day!
Supplies to Help You Get Started