


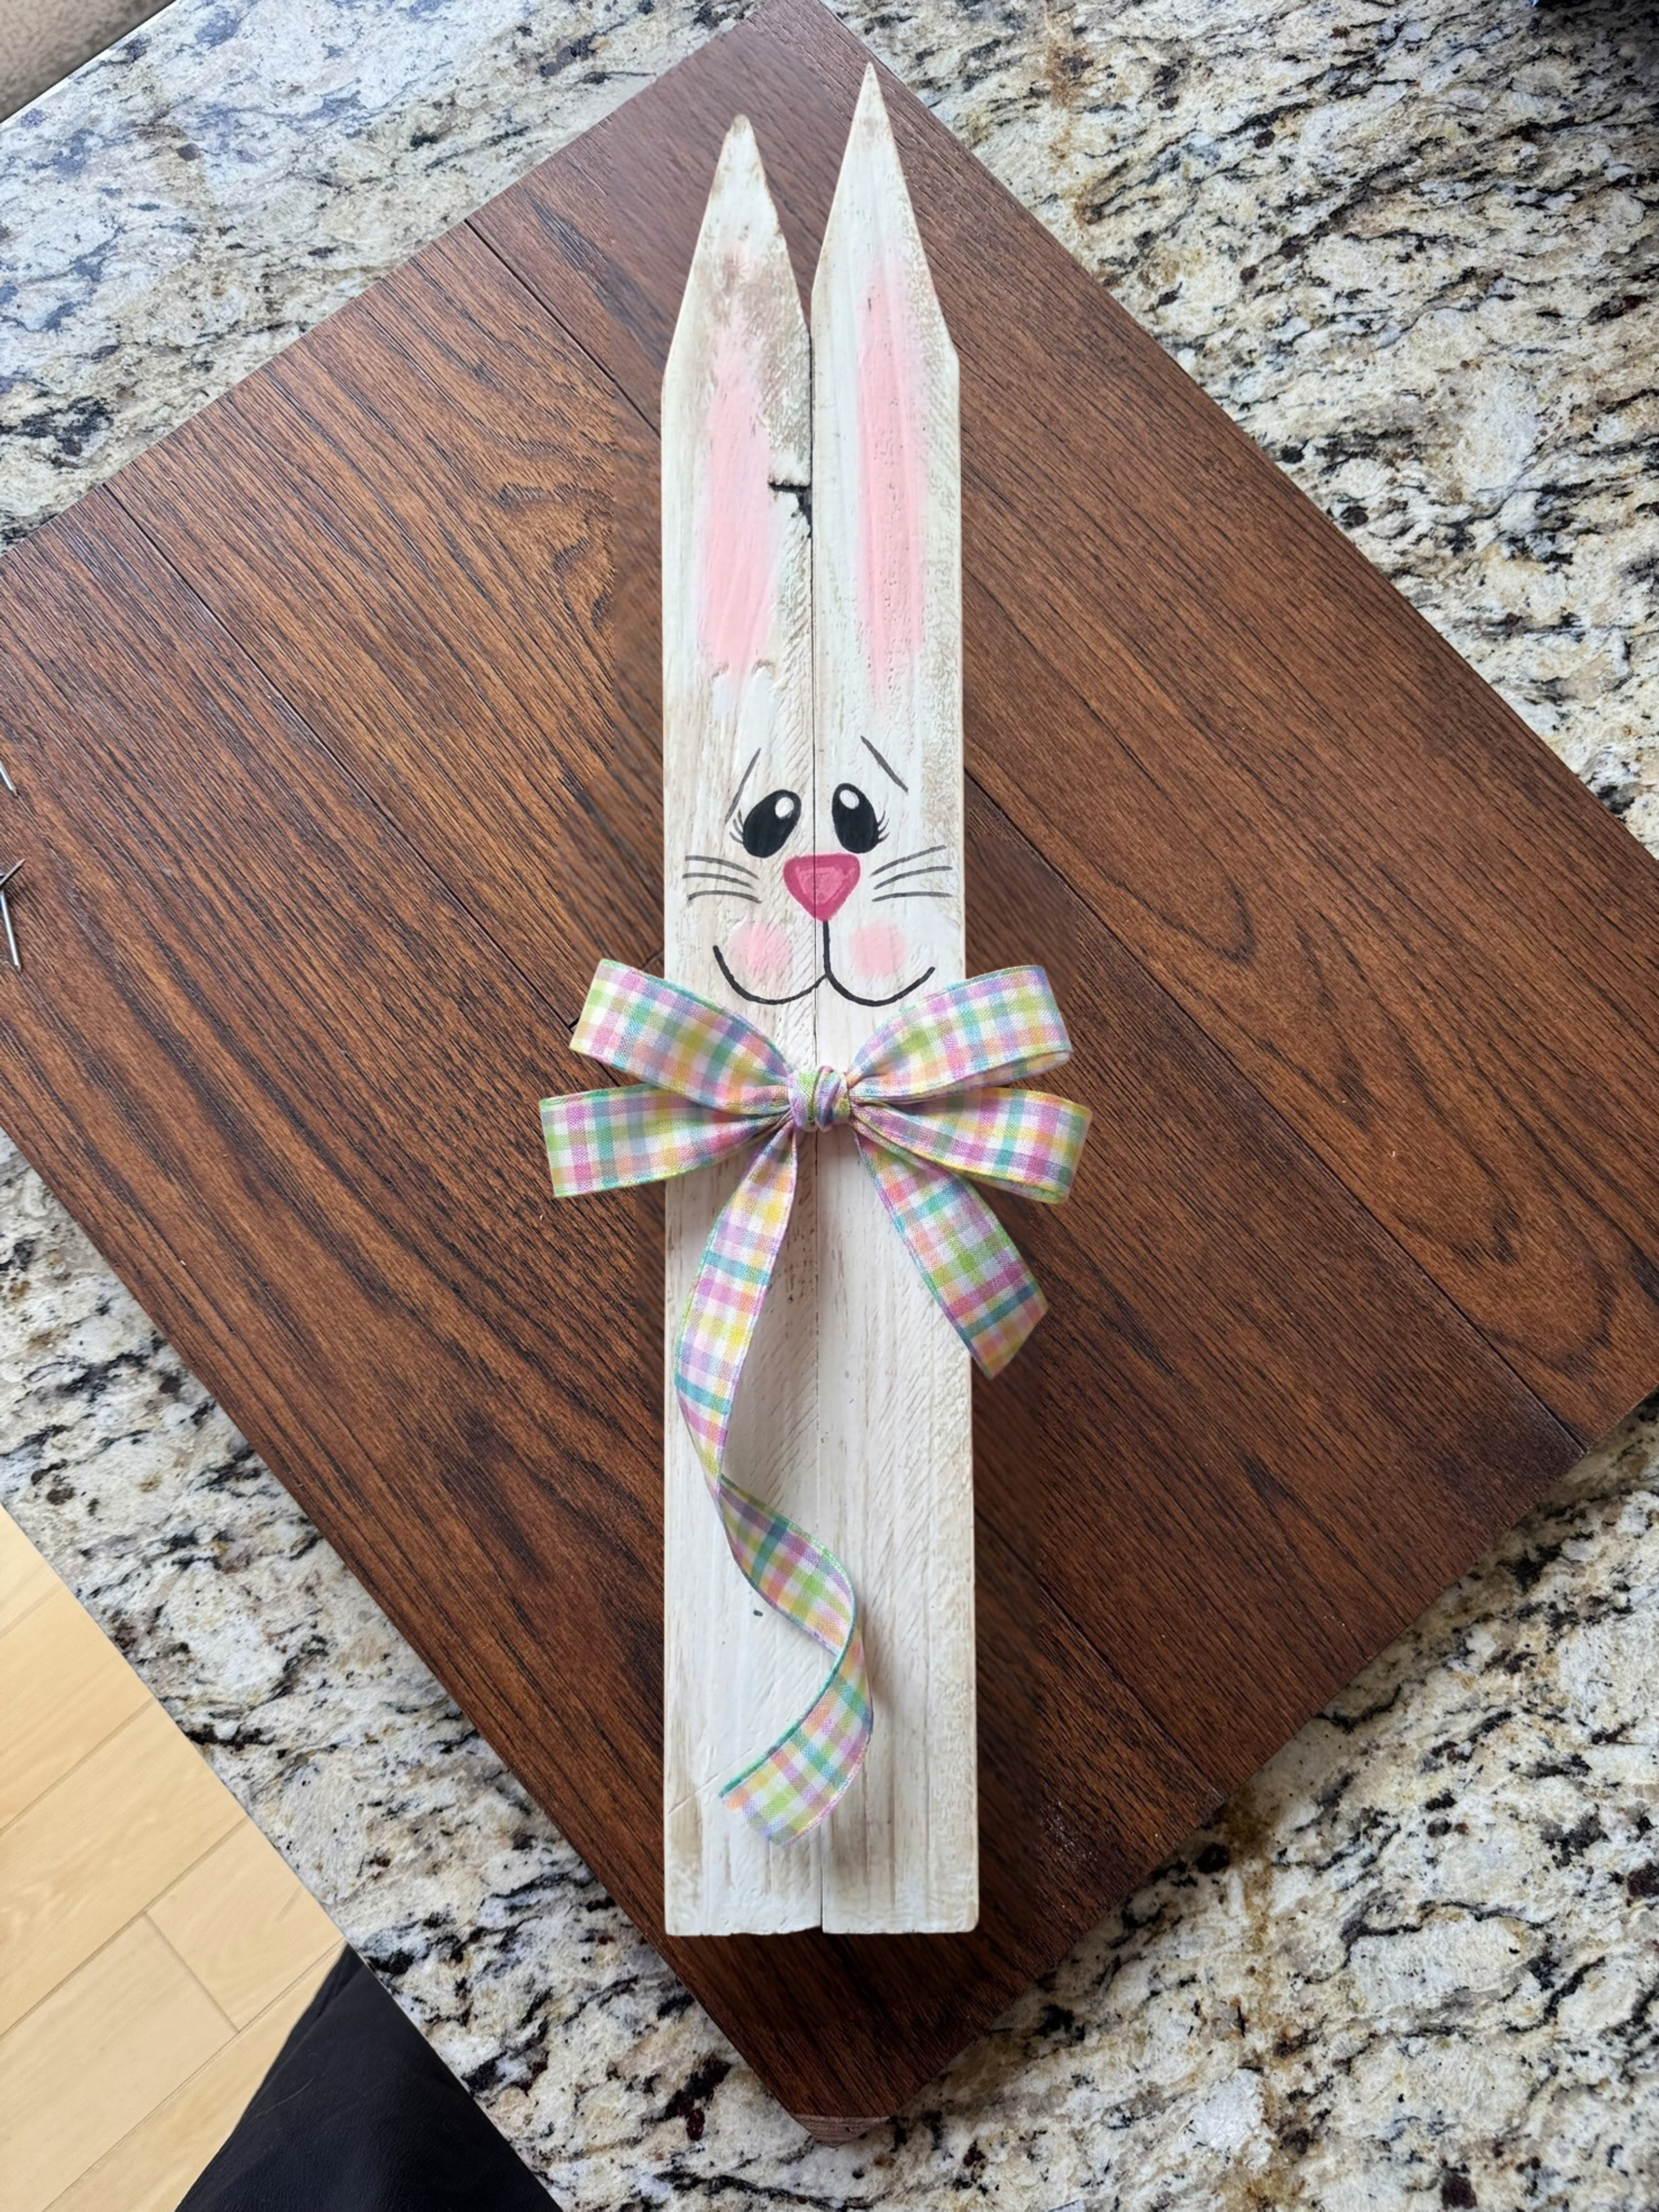
Easter is just around the corner, and there's no better way to celebrate the season than by adding a personalized touch to your home decor. A handcrafted Easter bunny wooden sign is an excellent project that combines creativity with functionality, resulting in a charming piece that can be displayed year after year.
Why Choose a Wooden Sign?
Wooden signs have become increasingly popular in home decor due to their rustic appeal and versatility. Unlike mass-produced decorations, a handmade wooden sign carries character and warmth that reflects your personal style. Wood is also a durable material that, when properly sealed, can withstand the test of time, making your Easter bunny sign a lasting addition to your seasonal collection.
Materials You'll Need
Before beginning your project, gather the following supplies:
- (2) 24 in. grade stakes
- (2) 1 in. x 3 in. x 3 in. lumber
- 4 Nails
- Paintbrushes and foam brushes
- Ribbon
Step-by-Step Instructions
1. Organize Materials
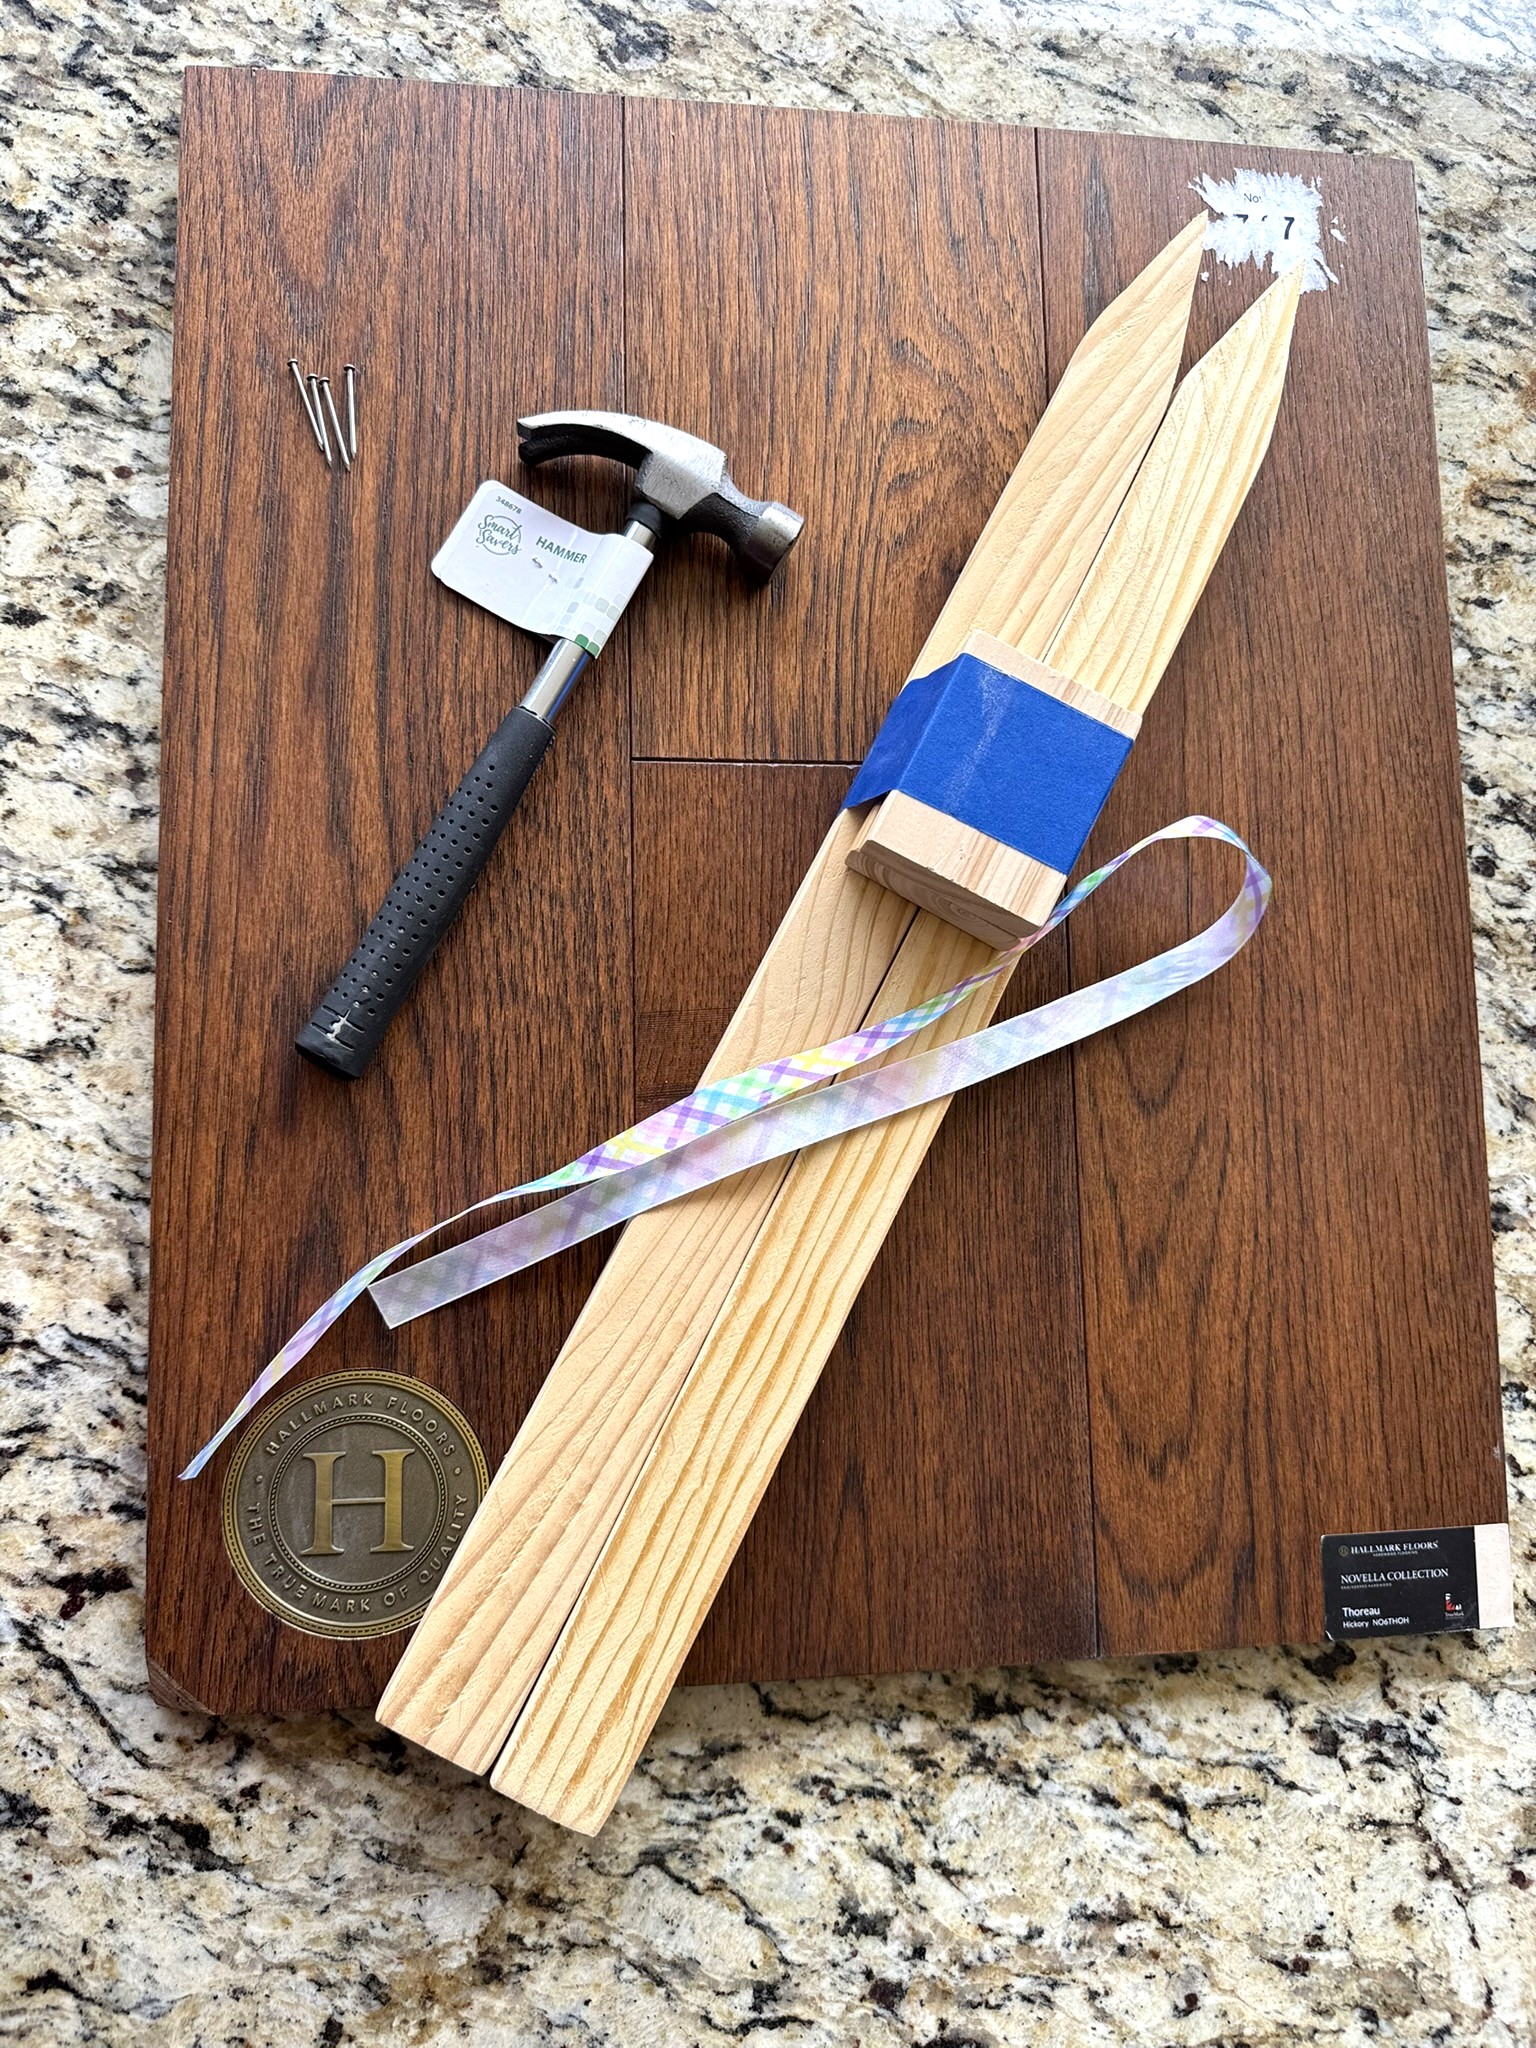
Identify all your pieces, and choose your decoration materials. You can use either chalk markers or acrylic paint.
2. Place Back Support
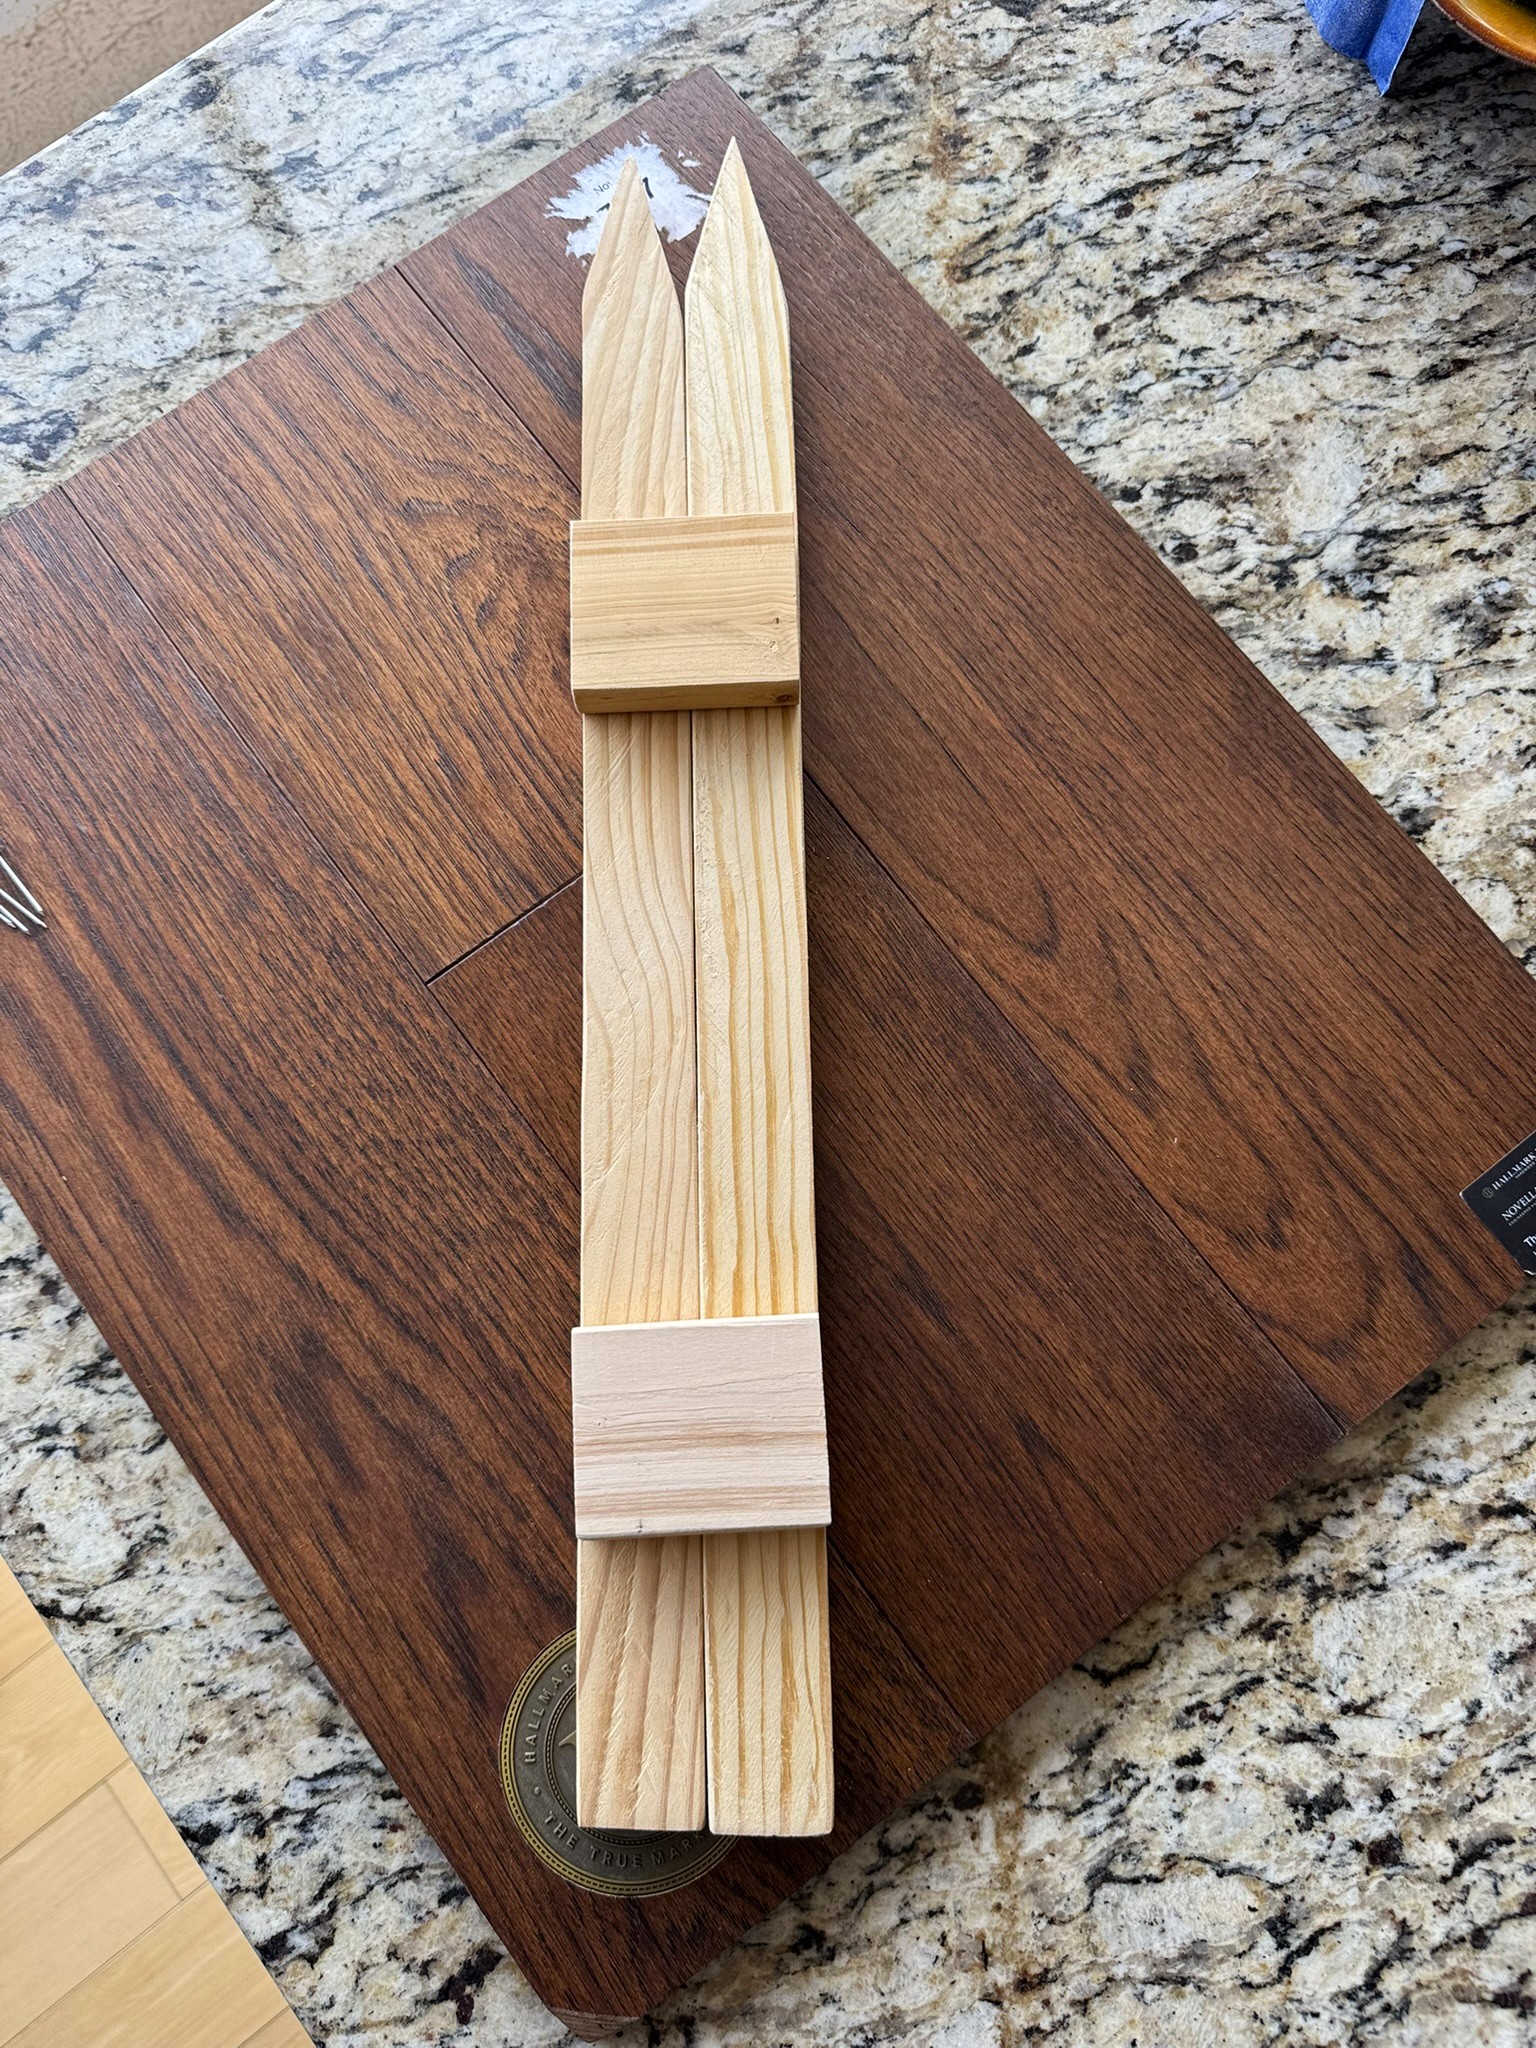
Place the B pieces along the back of the two A pieces. Keep the A pieces pushed tightly together, then position the B pieces so they sit evenly with a decent amount of space between the edge of the A pieces and the B pieces.
3. Nail Back Support
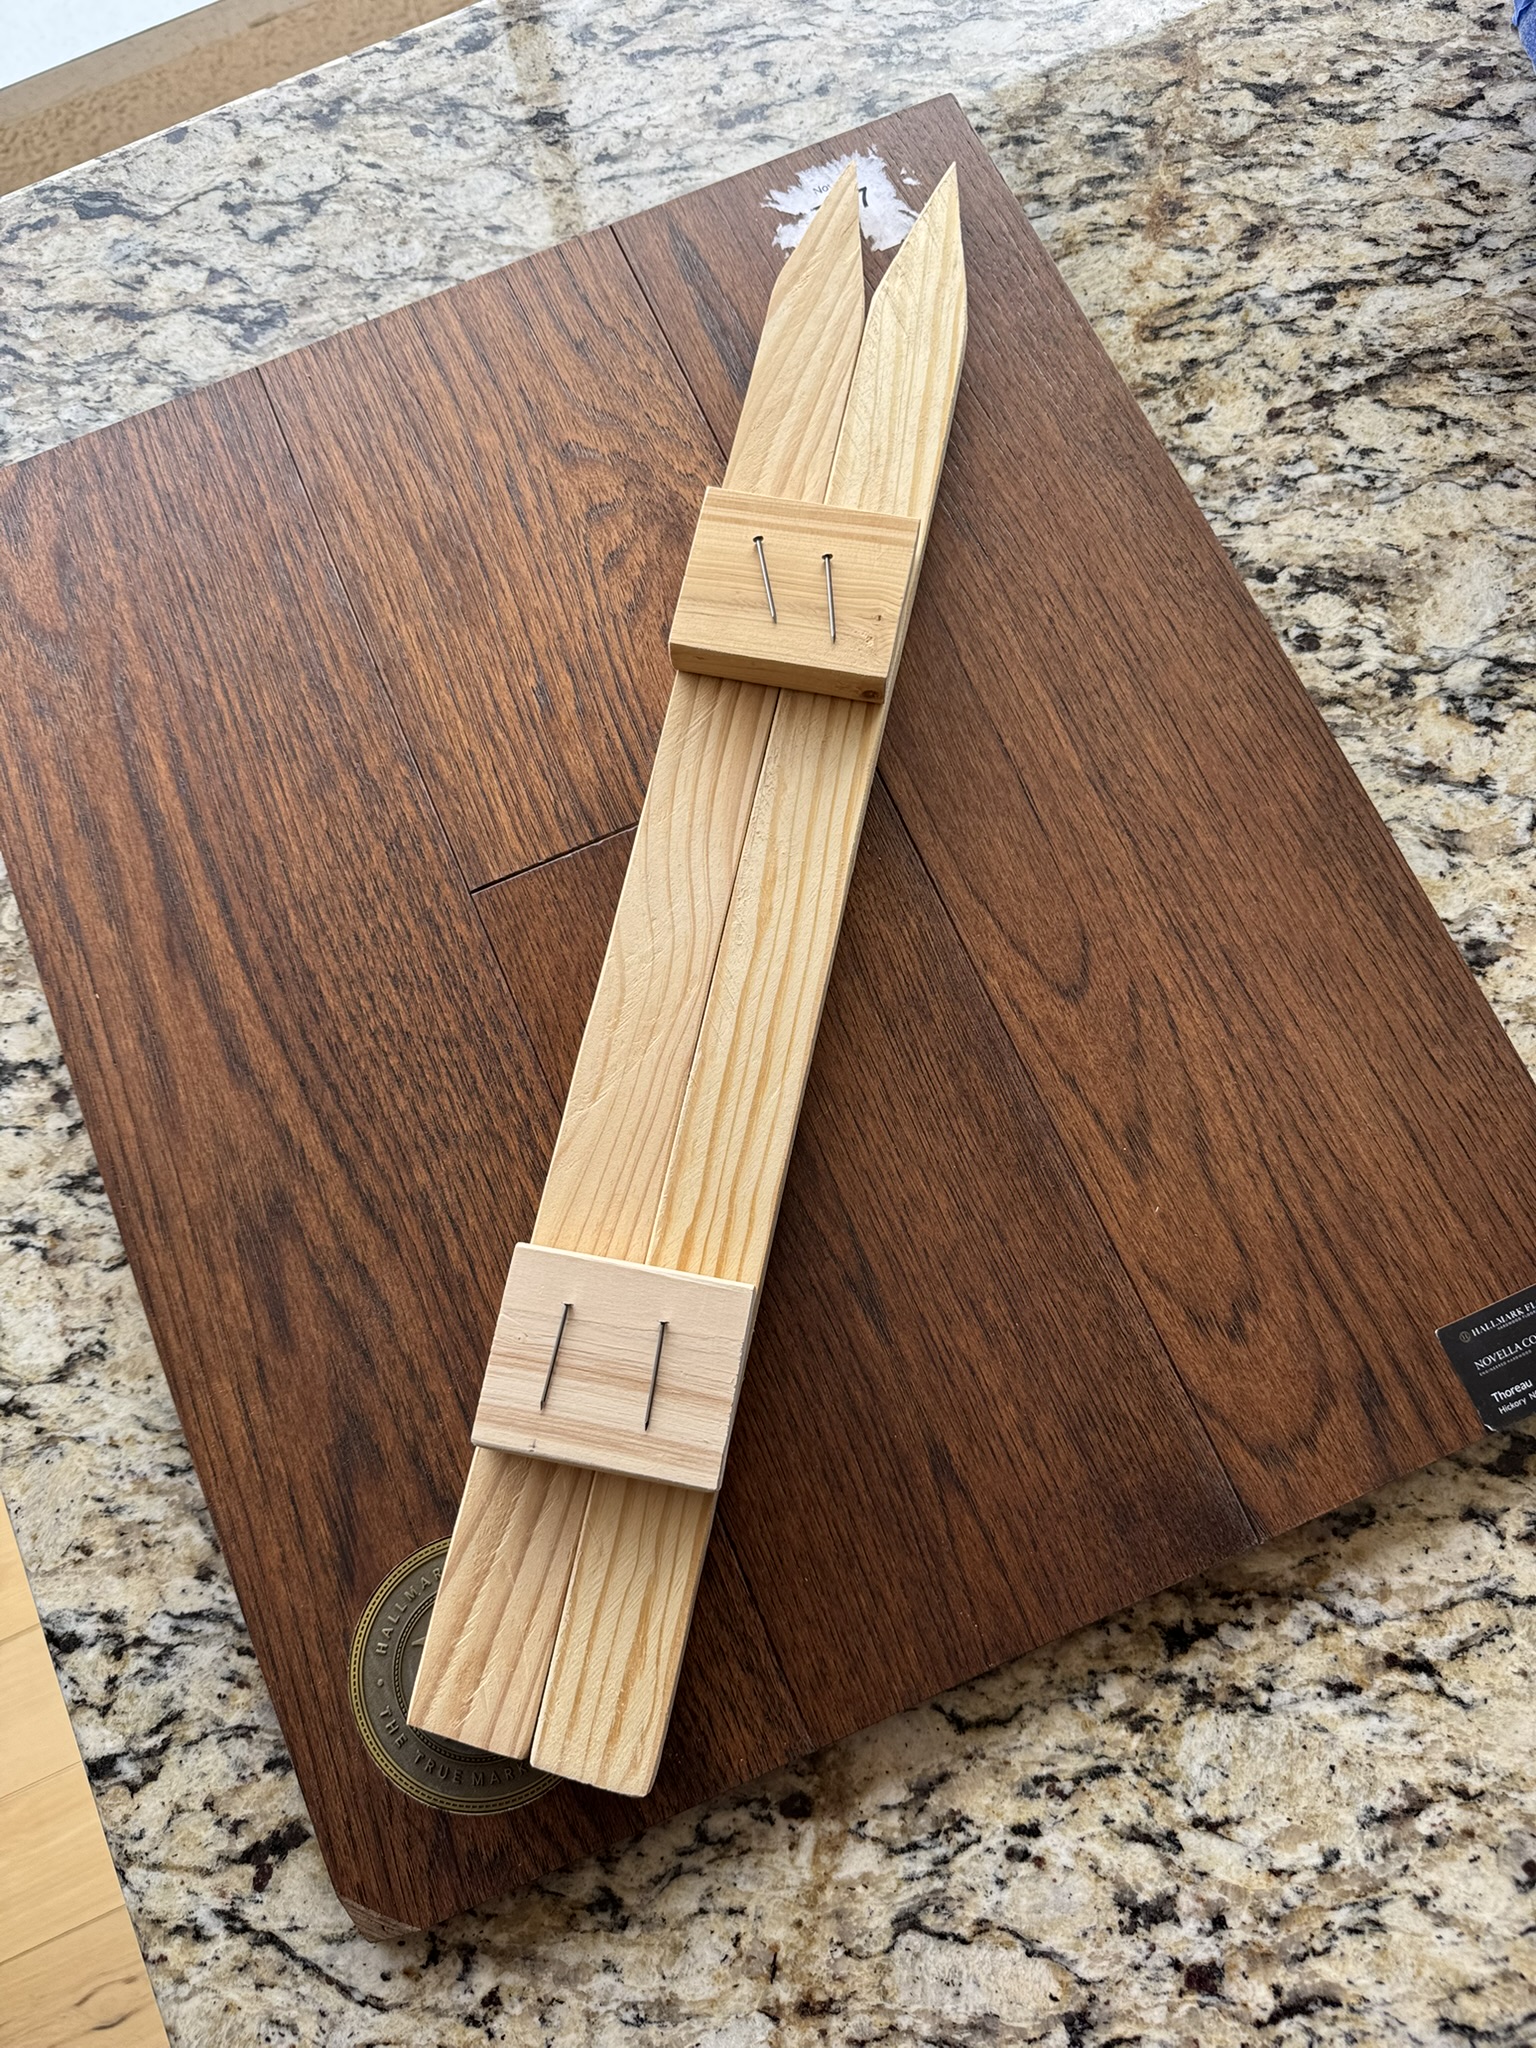
Now that the back supports are in place, look at the picture for reference and nail them down. Place 2 nails through each B piece into each A piece, making sure the nails go all the way through the B piece and into the A piece. In total, each B piece should have 4 nails: 2 into one A piece and 2 into the other.
4. Make the Ribbon
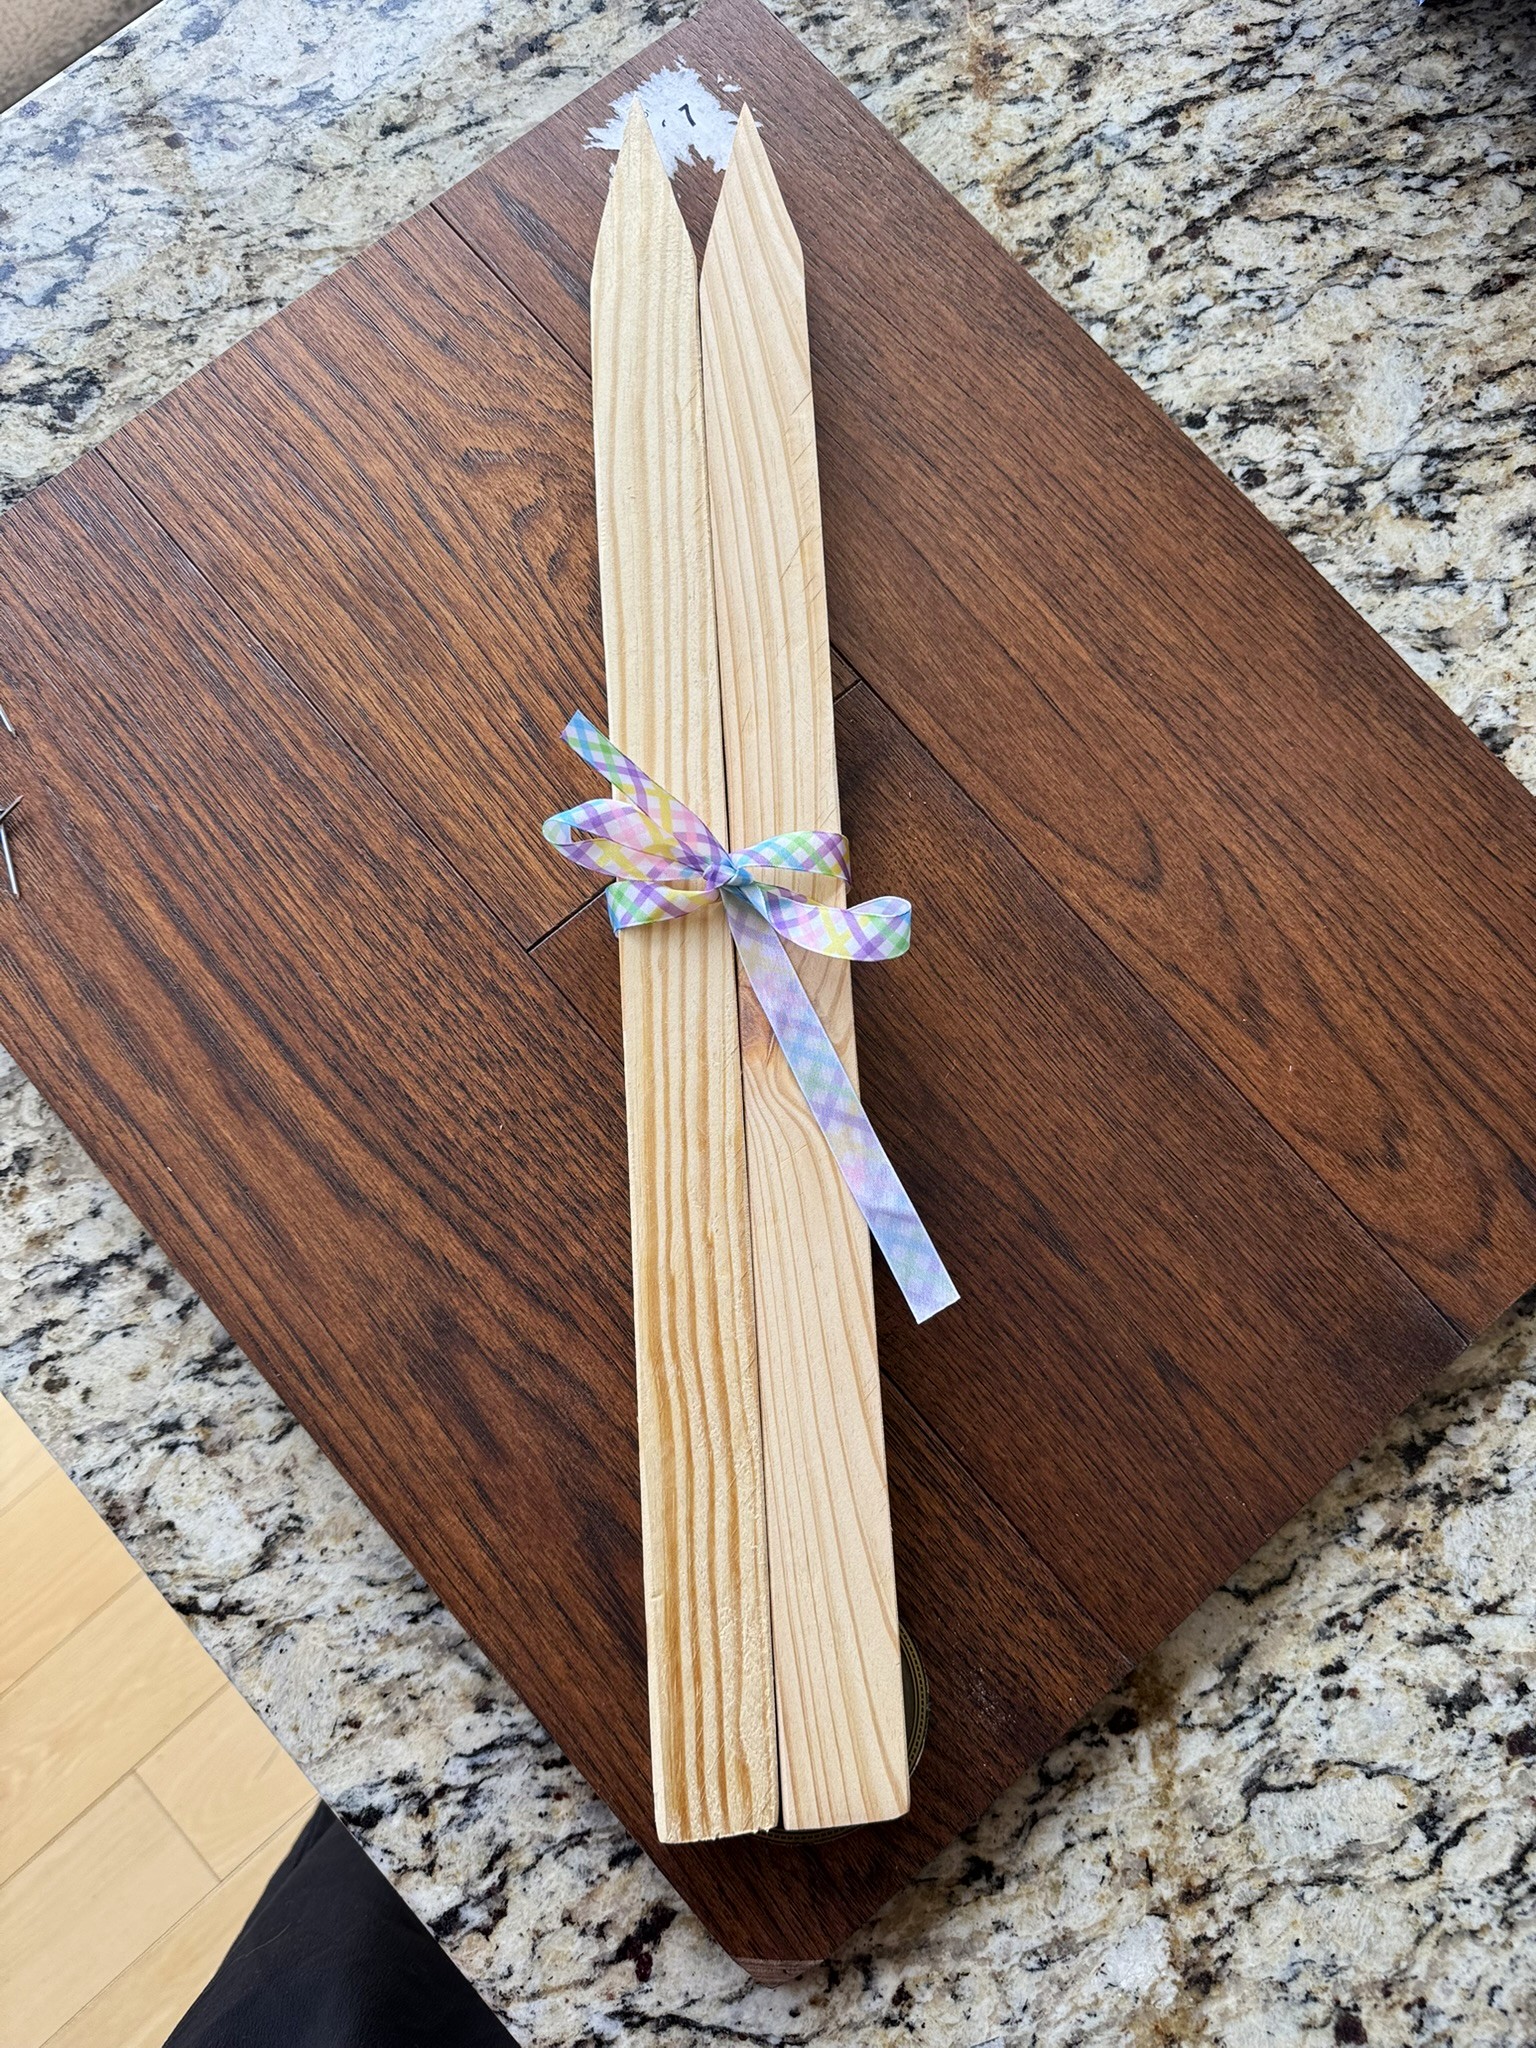
Turn the bunny sign upside down so the B pieces are flat against the table. This will support the sign while you add the next piece. Once it is positioned, find the correct location to place and assemble your ribbon. Use the reference picture to help guide where it should go.
5. Decorate Your Bunny Sign
Once your paint has dried completely, apply a clear sealant to protect your artwork. This step is crucial for longevity, especially if you plan to display your sign outdoors or in high-traffic areas.
Design Variations to Consider
The beauty of creating your own sign lies in the endless customization options. Consider these variations:
- Add a family name or welcoming message alongside the bunny
- Create a distressed or vintage look with special painting techniques
- Design a reversible sign with Easter on one side and spring decor on the other
Display Ideas
Your finished Easter bunny wooden sign can be displayed in numerous ways throughout your home. Lean it on a mantel surrounded by Easter eggs and spring flowers, hang it on your front door to welcome guests, or incorporate it into a gallery wall of seasonal decor. The sign also makes a wonderful gift for friends and family.
Conclusion
Creating your own Easter bunny wooden sign is a fun and rewarding way to celebrate the season while adding a personal touch to your home decor. This simple project is great for all skill levels and results in a unique piece you can proudly display each Easter.
If you are ready to start your next DIY project, stop by Niehaus Lumber. We offer quality lumber, paints, fasteners, tools, and other craft supplies to help bring your ideas to life. Our team is always happy to help you find the right materials so you can build, create, and enjoy projects all season long.
Supplies to Help You Get Started


Easter is just around the corner, and there's no better way to celebrate the season than by adding a personalized touch to your home decor. A handcrafted Easter bunny wooden sign is an excellent project that combines creativity with functionality, resulting in a charming piece that can be displayed year after year.
Why Choose a Wooden Sign?
Wooden signs have become increasingly popular in home decor due to their rustic appeal and versatility. Unlike mass-produced decorations, a handmade wooden sign carries character and warmth that reflects your personal style. Wood is also a durable material that, when properly sealed, can withstand the test of time, making your Easter bunny sign a lasting addition to your seasonal collection.
Materials You'll Need
Before beginning your project, gather the following supplies:
- (2) 24 in. grade stakes
- (2) 1 in. x 3 in. x 3 in. lumber
- 4 Nails
- Paintbrushes and foam brushes
- Ribbon
Step-by-Step Instructions
1. Organize Materials
Identify all your pieces, and choose your decoration materials. You can use either chalk markers or acrylic paint.
2. Place Back Support
Place the B pieces along the back of the two A pieces. Keep the A pieces pushed tightly together, then position the B pieces so they sit evenly with a decent amount of space between the edge of the A pieces and the B pieces.
3. Nail Back Support
Now that the back supports are in place, look at the picture for reference and nail them down. Place 2 nails through each B piece into each A piece, making sure the nails go all the way through the B piece and into the A piece. In total, each B piece should have 4 nails: 2 into one A piece and 2 into the other.
4. Make the Ribbon
Turn the bunny sign upside down so the B pieces are flat against the table. This will support the sign while you add the next piece. Once it is positioned, find the correct location to place and assemble your ribbon. Use the reference picture to help guide where it should go.
5. Decorate Your Bunny Sign
Once your paint has dried completely, apply a clear sealant to protect your artwork. This step is crucial for longevity, especially if you plan to display your sign outdoors or in high-traffic areas.
Design Variations to Consider
The beauty of creating your own sign lies in the endless customization options. Consider these variations:
- Add a family name or welcoming message alongside the bunny
- Create a distressed or vintage look with special painting techniques
- Design a reversible sign with Easter on one side and spring decor on the other
Display Ideas
Your finished Easter bunny wooden sign can be displayed in numerous ways throughout your home. Lean it on a mantel surrounded by Easter eggs and spring flowers, hang it on your front door to welcome guests, or incorporate it into a gallery wall of seasonal decor. The sign also makes a wonderful gift for friends and family.
Conclusion
Creating your own Easter bunny wooden sign is a fun and rewarding way to celebrate the season while adding a personal touch to your home decor. This simple project is great for all skill levels and results in a unique piece you can proudly display each Easter.
If you are ready to start your next DIY project, stop by Niehaus Lumber. We offer quality lumber, paints, fasteners, tools, and other craft supplies to help bring your ideas to life. Our team is always happy to help you find the right materials so you can build, create, and enjoy projects all season long.
Supplies to Help You Get Started